Upload clinical resources or files, share them directly with your client, and decide whether to run automated AI clinical scans.
Navigate to the Clients tab in the main sidebar. Search for your client by name or select their client card to open their profile, then click the Docs & Forms tab.
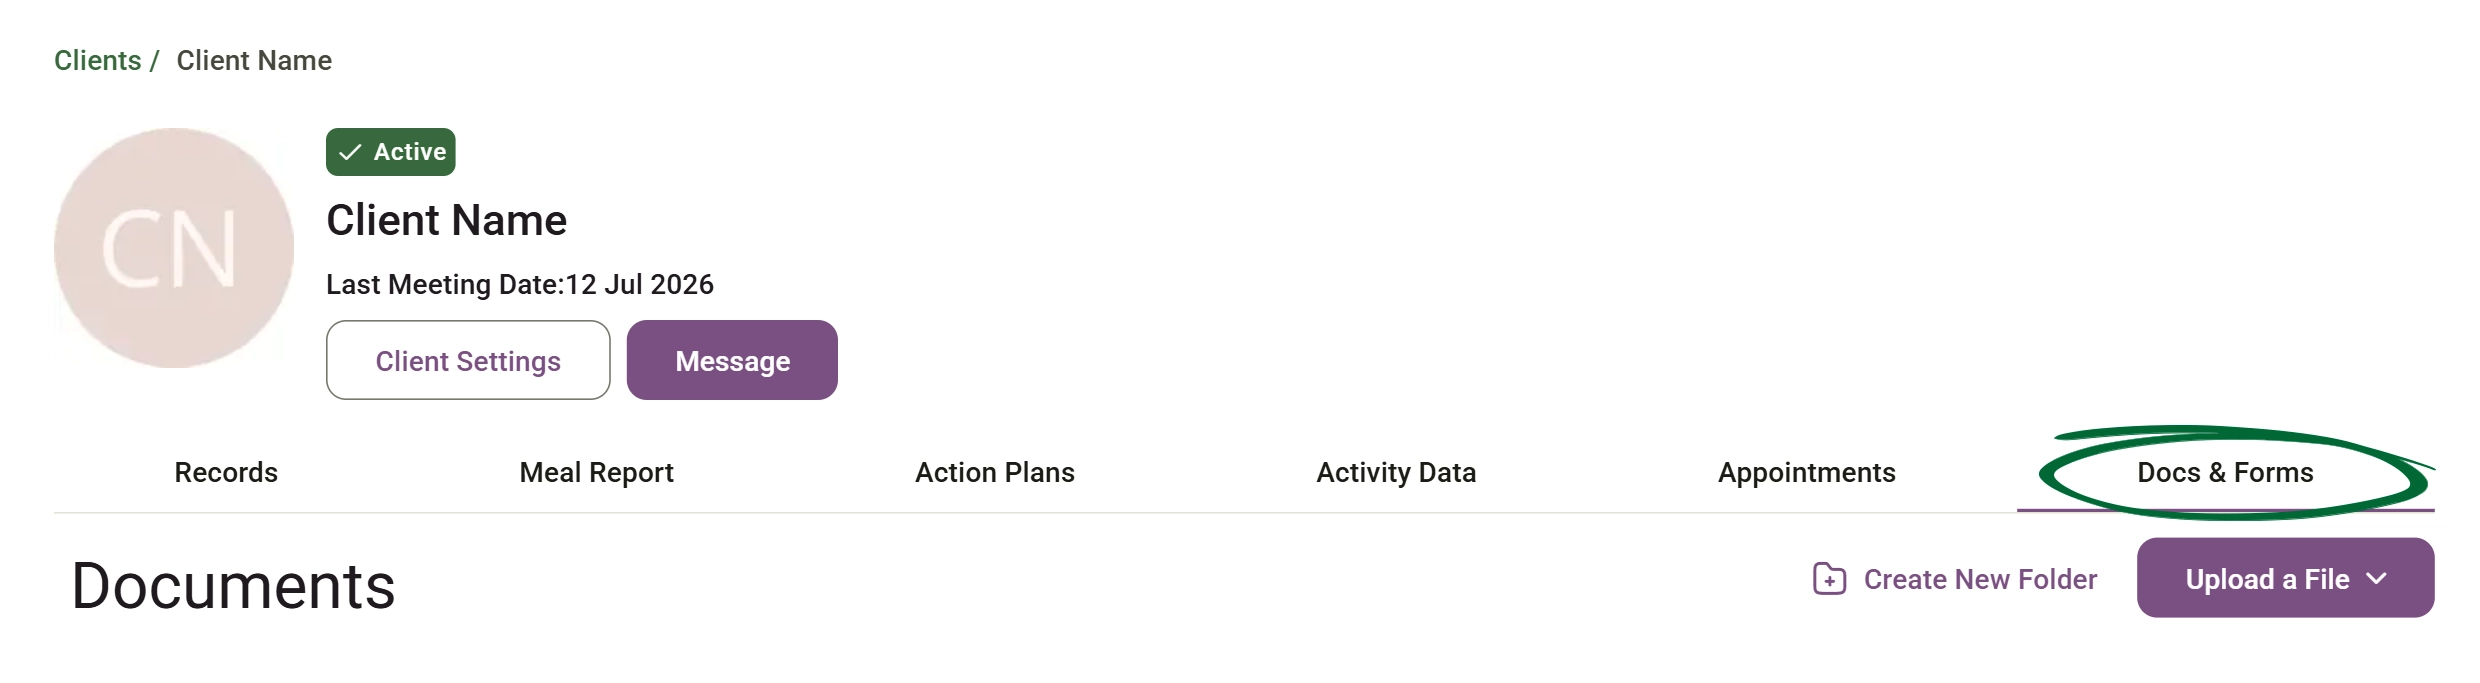
Click the Upload Document button located at the top right of the Documents area.
A pop-up overlay will appear, enter the Document Title. If you want the client to access this file in their app, check the Share with [Client Name] box. To extract, summarise, and analyse clinical data from the document, tick the Analyse document with AI box.
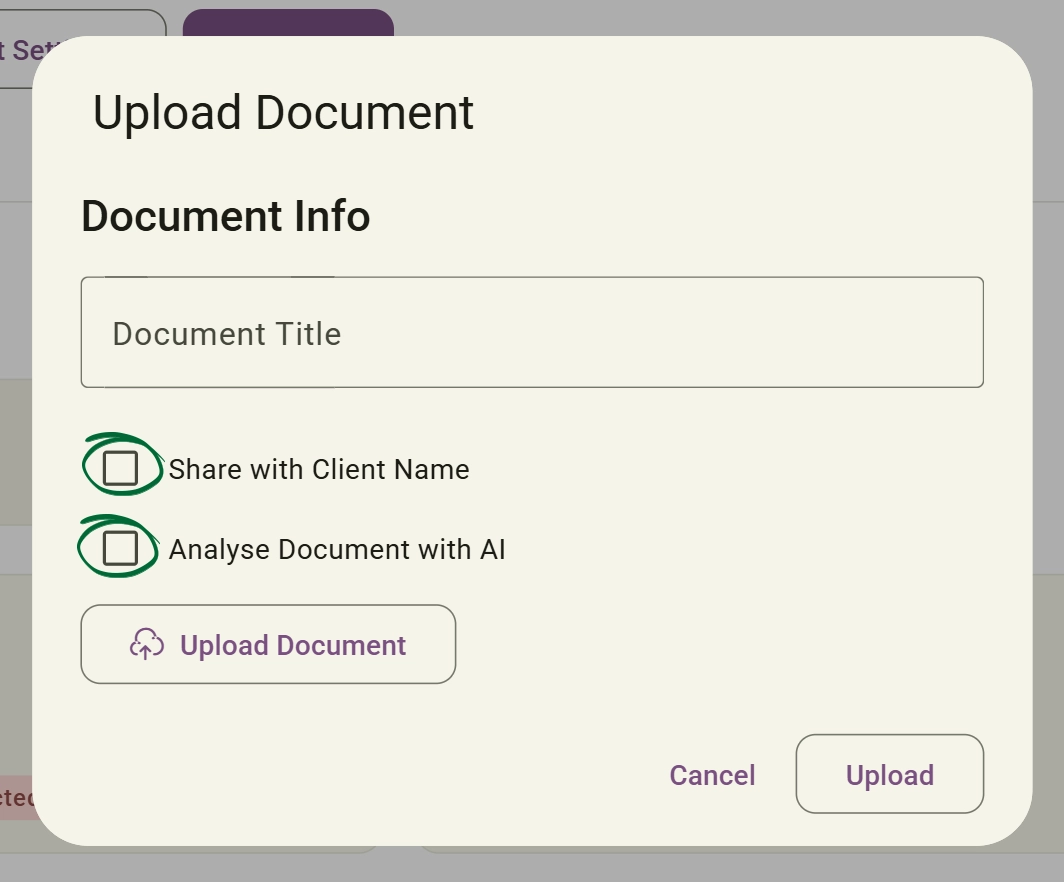
Click the Upload Document button with the cloud icon to select a file from your device. Once selected, click Upload to finish.
Notes:
- While you can upload any document type, please note that the AI feature can only detect and analyse clinical data from PDF files and images.
- If you choose Share with [Client Name] when uploading a document, or select Sent to Client from the document menu, the file will be marked with a green Sent badge. Once shared, the Sent to Client option will no longer appear in the drop-down menu.
Leverage clinical AI to scan laboratory results and medical documents, extract key markers, and update health records without manual entry.
Once uploaded, check the status badge on the document card. A red badge indicates "No medical records detected", while a purple badge highlights "AI detected new info, Click to view".

Look for any document card that displays the "AI detected new Info, Click to view" badge. Click directly on this badge or the document card to open the analysis interface.
In the AI Analysis tab, review the automated summary, document type, clinical notes, and parsed laboratory results.
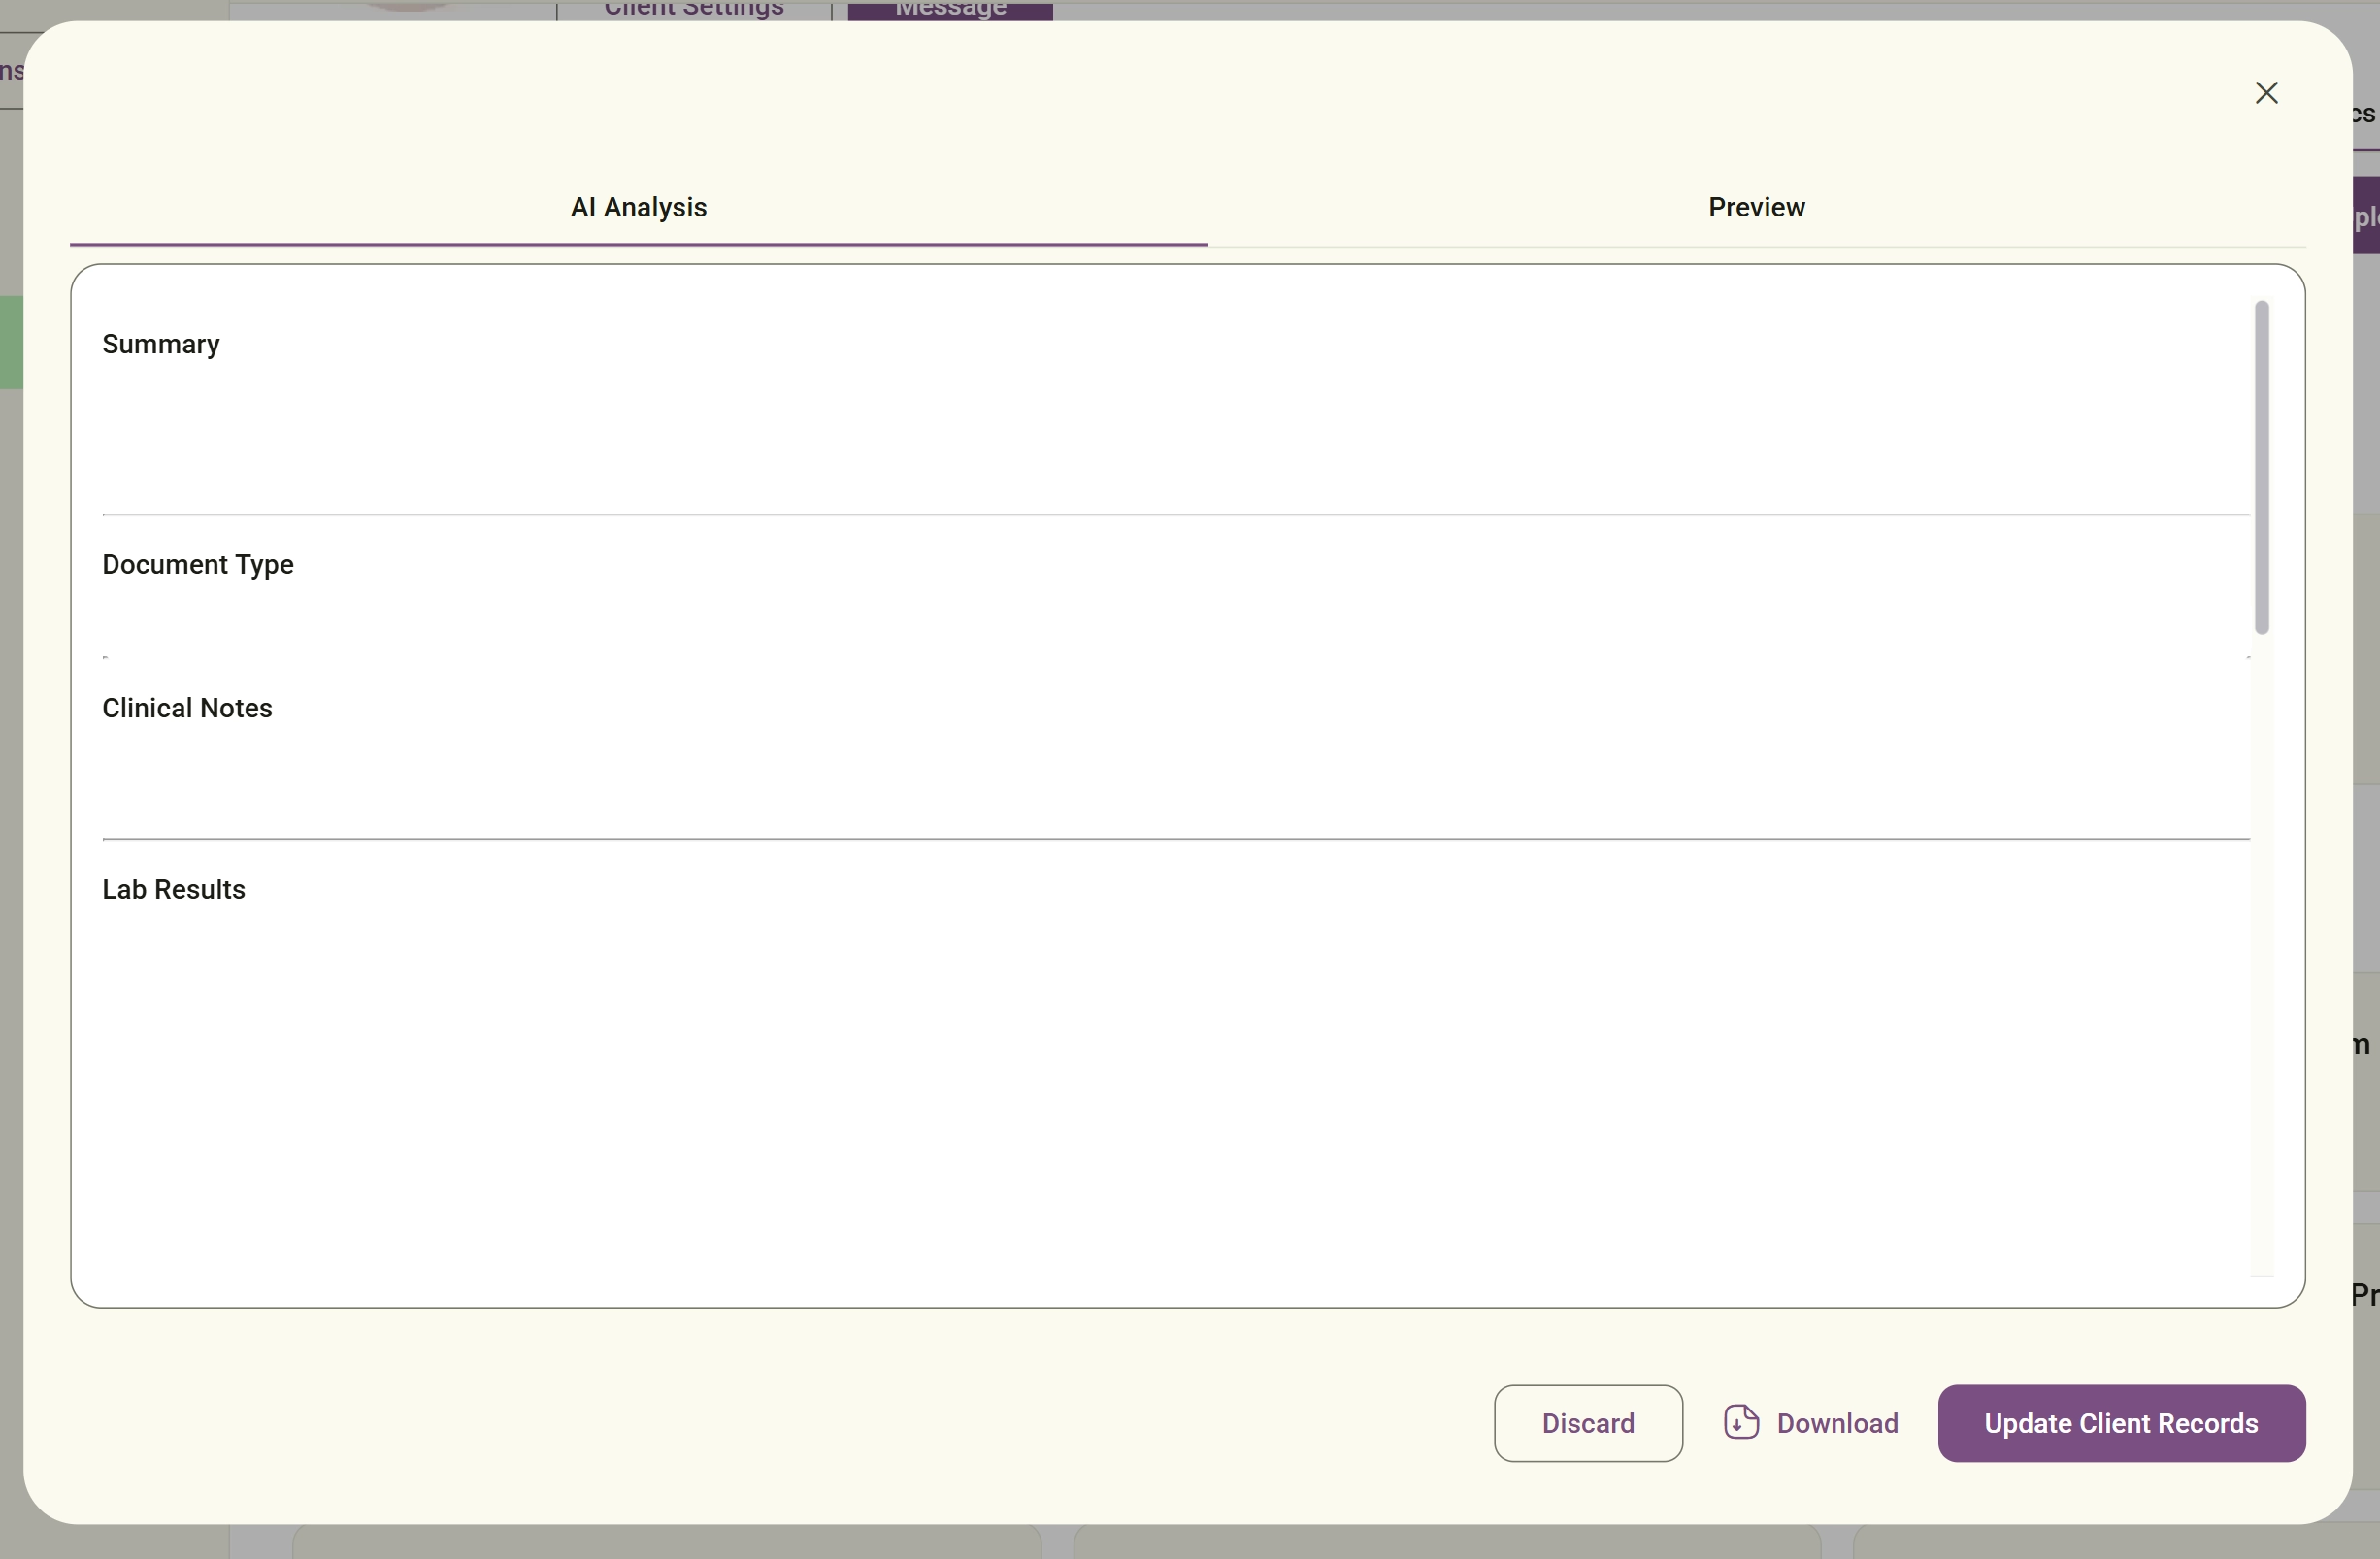
Click the Preview tab next to the AI Analysis tab to view the original uploaded document side-by-side with your parsed notes for easy validation.
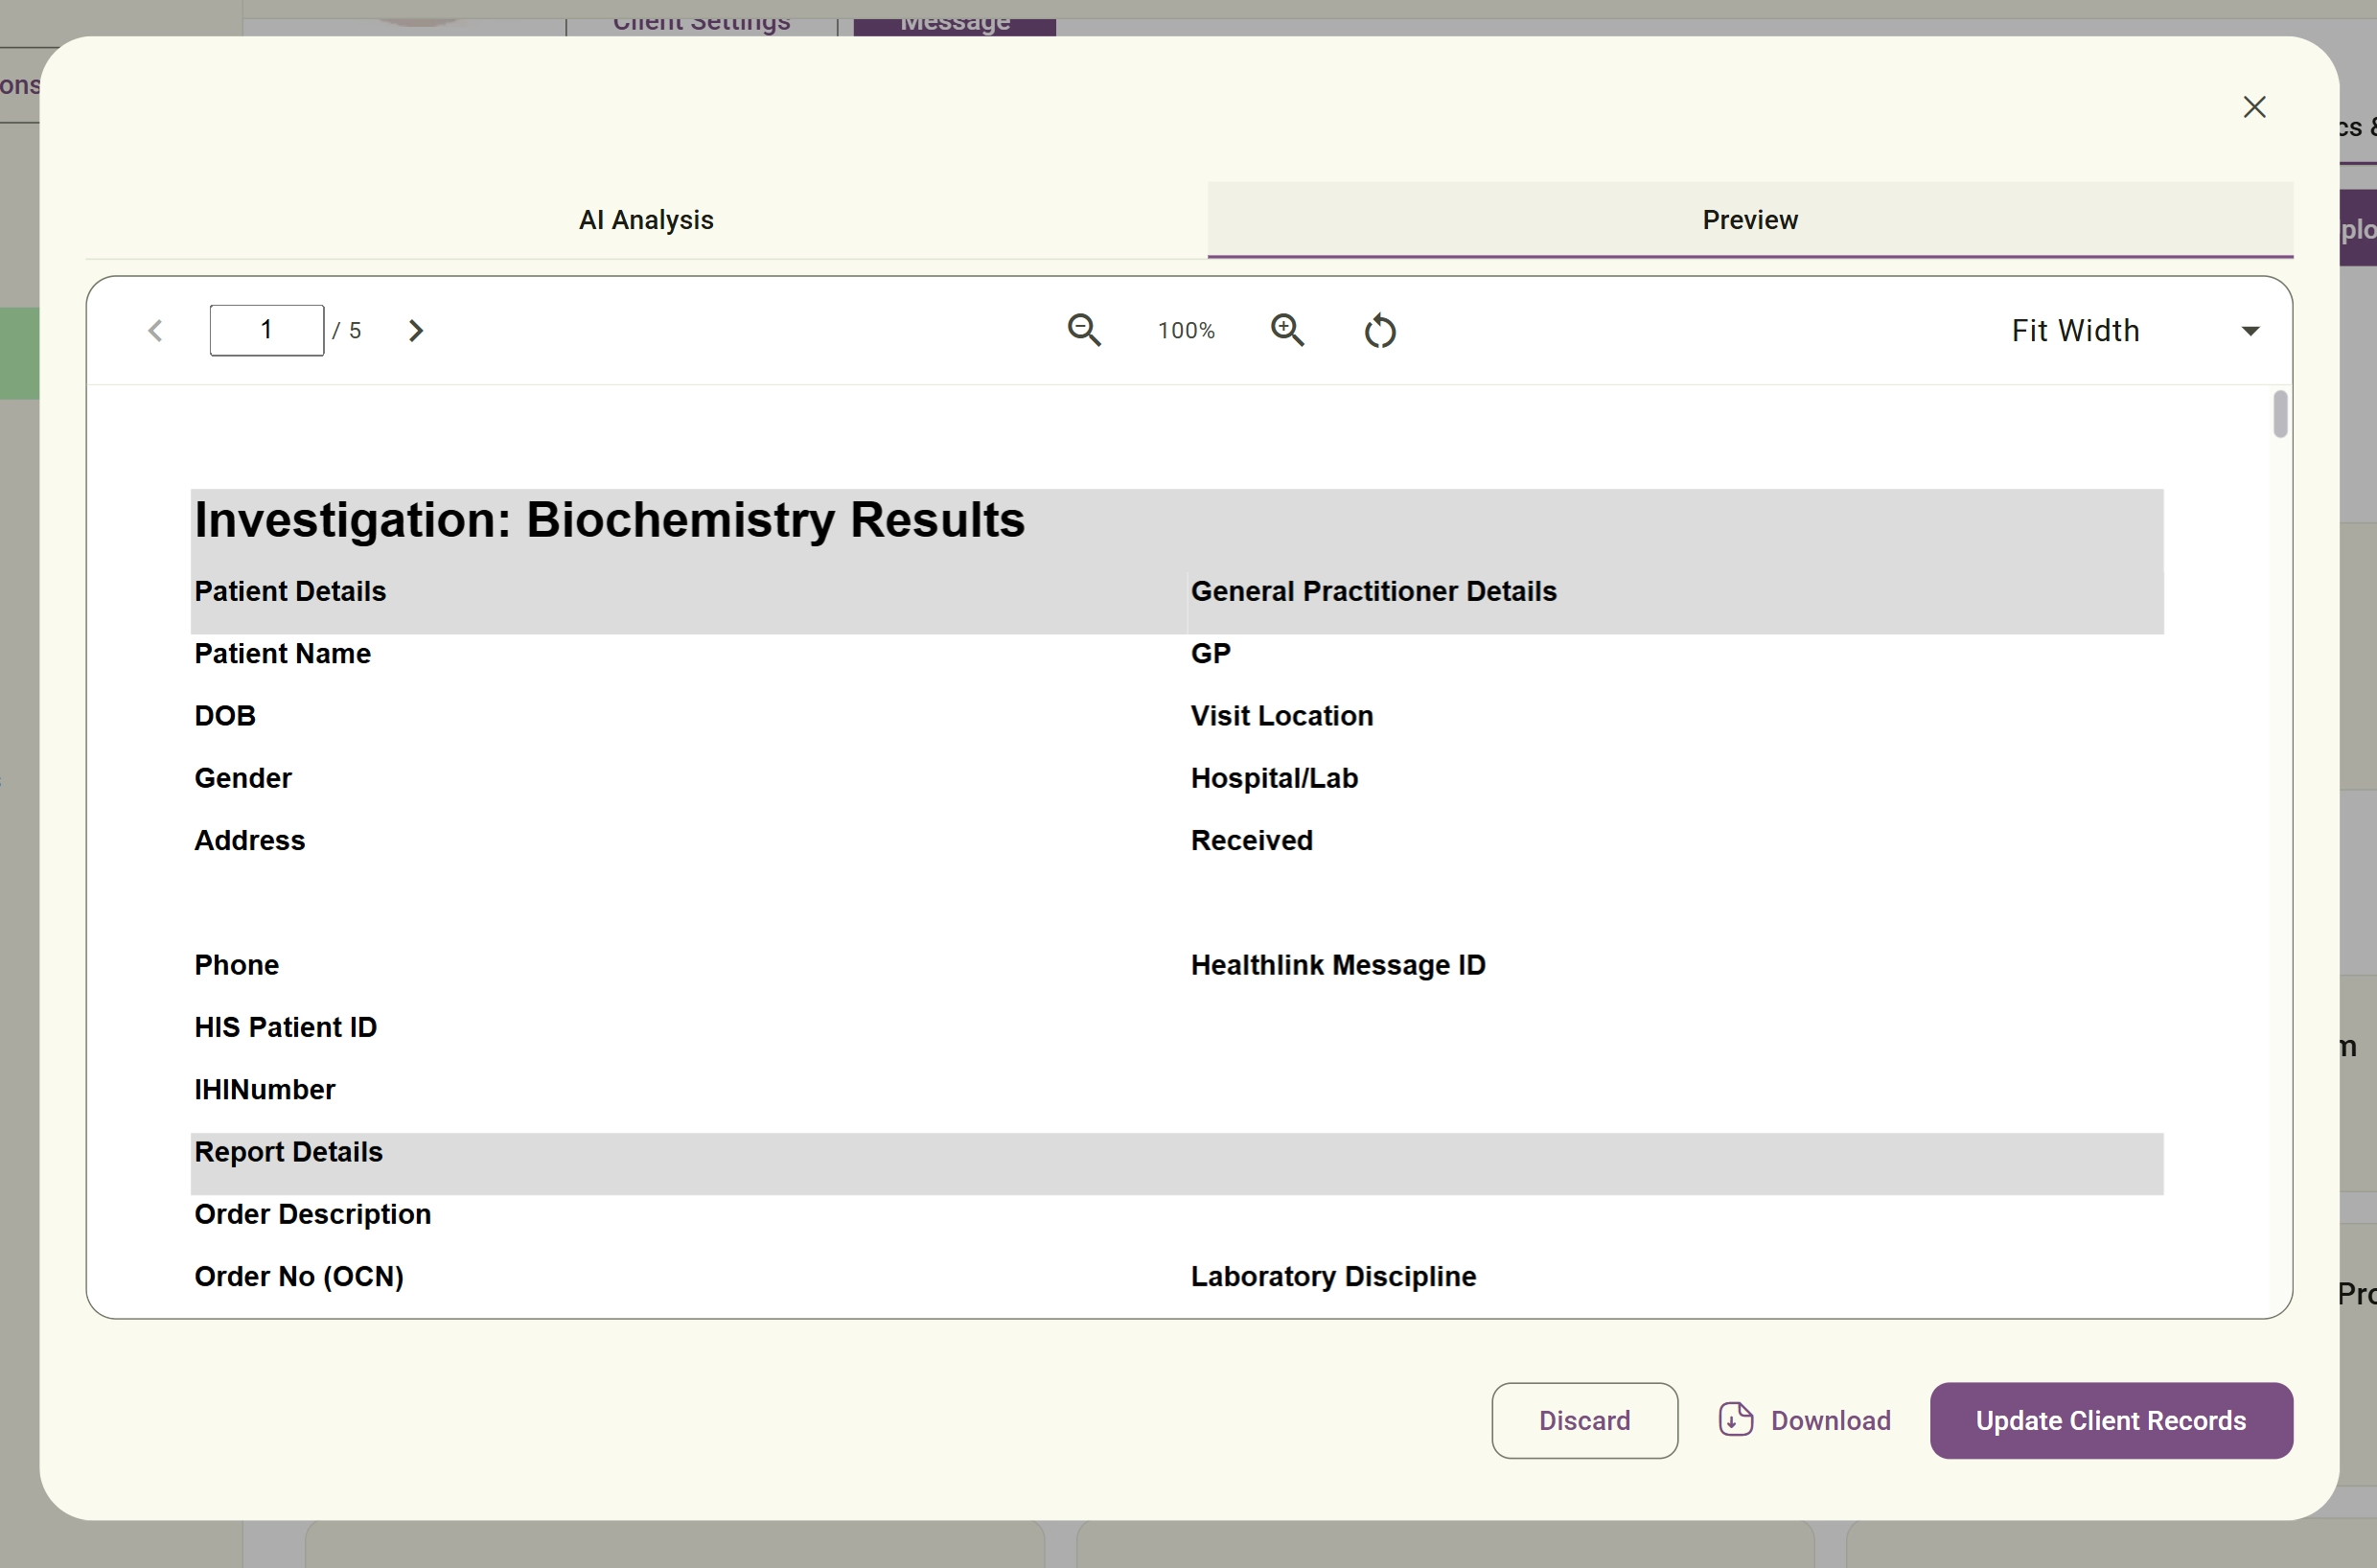
Click the Update Client Records button to instantly save the AI-extracted clinical details into your client's main Records tab. Alternatively, you can click Download to save the document locally to your device, or Discard to close the window.

Note: The controls at the top of the Preview tab allow you to manage how you view multi-page documents. Use the left and right arrows to navigate between pages, or type a specific page number into the input box to skip directly to it. You can adjust your view using the magnifying glass icons to zoom in and out, click the circular arrow icon to reset the zoom level, and use the dropdown menu to alter the display layout by selecting Fit Width, Page, or Height.

Quickly preview, download, categorise, or delete clinical documents inside your active list.
Click the options menu (three dots) on the card of any document you wish to manage.
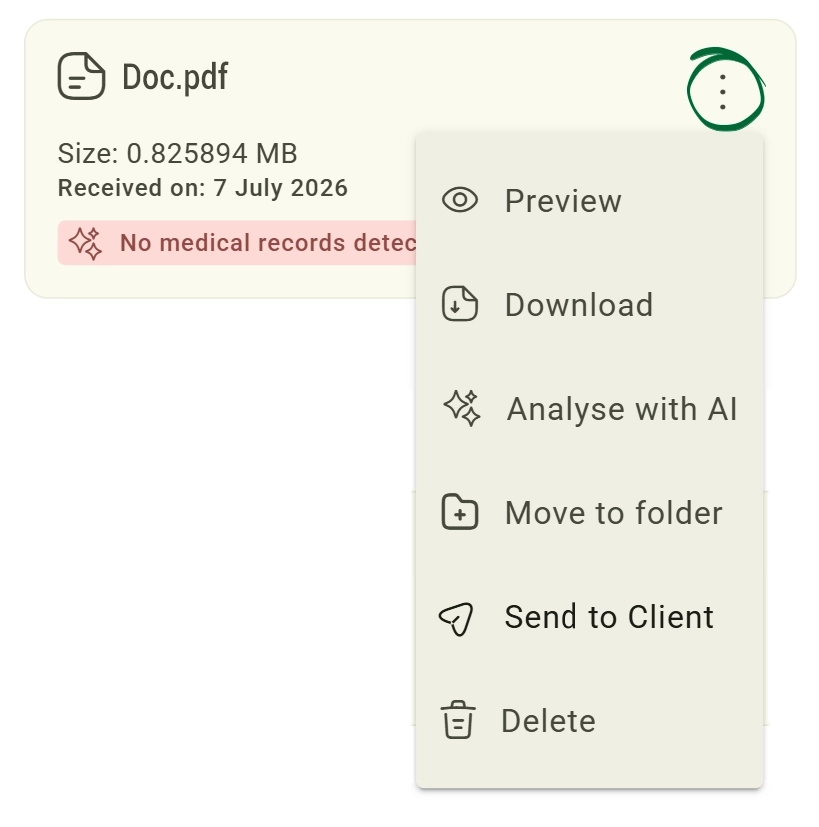
Select Preview to view the document inside the platform, Download to save it locally, Analyse with AI to run an on-demand medical scan, Move to Folder to change its folder path, Send to Client to share it directly with your client, or Delete to permanently remove the file.
Create custom digital filing cabinets and unlimited subfolders to keep clinical letters, lab sheets, and resources well-arranged. You can also upload compressed folders to have the system automatically extract and structure your files instantly.
Click the Create New Folder button at the top right, enter your preferred folder name, and confirm to generate it. To create a subfolder, simply open any existing folder and click the same button. There is no limit to how many levels of nested subfolders you can create.
Note: Once inside a folder, you can also use the edit icon to rename it or the trash icon to delete it.
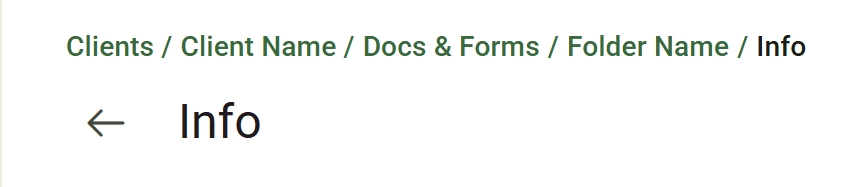
When working deep inside nested subfolders, you can easily track your location and jump back to previous directories. Use the clickable breadcrumbs pathway at the top of the page, or click the back arrow icon located left next to the active folder's title.
Move a document into any folder or subfolder by clicking its three-dot menu, selecting Move to Folder. You can also simply drag and drop the document directly into your chosen folder.
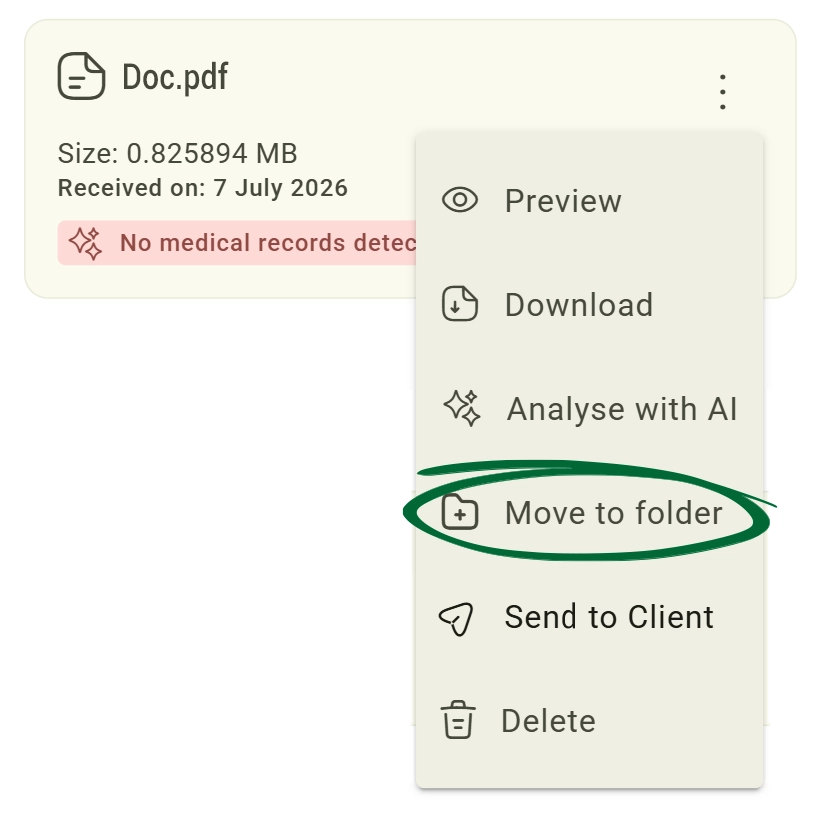
After pressing “Move to Folder”, a pop-up window titled Choose Folder will appear showing your current directory structure. Browse through the available folders and click on the destination folder where you want to store your file. Once selected, click the Move Document button at the bottom.
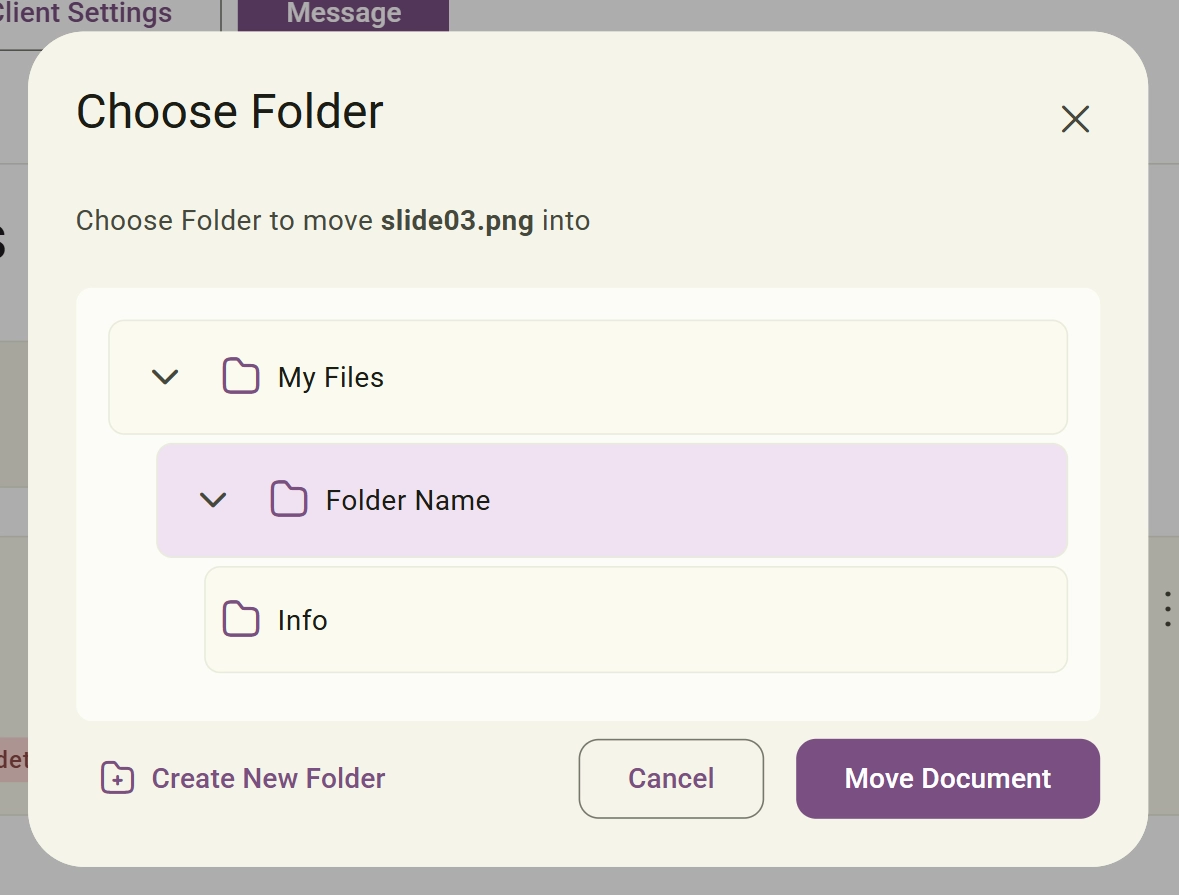
If you haven't got a suitable folder ready, select the parent folder where you'd like it stored, then click Create New Folder in the bottom-left corner of the pop-up. Enter a name for your new folder in the box provided and click Create to set it up before completing the move.
.webp)
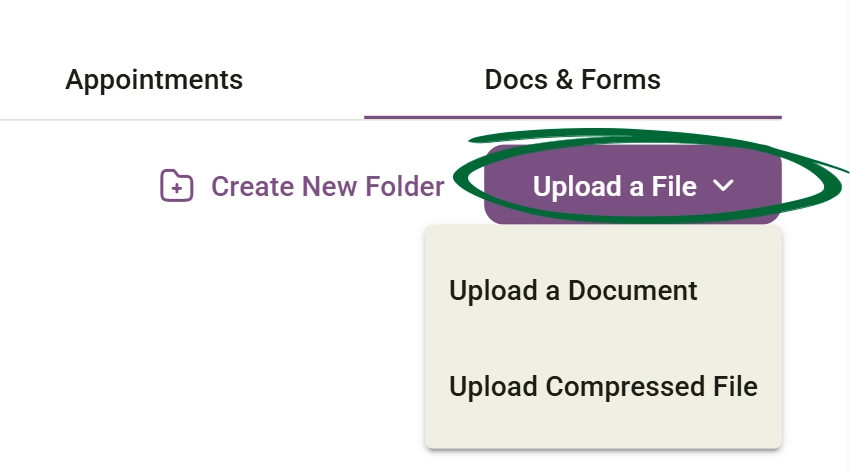
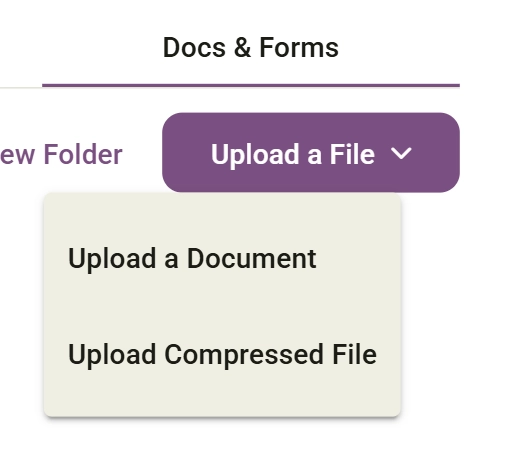
- On the main Docs & Forms tab: Click the Upload a File button to open the dropdown menu. Select Upload a Document for individual files, or Upload Compressed File for archives (.zip files). The system will automatically extract all enclosed files and folders instantly.
- Inside a specific folder: Open the folder and click the dedicated Upload a Document button to save new files directly into that specific category.
Monitor the progress of intake forms, agreements, and medical assessments shared with your client.
Scroll down to the Forms section of the Docs & Forms tab to view the clinical forms assigned to your client.
Check the status indicator on each form card: Pending (unopened), Incomplete (saved as a draft and not submitted yet), or Submitted (completed and sent back).

Click the three-dot menu on any form card to Preview the questions, Save as PDF, or Delete the form answer from the client's queue.
Take direct clinical control over questionnaire answers by manually updating responses across any stage of the workflow.
Click directly on the body of any form card in your list, regardless of whether its status is currently Pending, Incomplete, or Submitted.
Select Edit form answers to begin making manual clinical modifications.

Overtype or update the question's answer as needed and click the Update form answers button to update the database records accordingly.
Click the adjacent Download as PDF button to export a copy of the form answers.
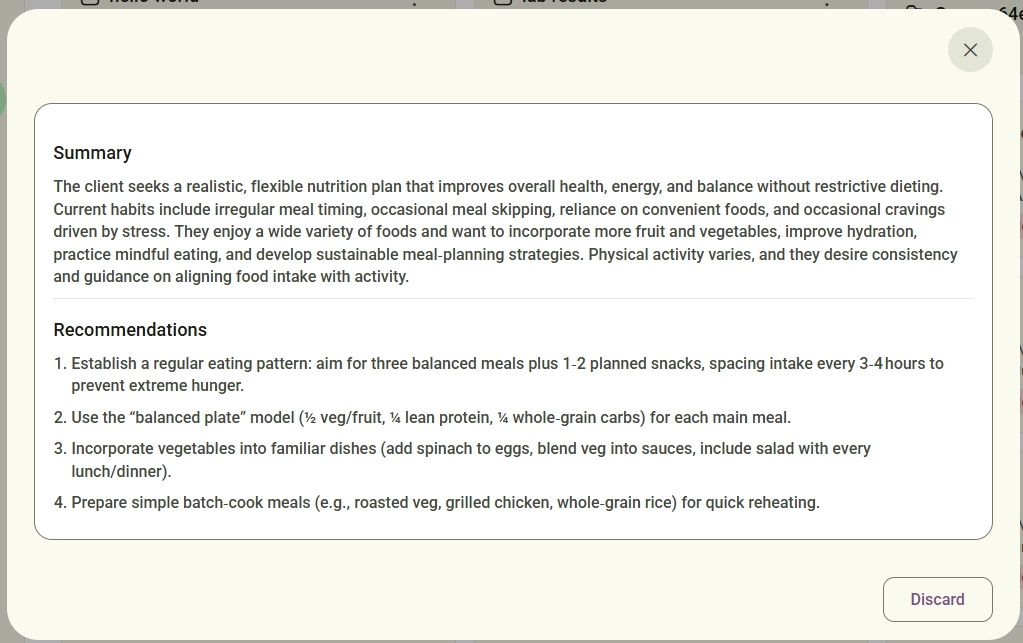
Save valuable time by generating instant, AI-driven summaries and action-oriented recommendations from submitted client forms.
Locate the submitted or Incomplete form on your client’s profile card, click the three-dot context menu in the top-right corner of the form card, and select Summarise with AI.
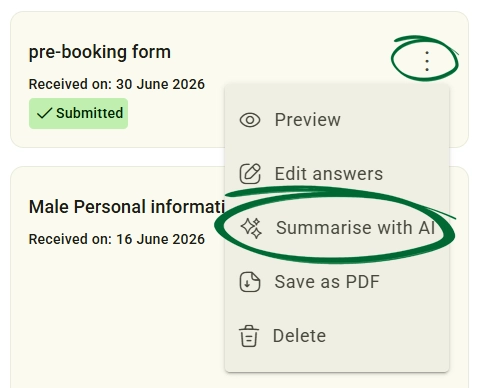
If it was generated successfully , an AI summary available badge will appear on the form card. You can view the output at any time by selecting View AI Summary from the three-dot menu.
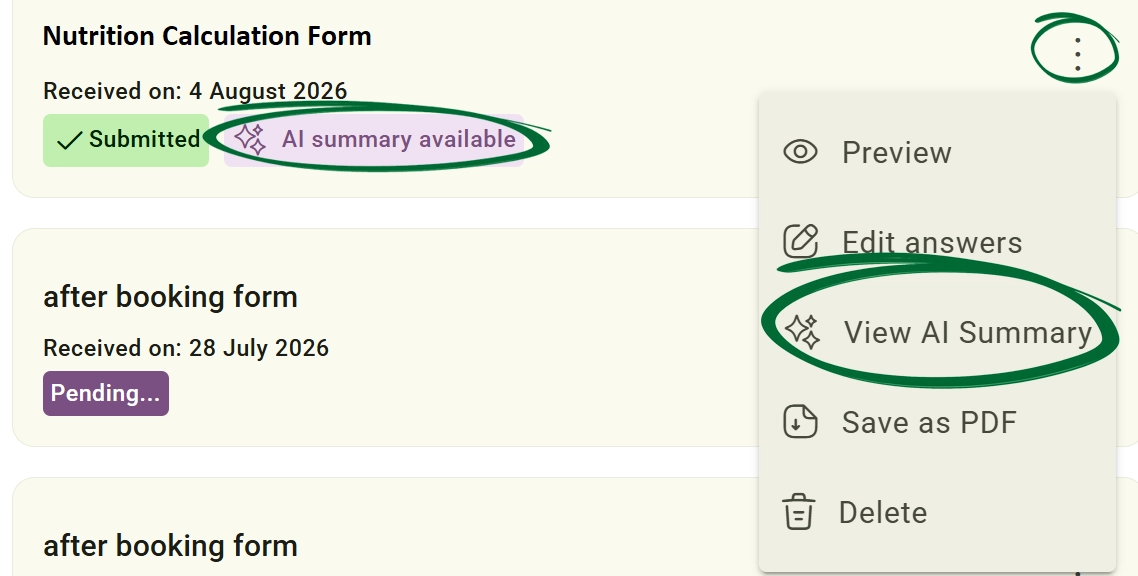
A popup window will display a concise Summary of your client's form answer to help guide your session planning.
Can a client see everything I upload?
Where do clinical values go when I click 'Update Client Records'?
What file formats are supported for automated AI analysis?
Issue: I cannot find a document I uploaded
Issue: A client says a form completely vanished from their mobile app queue.
Next Step
Your client's profile, settings, and documents are fully managed! Now, return to the Client Directory to monitor other active clients or explore our guide on Appointments & Calendar to configure your clinic's booking schedules.
Go to Appointments & Calendar