This section allows you to narrow down the client's dietary timeline and choose your preferred format for data visualisation.
Locate the Show From date picker on the right side of the screen. Click the date field to select or adjust the specific week you wish to review.
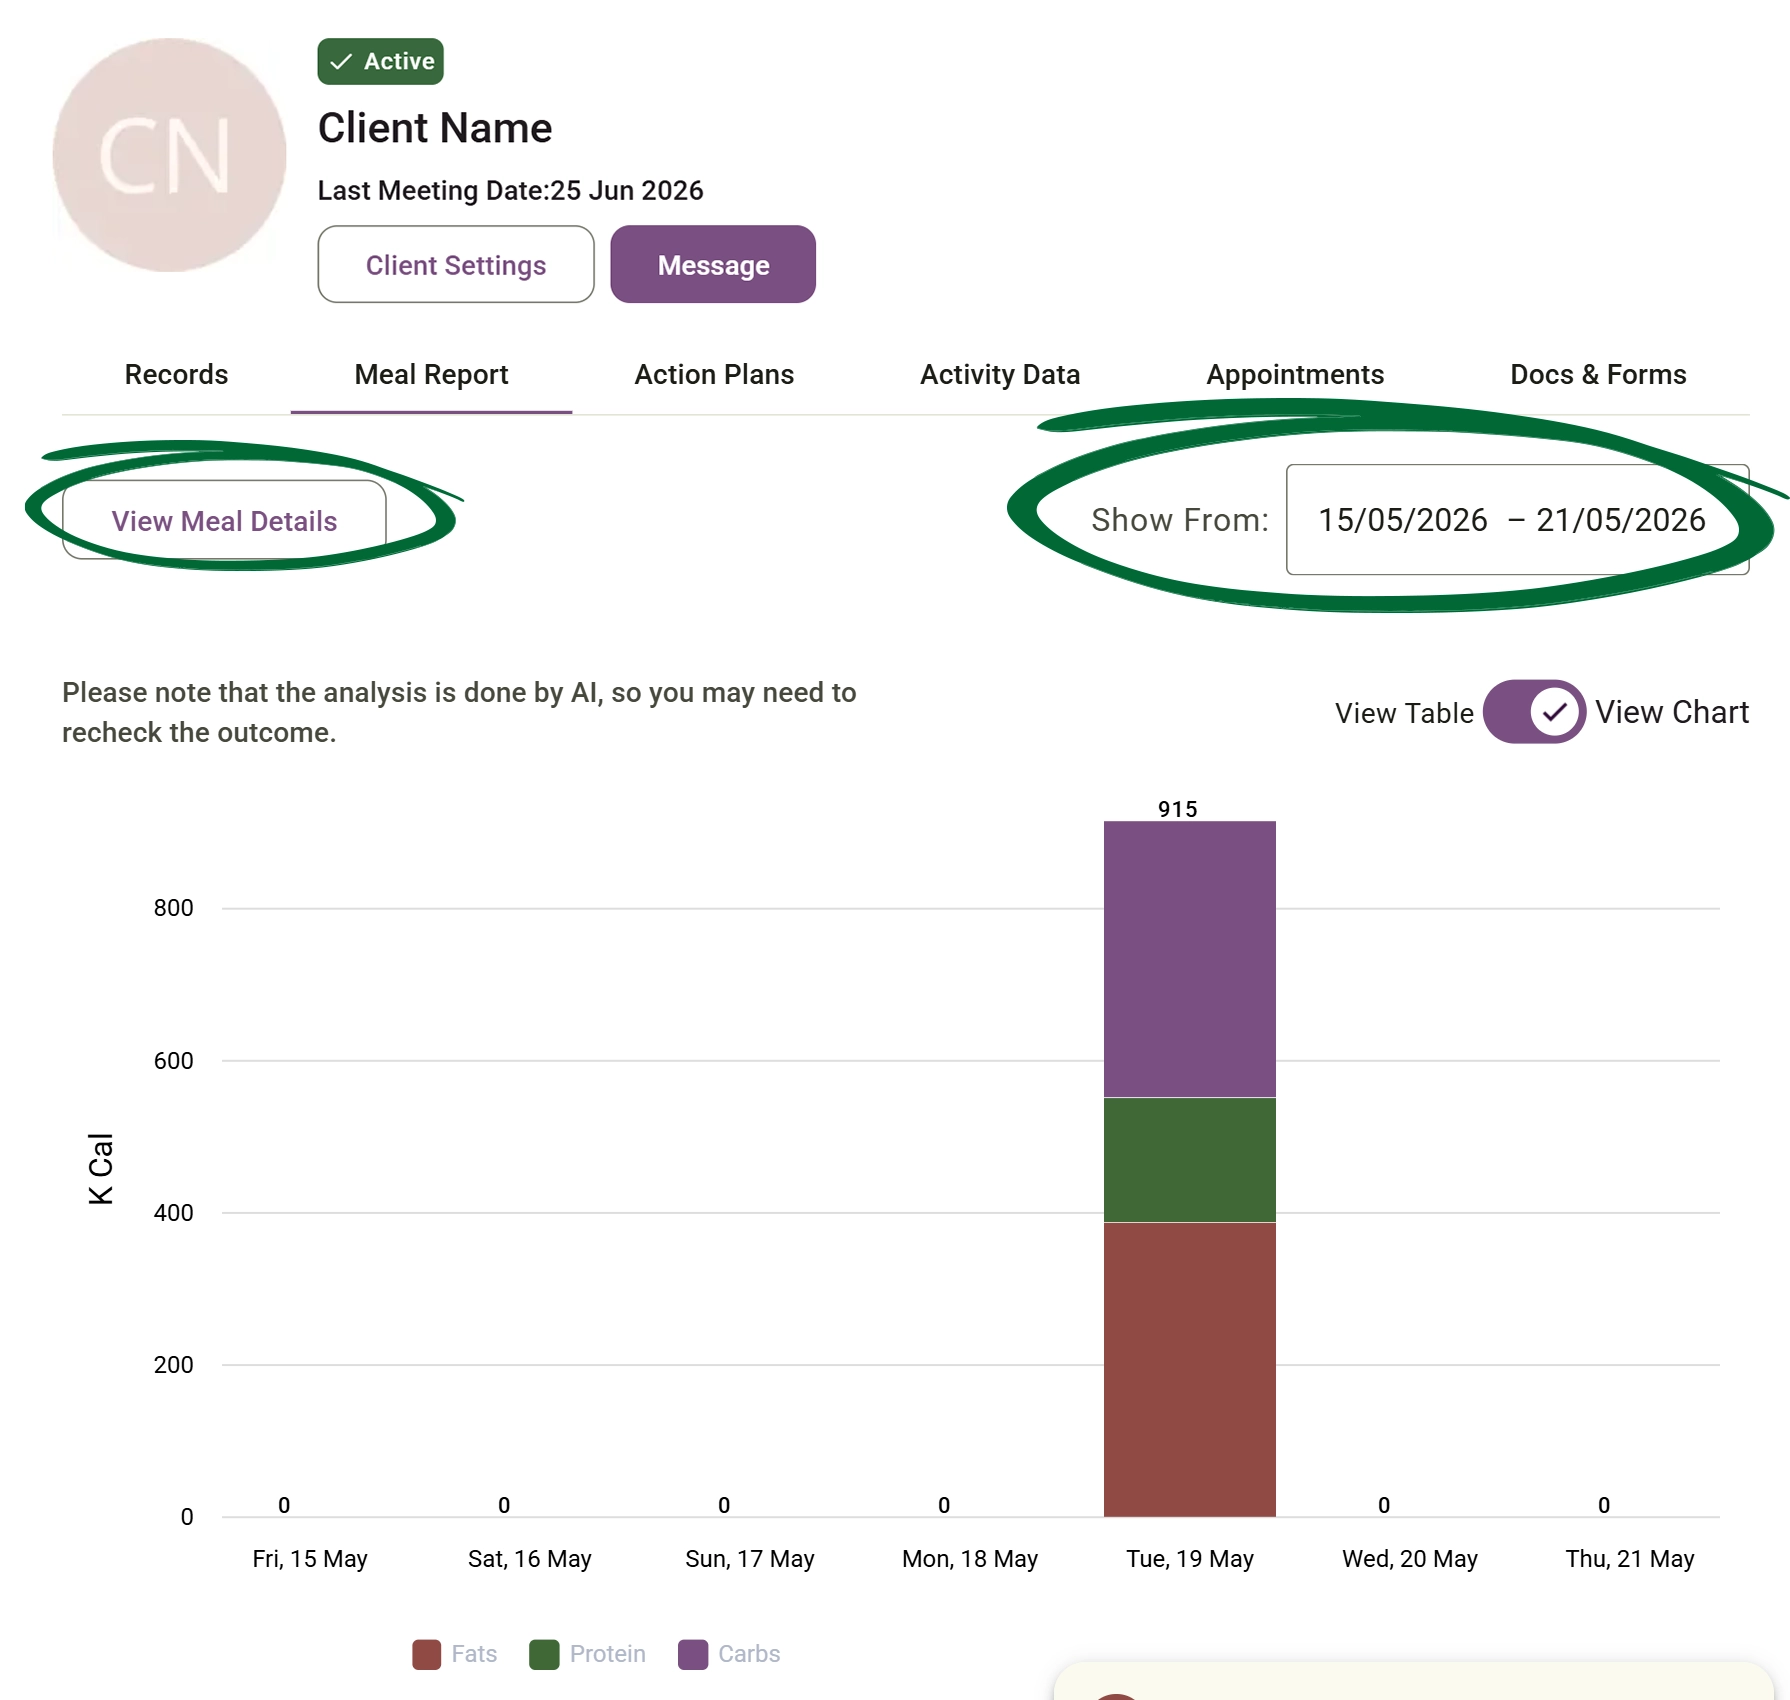
This helps you easily monitor your client's daily intake of calories, specific nutrients, and any physical symptoms they experience during the selected week.
Review the Symptoms line graph to check for logged physical reactions, such as Abdominal pain, to see exactly when & which symptoms peaked during the week.
This features the automated intake engine. Any food diary photo or meal image a client uploads for their practitioner is automatically processed using AI and displayed instantly with full details.
Modify, update, and annotate existing meal entries to maintain an impeccable and accurate clinical record.
If you want to add your own notes, clinical observations, or feedback about the meal or a symptom, click the Add Comment button.
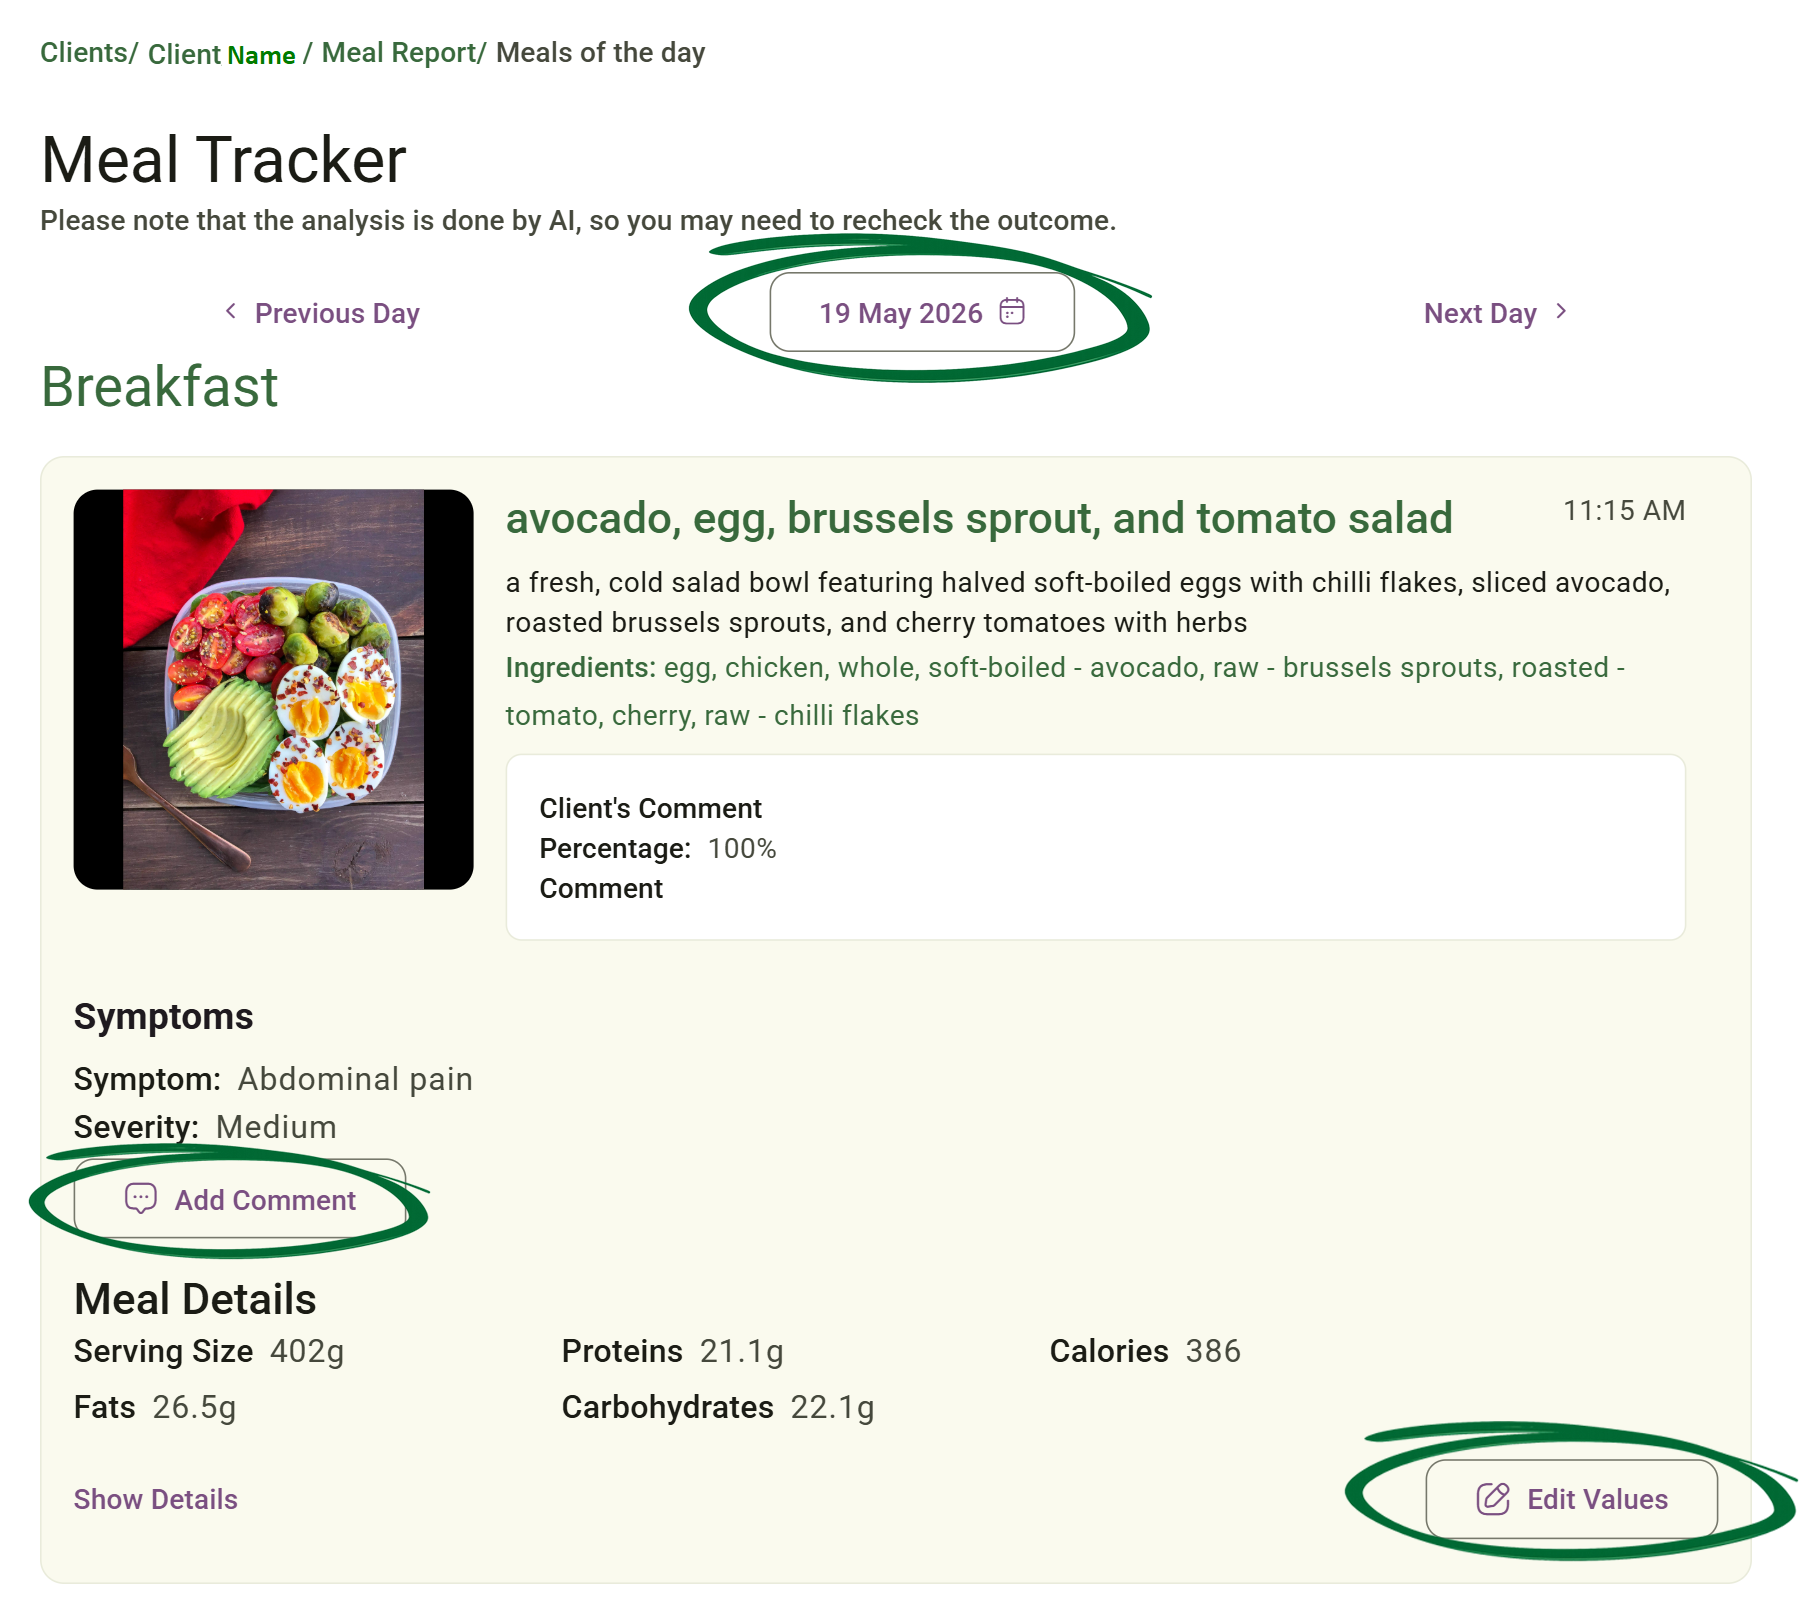
click the Edit Values button. This opens a pop-up form where you can update the Dish Name, Serving Size, Calories, or macronutrients, and so on. Click Save Changes when you are finished.
view at the Client's Comment box to read what your client wrote.
Can I edit the comments left by the client?
Why is a certain day on the weekly chart showing zero values?
How often is the AI analysis updated?
Can I change the micronutrient details if the AI misses something?
Issue: The client says they cannot upload photos or log meals
Issue: The AI analysis has missed an ingredient or is showing the wrong numbers.
Next Step
Now that you’re fully clued up on your clients' meal reports and dietary habits, it’s time to take things up a gear! Dive straight into the next section to master Client Action Plans. This is where you transform those nutritional insights into solid, daily strategies!
Go to Client Action Plans