Client Communications & Engagement

Maintain a constant, professional connection with your clients. This section covers how to handle direct messaging, configure communication boundaries, share clinical resources, and customise automated email workflows to support your clients throughout their journey.

1. Direct Messaging & Management

Engage in real-time conversations, manage your clinical inbox, and share rich media directly with your clients.

1
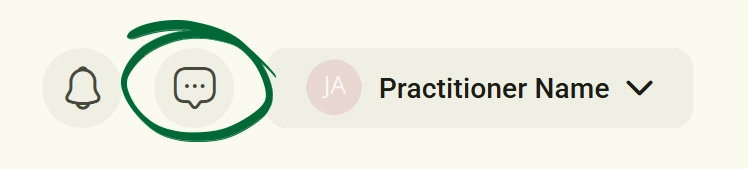
Open Messages:

Select the Message button in the top header next to your profile image.

Note: You can also click the Messages widget in the bottom-right corner of the screen to expand this widget.
Open Messages screenshot
2
Select a Conversation:
Choose a group class chat or click a client card from your contact list on the left to open the chat window on the right.
3
Access chat details and actions:

At the top of the active chat window, click the Information (i) icon next to the chat name to view and manage interaction settings. 

  • For individual clients, this allows you to quickly view their profile or block them. 
  • For a group class chat, clicking the (i) icon opens the Details overlay (as shown in the screenshot below), which serves as a central hub for group management. From here, you can select View Members to see the participant list and access options to remove, block, or change a member's role. Additionally, you can select Add Members to search and add new participants from your clients list, check the Banned Members directory, or choose to either Leave the group or permanently Delete and Exit it.

chat details and actions screenshot
4
Type and Customise Your Message:
Type your message in the text box at the bottom of the chat. You can click the Microphone icon to send voice recordings, or click the adjacent icons to send emojis and stickers.
5
Attach Media and Files:
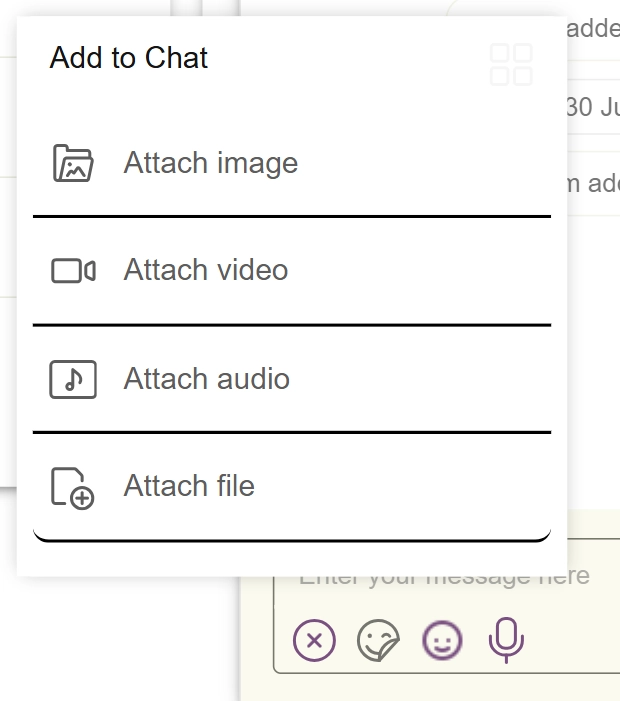
Click the Plus (+) icon next to the text box to reveal attachment options. Select Attach image, Attach video, Attach audio, or Attach file to upload clinical resources directly from your device.
Attach Media and Files screenshot
6
Reply to and interact with messages:

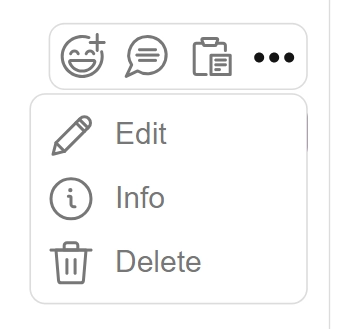
Hover over or tap any message to access its interaction options. For your own messages and replies, you can add an emoji reaction, edit the text, copy the content, view message info, or delete it permanently. If a message belongs to another user, you can only reply to it, add a reaction, or copy the text. Clicking the Reply link underneath a message will open a dedicated Thread, allowing you to view and manage ongoing sub-conversations smoothly.
Reply to and interact with messages screenshot
7
View your Automated Group Chat Features:

Once you create a group class, a dedicated chat is automatically generated alongside an initial system notification displaying the creation date. The system automatically adds you to the chat and will post real-time updates whenever a new member joins the class.

8
Send Your Message:
Press Enter on your keyboard or click the Send icon to deliver your message instantly to the chat.
Tip: If you no longer need a chat, you can delete it to keep your inbox organised. Simply hover your cursor over the conversation thread in your contact list and click the Trash icon.
2. Share Resources With Clients

Deliver clinical forms, documents, and action plans directly to your clients via email and the Nurish Life client portal.
1
Locate your Resources:
Navigate to your resource library by clicking the Resources tab in the left-hand sidebar.
2
Open the Sharing Option:
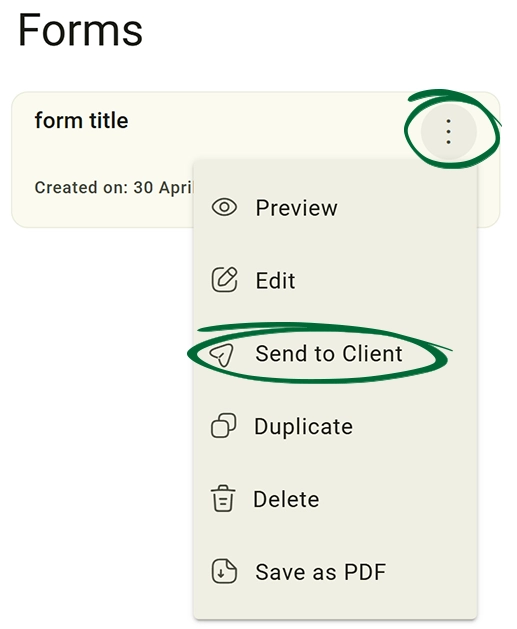
Open the options menu (three dots) next to the item.
3
Send to Client:
Select Send to Client, search for your recipient, and confirm the action to trigger an instant notification in both their portal and email.
Send to Client screenshot
Tip: You can also send action plans directly from a client's profile, which automatically notifies them via email and a push notification. Simply go to the “Clients” tab, select the relevant client to open their profile, and navigate to the “Action Plan” tab. From there, choose to either “Generate Plan with AI” or create a plan from scratch, then send it straight to your client.
3. Customise Email & Push Notifications

Configure global automated notifications and customise the email templates sent from your practice.

1
Open Notification Settings:

Navigate to Settings → Notification Settings to use the checkboxes to enable or disable automated email and push notifications for specific client actions and system events, such as: Appointment cancelled / Appointment rescheduled / Appointment reschedule request sent / Client form answer submitted / New appointment scheduled / New message received / New programme enrolment

2
Customise Client Emails:

Navigate to Settings → Client Email Preferences to select a template (such as booking confirmations or cancellations) and modify the text using dynamic placeholders (e.g., {Client_Name}) to keep communications personalised.

Note: For a detailed walkthrough, please refer to the settings guide all notification triggers and email template customisations.

Frequently Asked Questions (FAQs)
Is the messaging platform GDPR compliant?
Yes. All communications within Nurish Pro and the Nurish Life app are encrypted end-to-end, ensuring client data remains secure and private.
Can I attach files directly in the chat?
Absolutely. Click the plus icon in the chat box to upload a file directly from your computer or select a resource from your library.
How are group class chats created?
Group class chats are generated automatically by the system as soon as a group class is created. The system automatically adds you to the thread, posts an initial creation date notification, and sends real-time updates whenever a new member joins the class.
Troubleshooting & Common Issues
Issue: Client isn't receiving notifications
Potential Solution: Ask the client to check their phone’s app notification settings for Nurish Life. Verify their email address is correct in their profile.
Issue: I can’t edit or delete a message sent by someone else.
Potential Solution: You can only edit or delete messages that you authored. For other users' messages, your options are limited to replying, copying the text, or adding an emoji reaction.
Issue: A client claims they haven't received the action plan I sent.
Potential Solution: Ask the client to check their email spam or junk folder, or advise them to log directly into the Nurish Life client portal, where they can locate the plan under the "Plans and Docs" section within their Health Records tab. If the plan is still missing, you can simply resend it at any time.

Next Step

Your client communications are organised! Now, explore Meal Report to learn how to review automated food diary analyses and monitor nutritional tracking.

Go to Meal Reports
Contact Support

Still need a hand?

Email Support: [email protected]