Generate, review, and manage AI session transcripts and summaries directly within your client’s appointment history.
When you join a video call, the "Ai Notes" taker button is enabled by default in the bottom toolbar. This allows the system to automatically capture your session transcript and notes.
If you prefer not to use this feature for a session, simply click the "Ai Notes" taker button to disable it before or during the call.

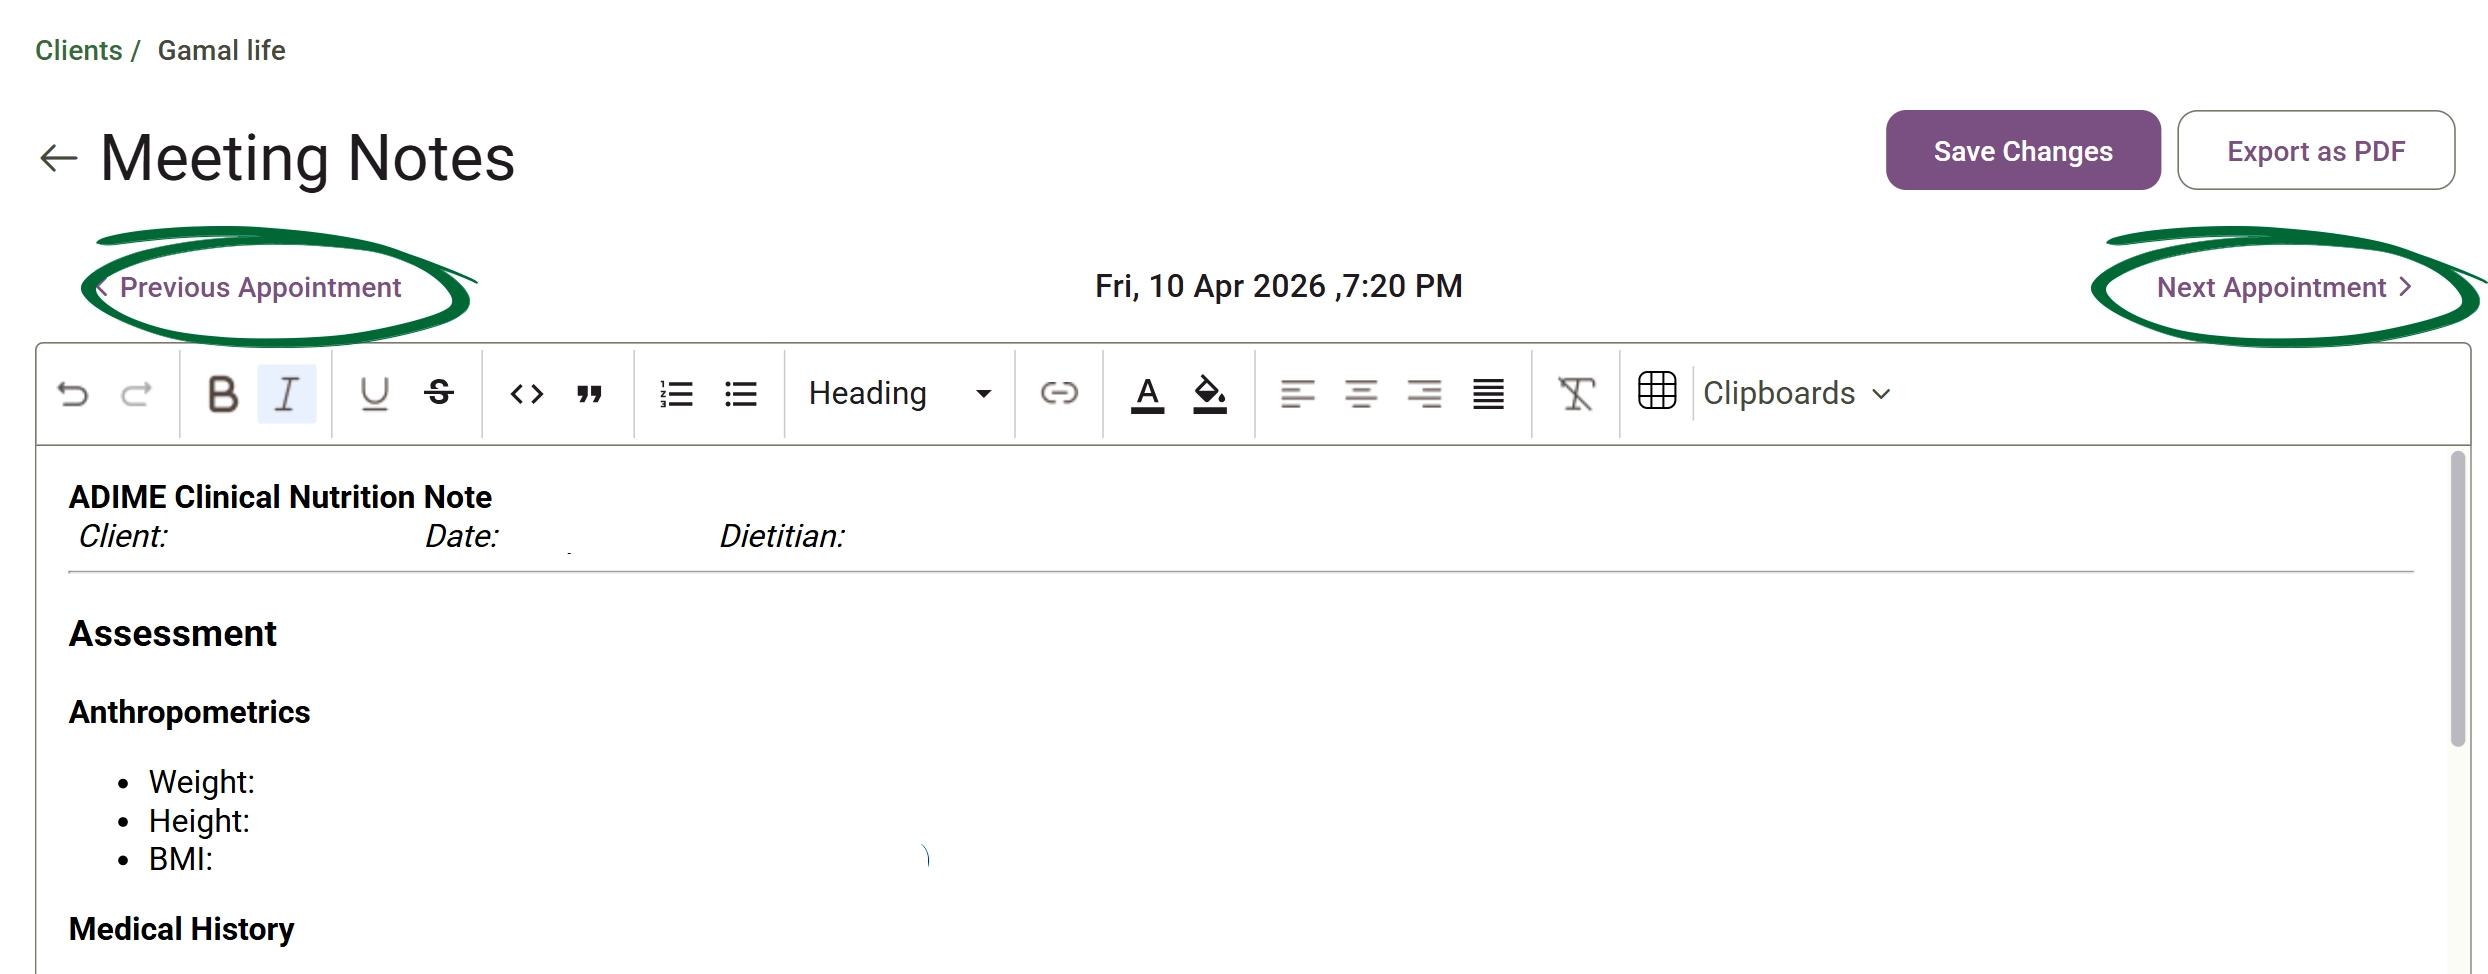
Under your selected session, click the Meeting Notes button. This opens the rich text editor, where you can manually type clinical notes, use formatting tools, or insert links and saved clipboard snippets.
You can also navigate between appointments using the Previous Appointment and the Next Appointment buttons above the rich text editor.
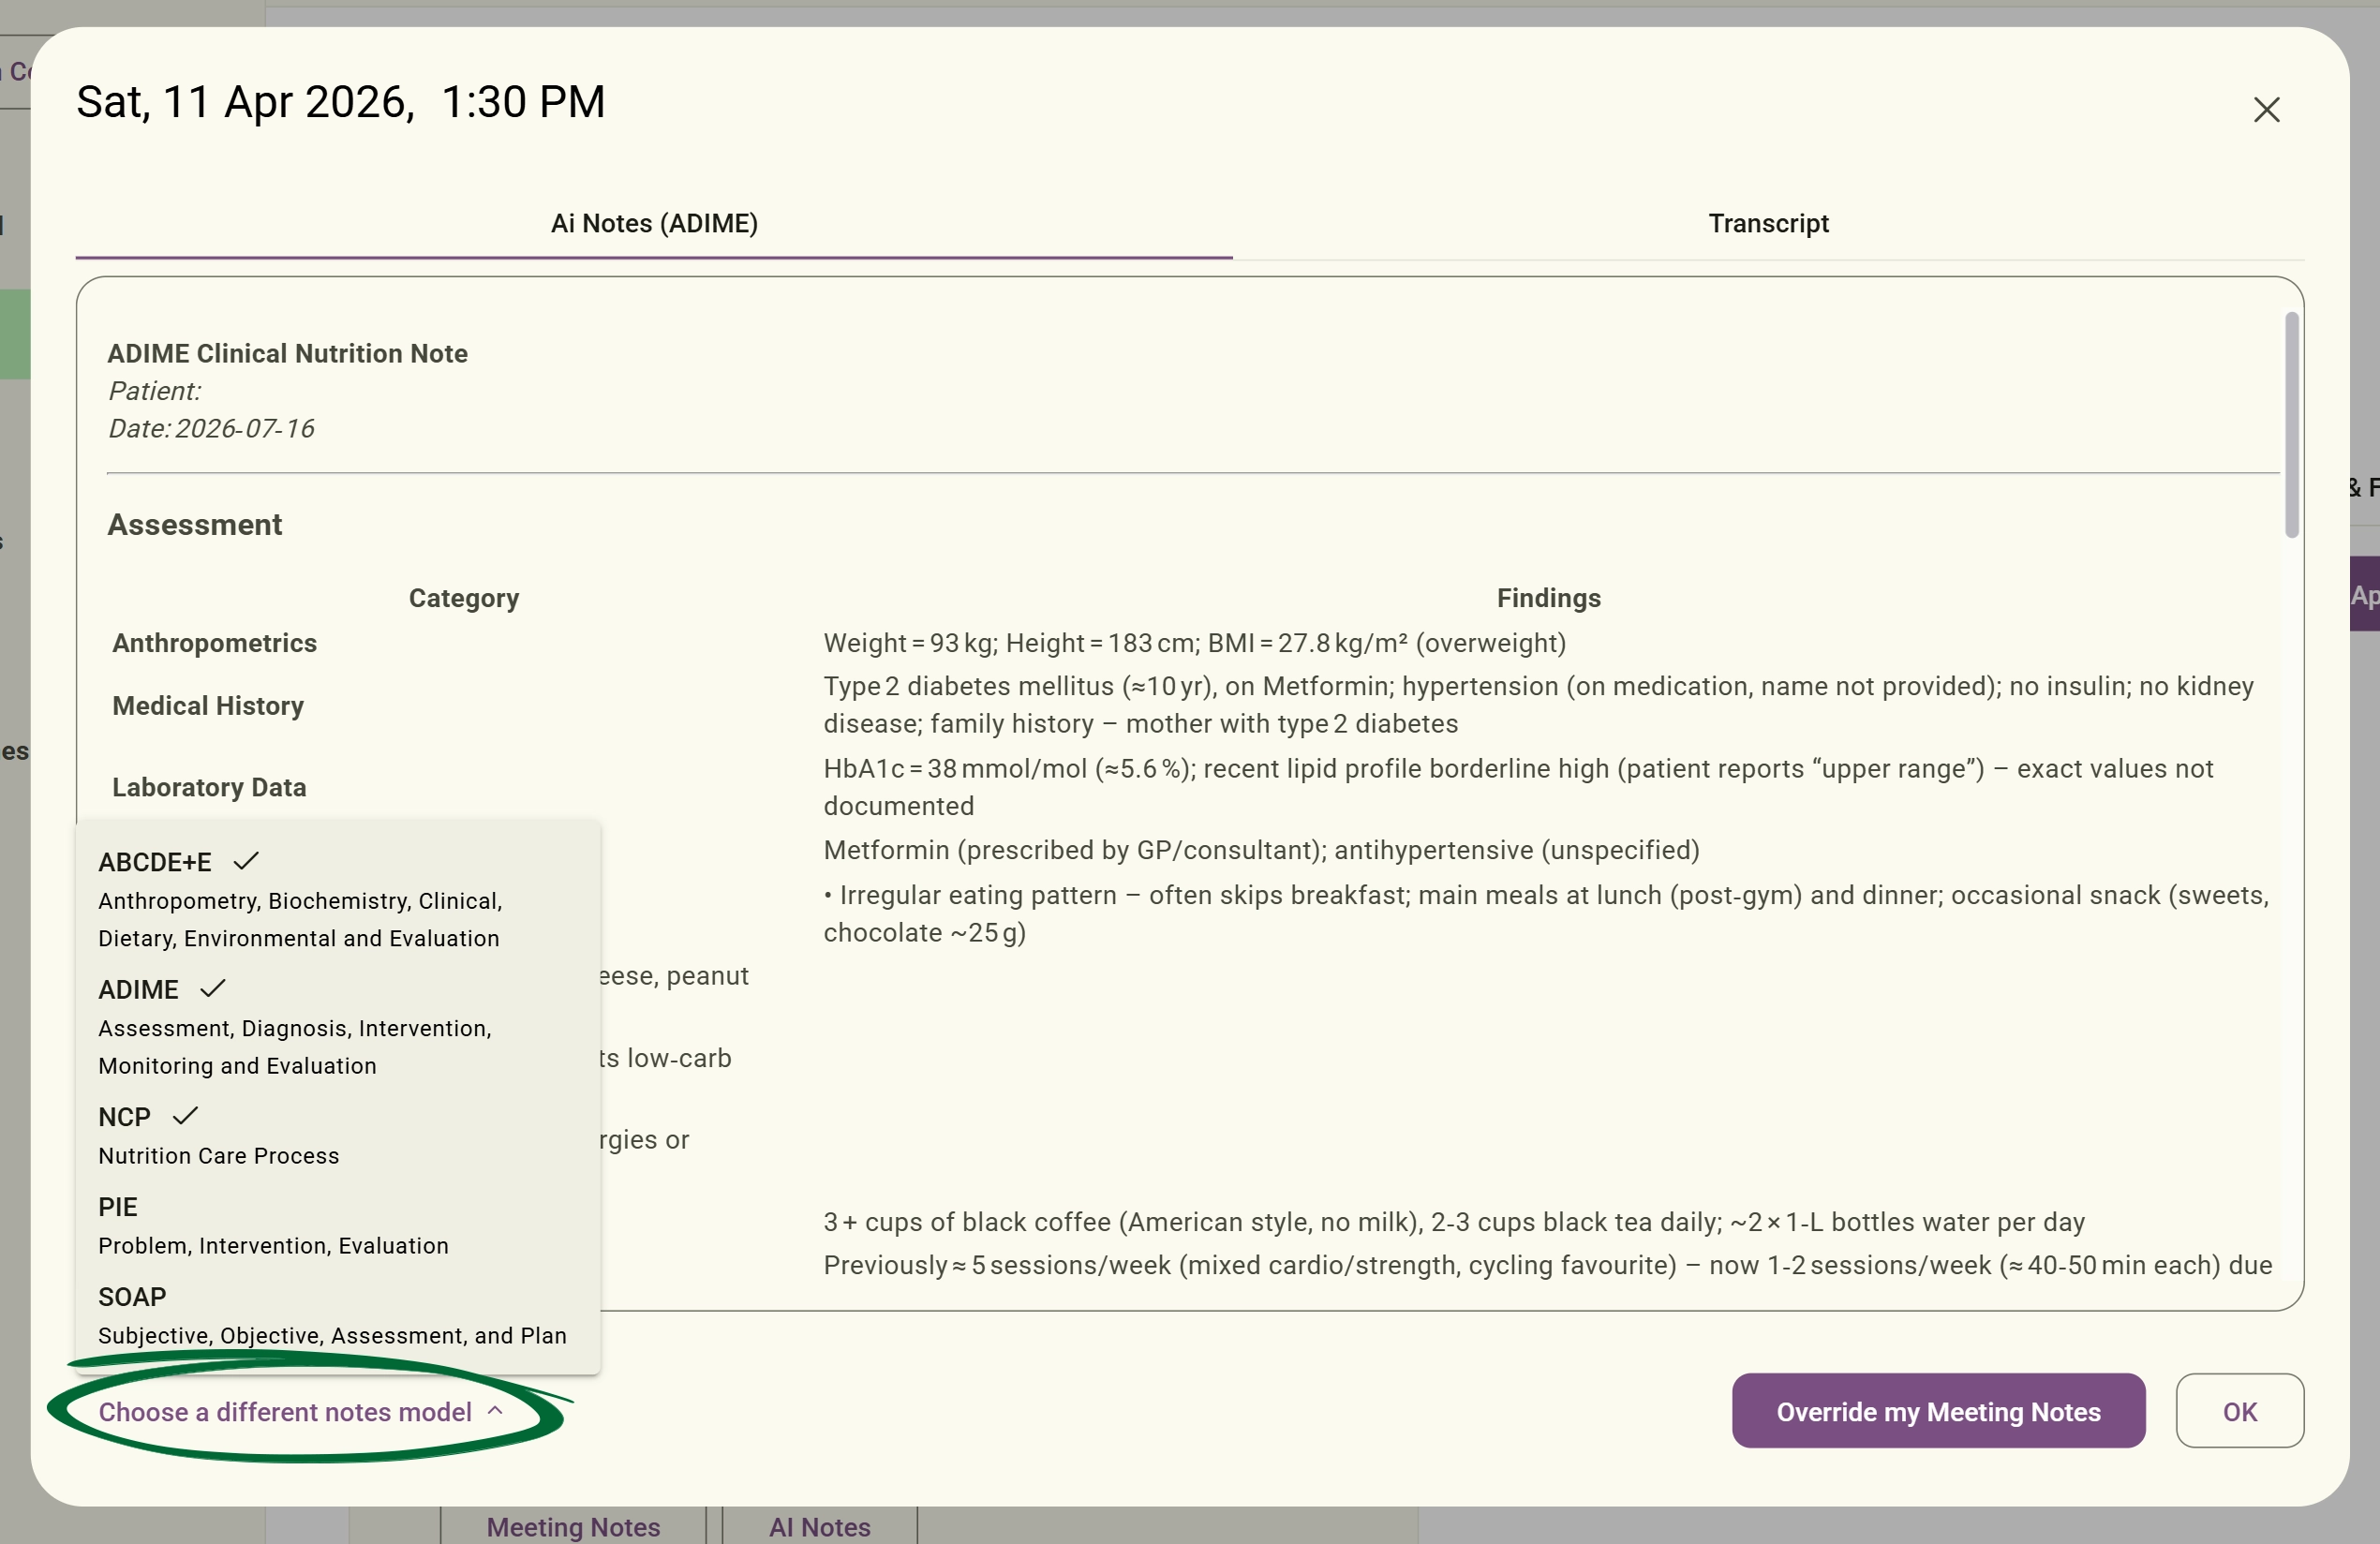
Click the AI Notes button to open the pop-up window. Switch between the tabs at the top to view either the AI clinical summary notes or the full meeting transcript. If you wish to change the structural framework of the generated summary, click the Choose a different notes model dropdown menu at the bottom left. Select your preferred clinical format (such as ABCDE+E, ADIME, NCP, PIE, or SOAP) to instantly recalculate and update the layout.
If you want to replace your manual text with the active AI-generated framework summary, click the Override my Meeting Notes button inside the AI notes pop-up. This will automatically update your central text editor with the newly selected AI notes layout.
Note: This action cannot be undone. Clicking this button will permanently overwrite any existing text in your editor.
Once the AI notes are in your main text editor, you can freely edit, format, or add custom details to the text to ensure it perfectly reflects your client's session.
Click Save Changes to secure the completed notes within the specific appointment session, or use the Export as PDF option to download a copy of your finalised documentation.
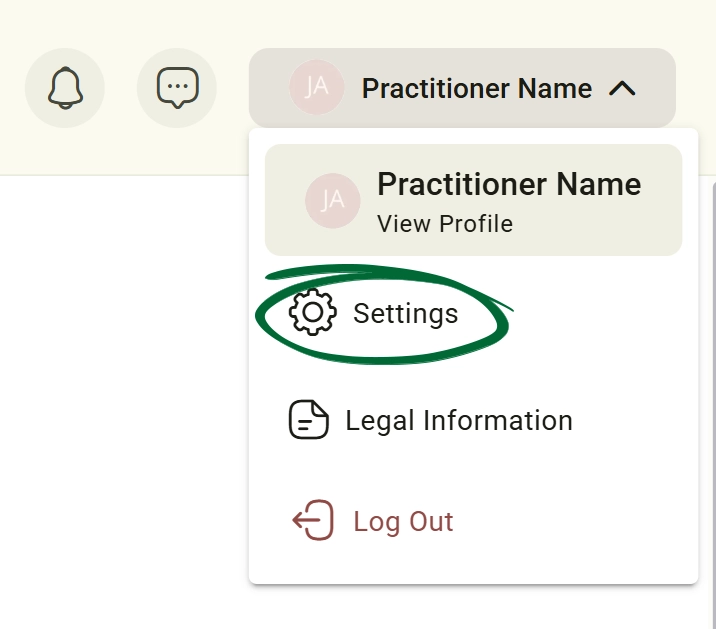
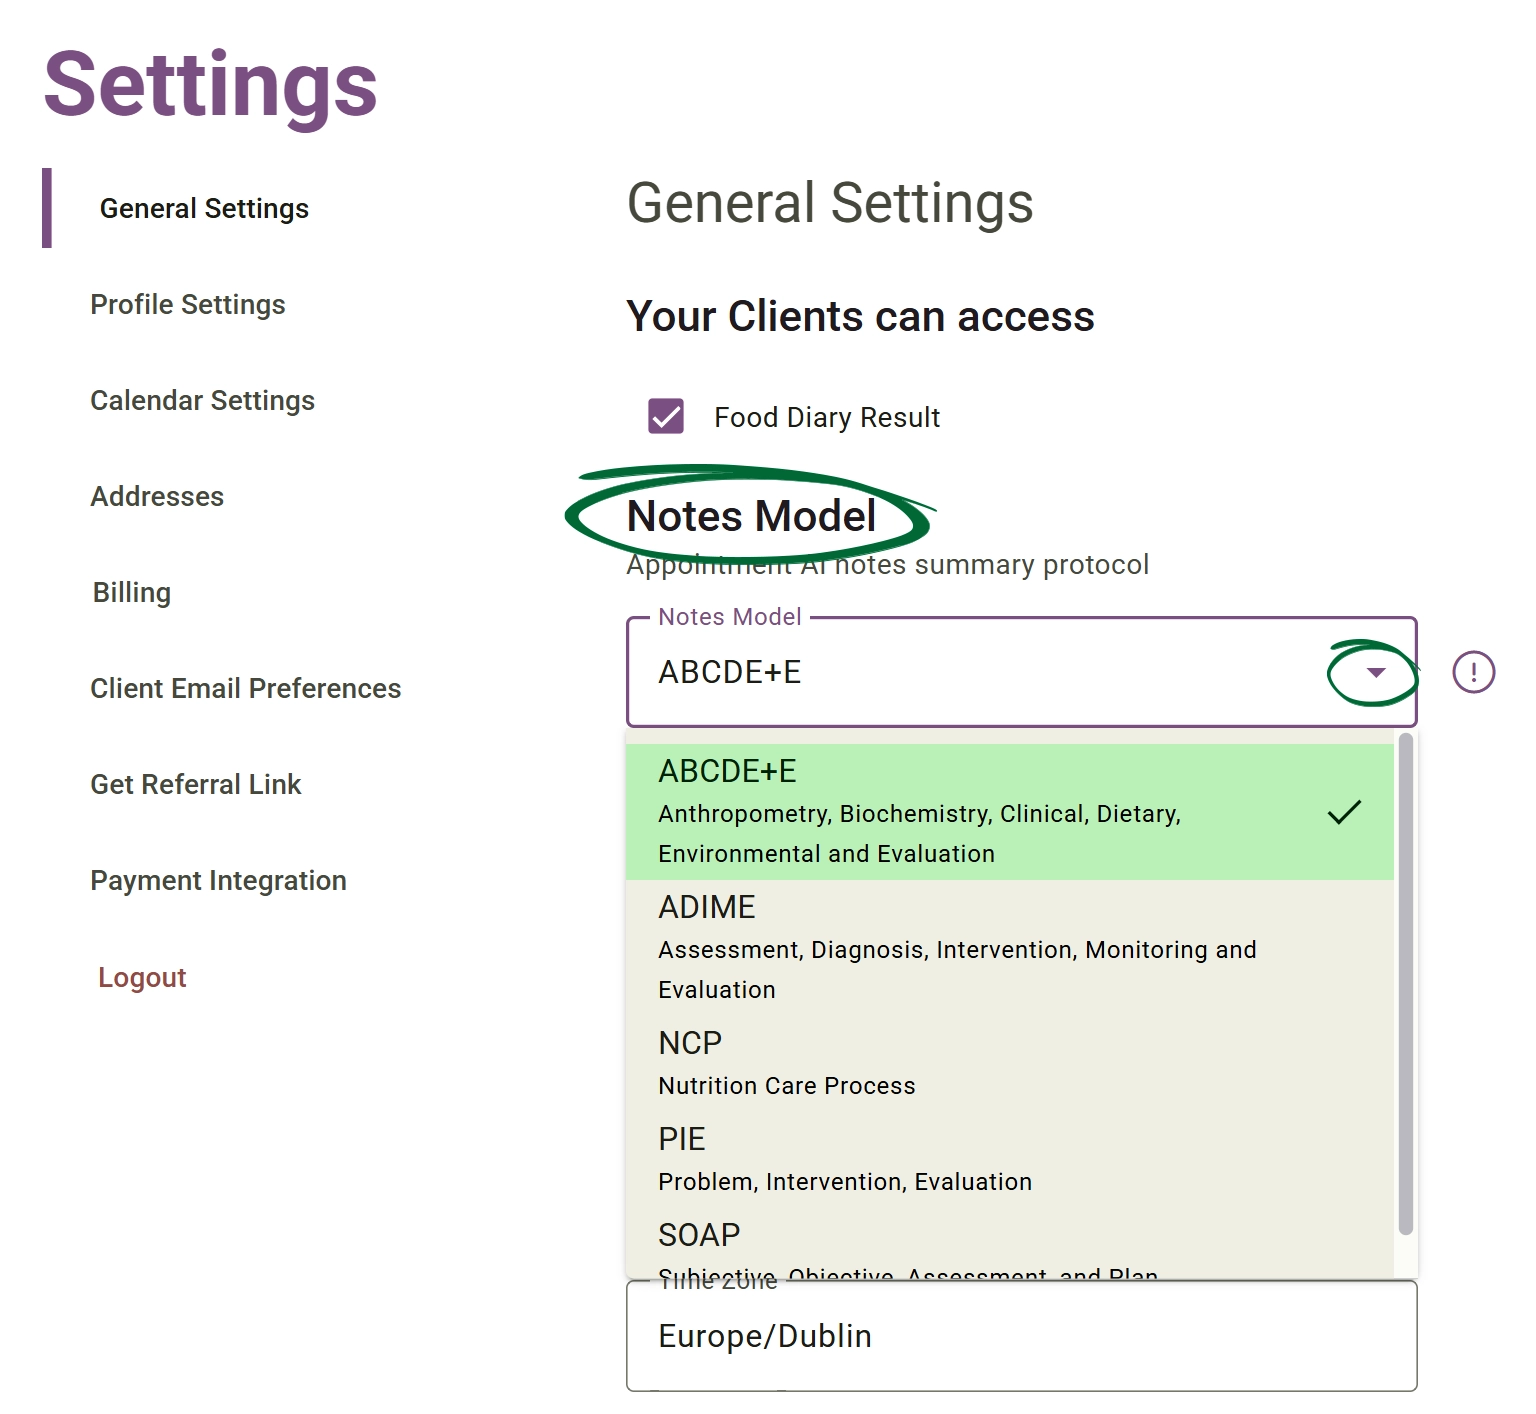
Select your preferred clinical documentation framework to be applied to your AI-generated notes.
Click the information icon (i) next to the dropdown menu to open a pop-up window. Use the tabs across the top to explore a detailed example of each clinical structure using the exact same script:
- SOAP (Subjective, Objective, Assessment, Plan): Use for general clinical documentation and routine progress notes. It easily organises client-reported details, objective data, your assessment, and the upcoming plan.
- NCP (Nutrition Care Process): Use this framework to deliver standardised, evidence-based nutrition care. It guides you systematically through documentation, ensuring consistency and quality across your practice.
- ADIME (Assessment, Diagnosis, Intervention, Monitoring, Evaluation): Use this format to explicitly document the steps of the Nutrition Care Process. It provides a structured approach to link your initial clinical assessment directly to your final outcome evaluation.
- ABCDE+E (Anthropometry, Biochemistry, Clinical, Dietary, Environmental, Evaluation): Use for comprehensive, data-heavy nutrition assessments. It is ideal for complex cases requiring an exhaustive baseline of physical measurements, lab work, lifestyle, and environmental factors.
- PIE (Problem, Intervention, Evaluation): Use for concise, outcome-focused documentation. It is best for fast-paced sessions or quick follow-ups where you want to focus strictly on a single problem, what you did, and how the client responded.
Our intelligent AI assistants are deeply integrated across the platform to eliminate manual work, streamline clinical data, and give you deeper insights into your clients' health journeys.
Extracts and analyses data from client forms, activity logs and form inputs to build a highly organised, comprehensive medical record that helps you track long-term progress. To use this feature, navigate to the relevant client profile and select “Extract All Client Info” to automatically fill the client's records with their available data.
Generate tailored clinical action plans in seconds. based on your client's unique profile, dietary needs, and health goals. It also utilises the client's specific health data, history, form answers, and inputs to formulate highly personalised recommendations.
To access this feature, navigate to the relevant client profile, open the Action Plans tab, and click Generate with AI. Complete the Plan Requirements form to generate a customizable action plan that you can review, edit, and personalise as needed.
Your AI assistant creates structured meeting notes, summaries, and full session transcripts based on your video meeting consultations. ( Refer to the 'Managing AI Appointments Notes' section for detailed steps).
Maximise the utility of your uploaded files. The AI automatically processes comprehensive medical documents to generate concise summaries. With a single click, you can review the data and choose to update the corresponding Client Records with the newly extracted data.
To access this feature, navigate to the relevant client profile, open the Docs & Forms tab, and click Upload Document. Upload a medical document and select Analyse Document with AI. After a few seconds, the AI will process the document and extract key information. Click the document card to view the AI-generated summary, or download and preview the original document.
Gives you full control to choose and configure the specific AI notes model (such as SOAP, ADIME, or NCP) that best fits your clinical practice. ( Refer to the 'Set up Your AI Notes Model' section for detailed steps).
Can I modify the notes after the AI generates them?
Will changing my appointment Notes Model alter my meal plans or document extraction settings?
How can I make sure the AI extracts document data into the right place?
Is the AI Assistant GDPR compliant?
Issue: I accidentally clicked "Override my Meeting Notes" and lost my manual text.
Issue: The AI-generated summary is using the wrong clinical format (e.g., SOAP instead of ADIME).
Next Step
With your clinical notes brilliantly automated by the AI assistant, it’s time to send Docs & Forms. Head straight to Client Docs & Forms next to slickly manage intake documents, send questionnaires, and keep all vital information in one seamless place!
Client Docs & Forms