Calendar Overview & Availability

Take full control of your clinical hours and appointment bookings. Manage your schedule, sync external tools, and automate your client bookings within the Nurish Pro calendar system.

Calendar & Event View

View your schedule and access all appointment and event details.
1
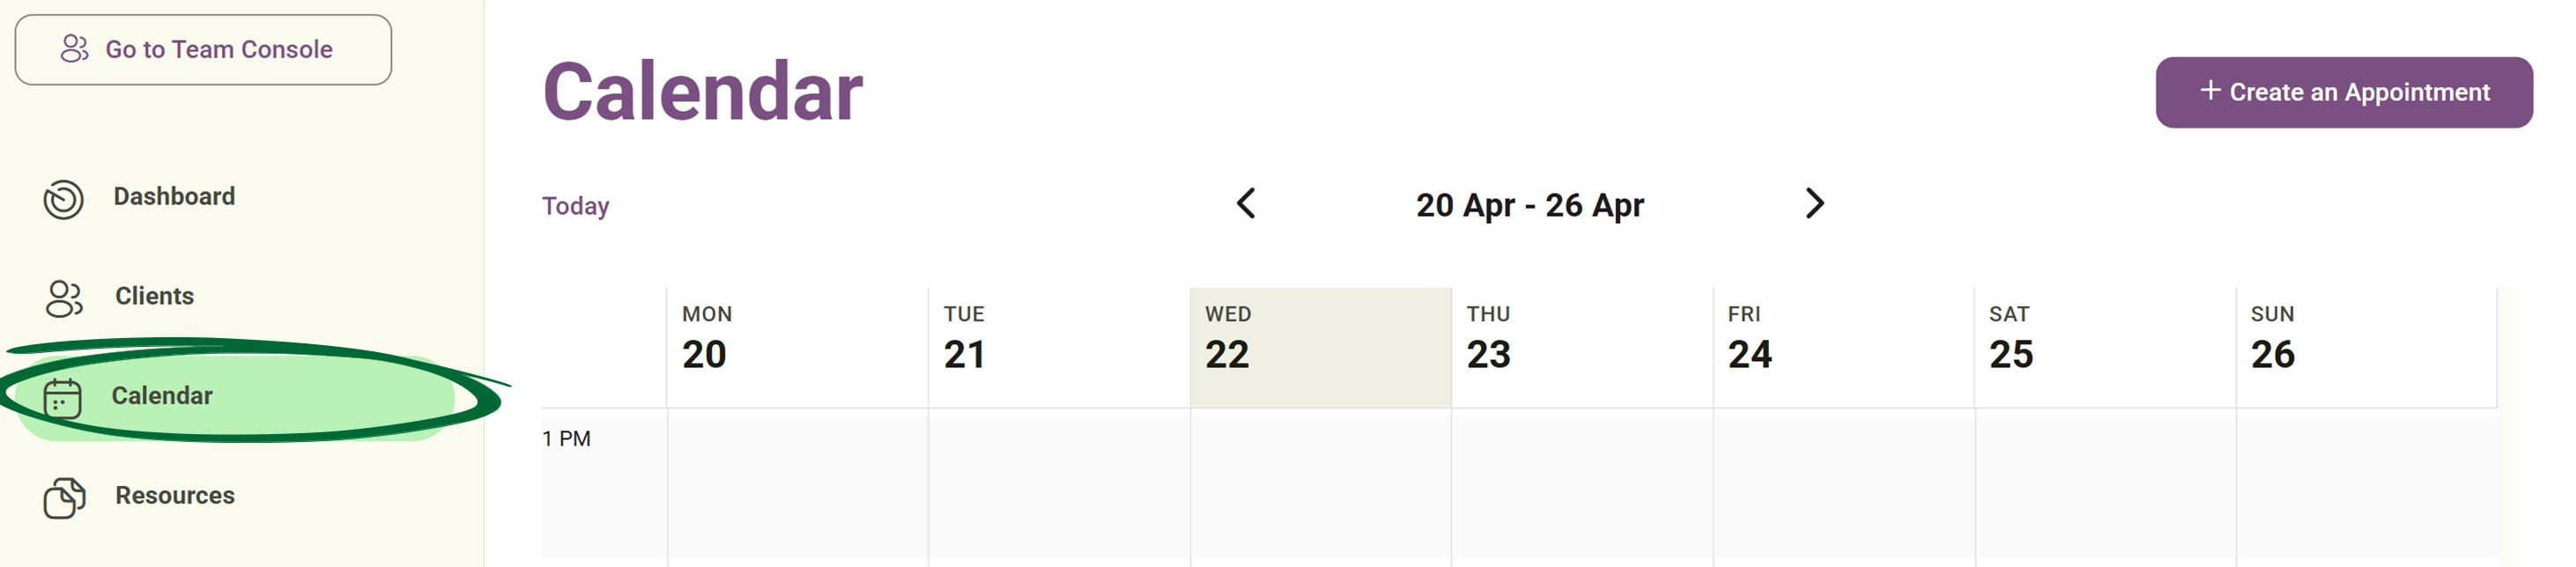
Open Calendar
Go to the Calendar from the dashboard.
Open Calendar screenshot
2
Select an Event
Click on any appointment or event.
Select an Event screenshot
View Details
Access full event information, including Time, Duration, Attendees, and Location.
Create an Appointment

Schedule a new appointment for your clients manually in just a few steps.

1
Go to Calendar
Open the Calendar section.
open calendar screenshot
2
Click “Create Appointment”
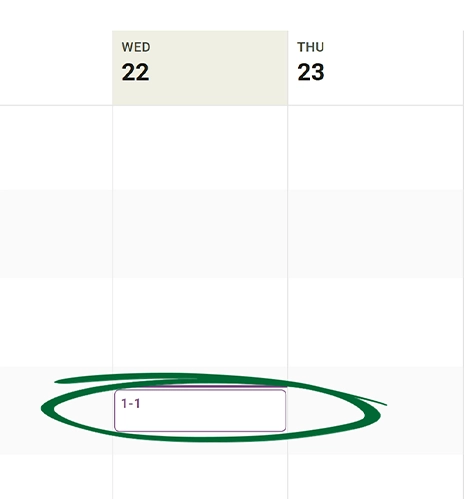
Click theCreate Appointmentbutton or Click any future Calendar Slot. Appointments can be created directly by selecting a time slot within the calendar view.
3
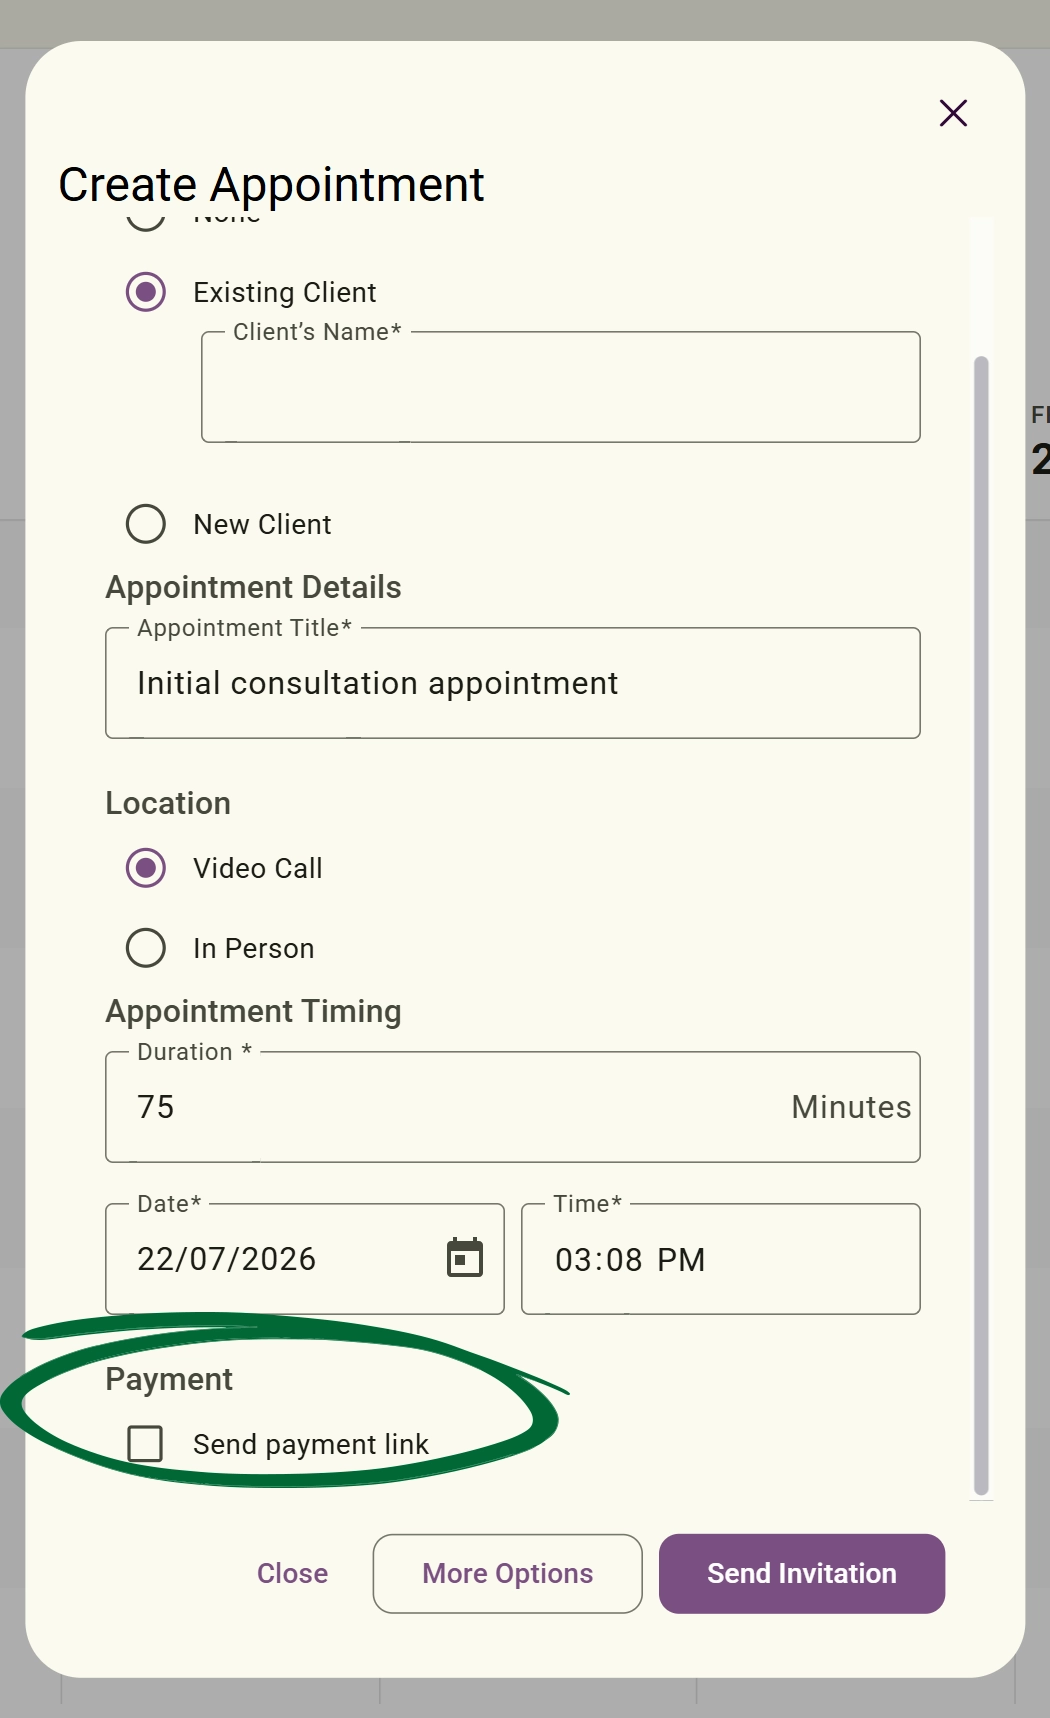
Add Appointment Details

Choose the client, service, date, time and Attendee Type 

Appointments can be created for: Existing clients already in the system, New clients, and None.

4
Appointment Description
Add notes, preparation instructions, or session objectives to the appointment details.
5
Buffer Time
Set buffer time before or after appointments.
6
Send Invitation 
Send appointment invitations directly to clients during appointment creation.
7
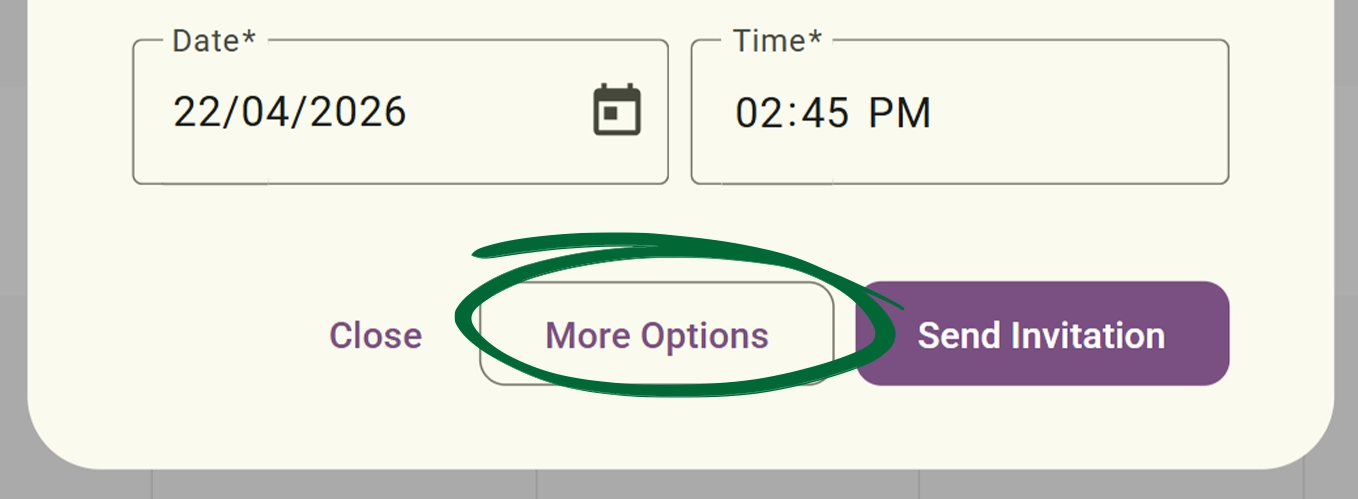
More Appointment Options
Use the “More Options” button to access additional appointment settings and scheduling preferences.
Create a Blocking Event

Just to show you are busy at this time! If you want to reserve time for a break, personal tasks, or admin work, you can easily create this busy slot on your calendar.
1
Open the appointment window
Click the + Create an Appointment button at the top right of your calendar screen, or click any future Calendar Slot.
2
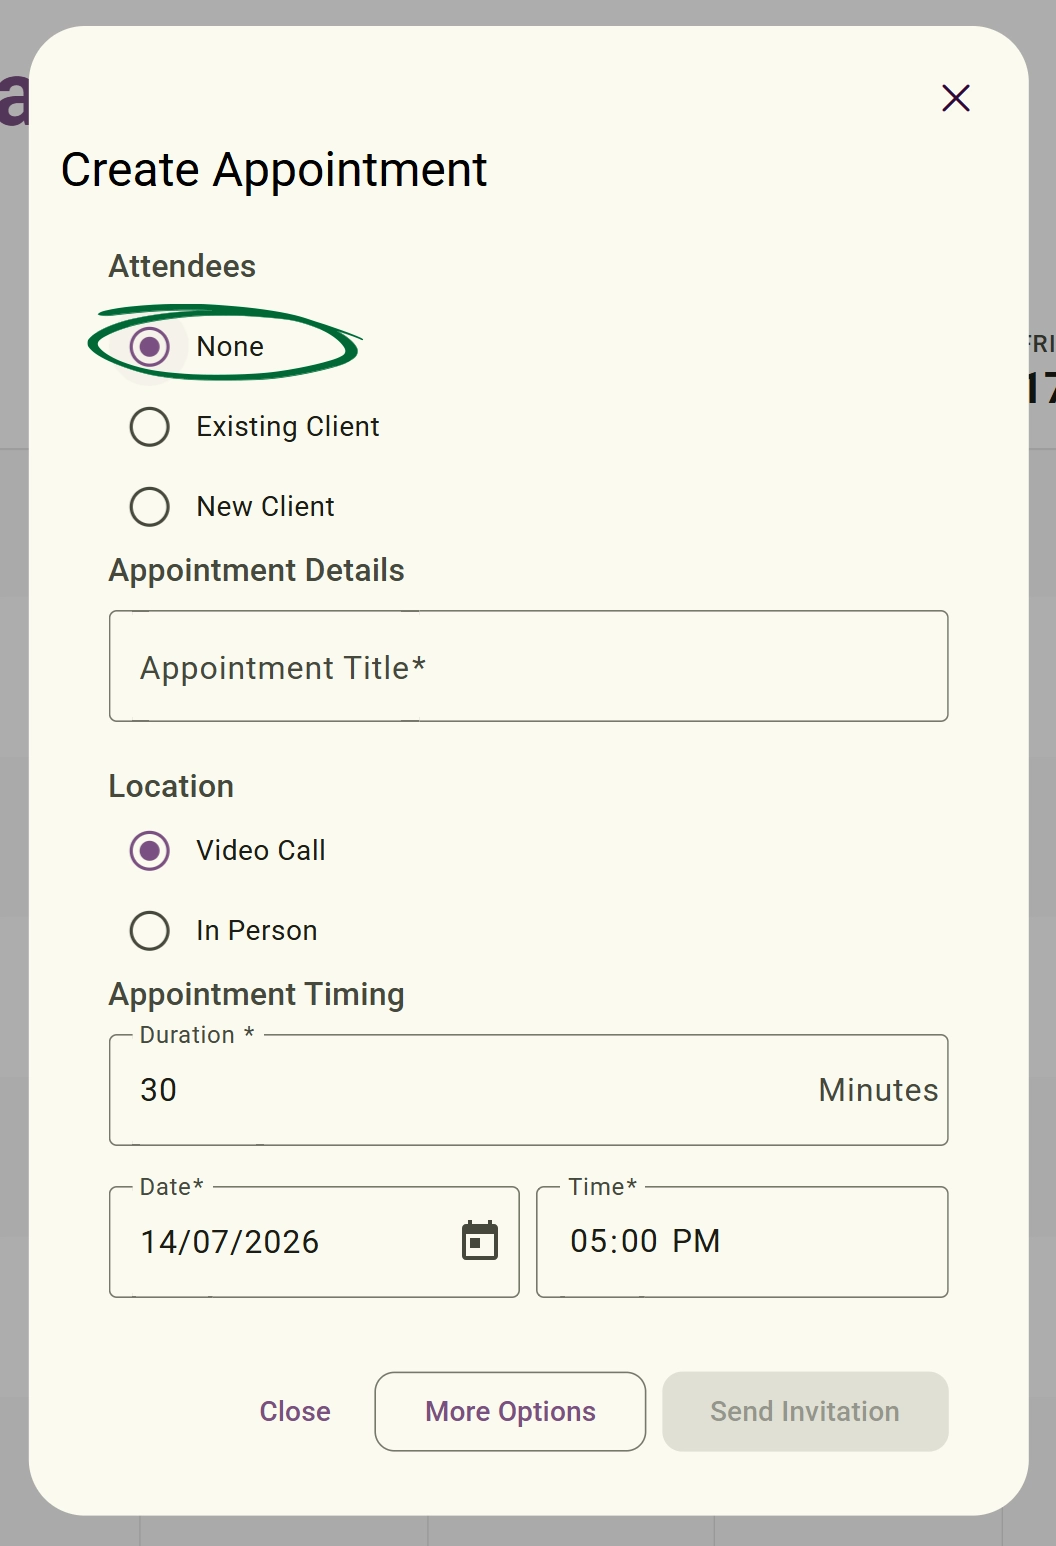
Select 'None' for attendees
Under the Attendees section, choose None. This tells the system you are blocking this time for yourself rather than booking a client. 
Select 'None' for attendees screenshot
3
Add Appointment Details

Enter a title. Choose service, location, date, and time.

4
More Appointment Options
Use the “More Options” button to access additional appointment settings and scheduling preferences, ex: Description, Buffer time before or after appointments, and Recurrence.
5
Save

Click the Send Invitation button to save this block to your calendar; since this is simply a busy slot for yourself, no emails will be sent and no meeting links will be created. 
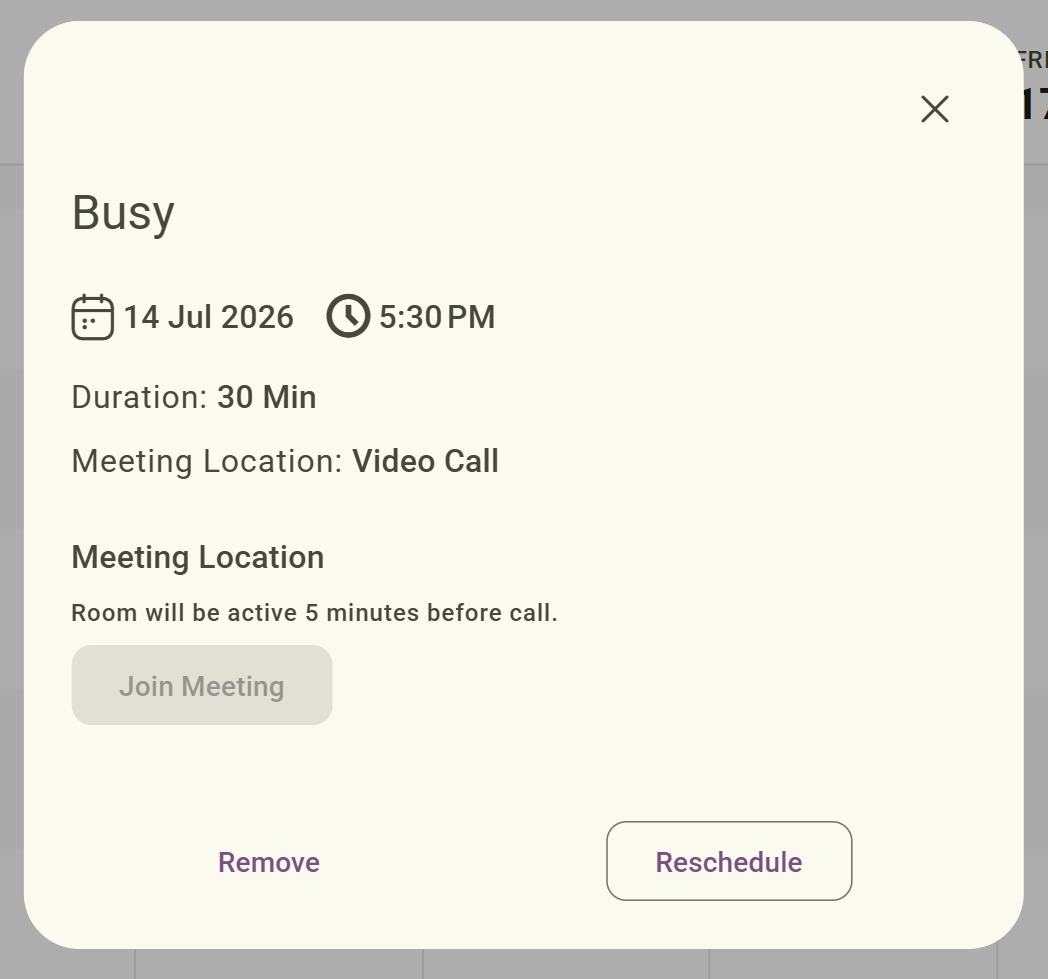
block event screenshot
Recurring Events & Appointment Location

Set up repeating appointments and define whether sessions are digital or physical.
1
Create Appointment
Select the recurring setting and choose frequency.
Create Appointment screenshot
2
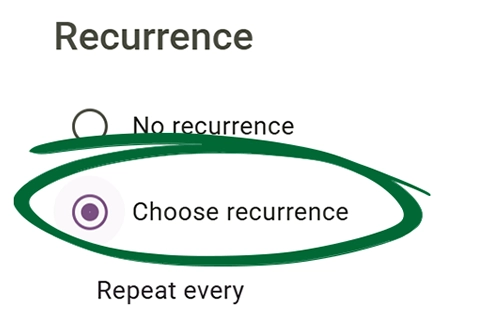
Enable Recurring Option

Choose between: No recurrence and Custom recurring schedules.
Enable Recurring Option screenshot
3
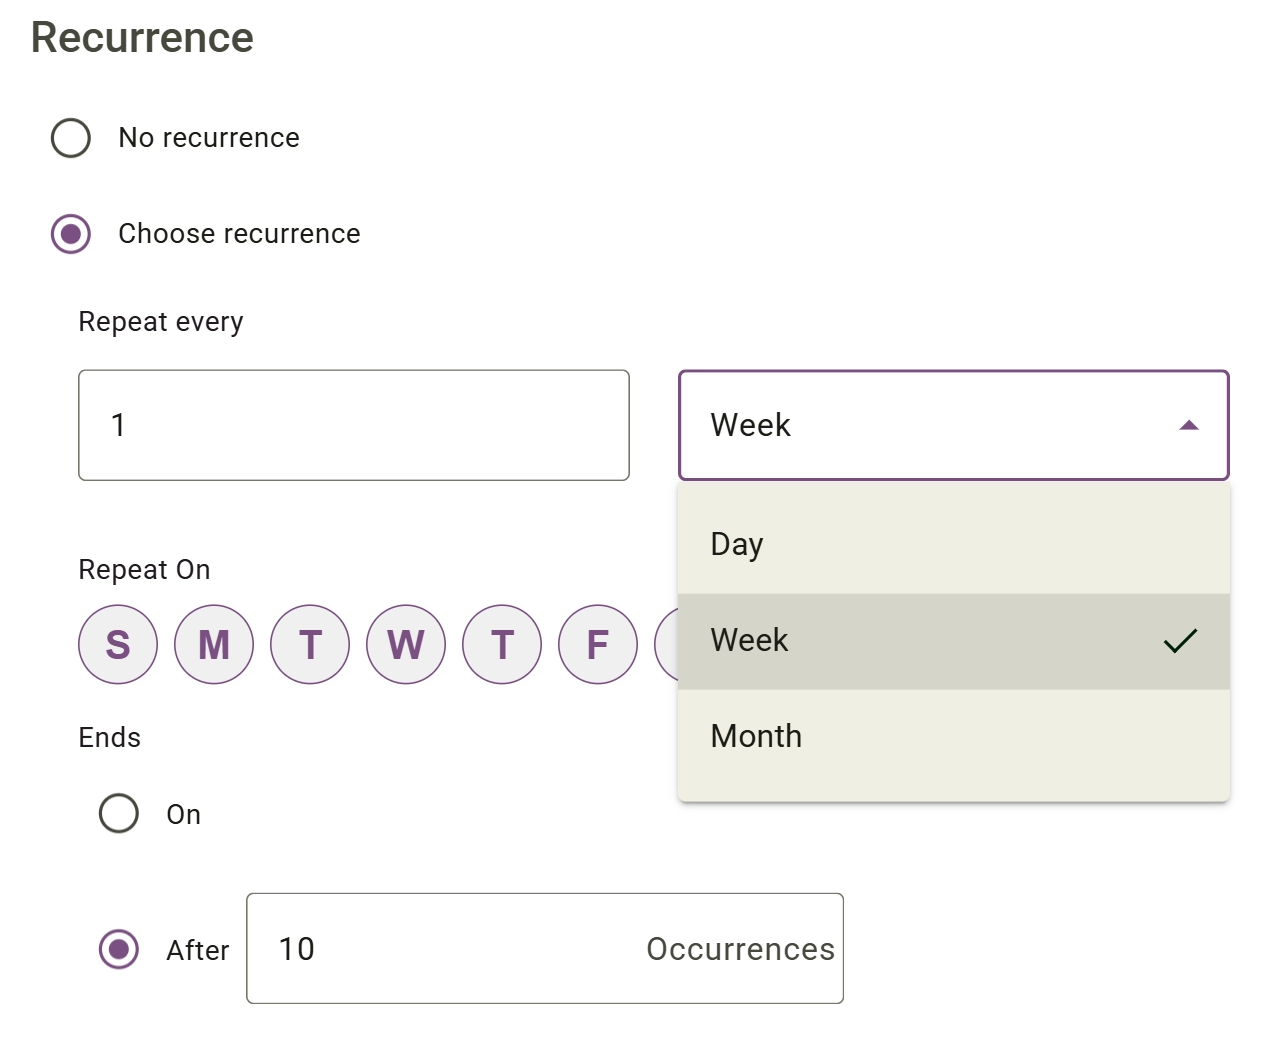
Select Recurrence Type

Choose how often the appointment should repeat. 

Selecting the "Day" option sets the session to repeat every specified number of days.

Selecting the "Week" option allows practitioners to set appointments that repeat weekly on specific chosen weekdays (for example, every Monday and Wednesday, or every Friday).

Selecting the "Month" option repeats the appointment monthly based on the initial 

selected date.
Enable Recurring Option screenshot
3
Set Recurrence End

Practitioners can choose exactly how the recurring appointment should end, with options to either stop after a specific number of occurrences or conclude on a designated date.

4
Choose Location
Set the appointment online or in person.
5
Send Invitation 
Confirm to apply settings.
6
Remove an Appointment or an Entire Series
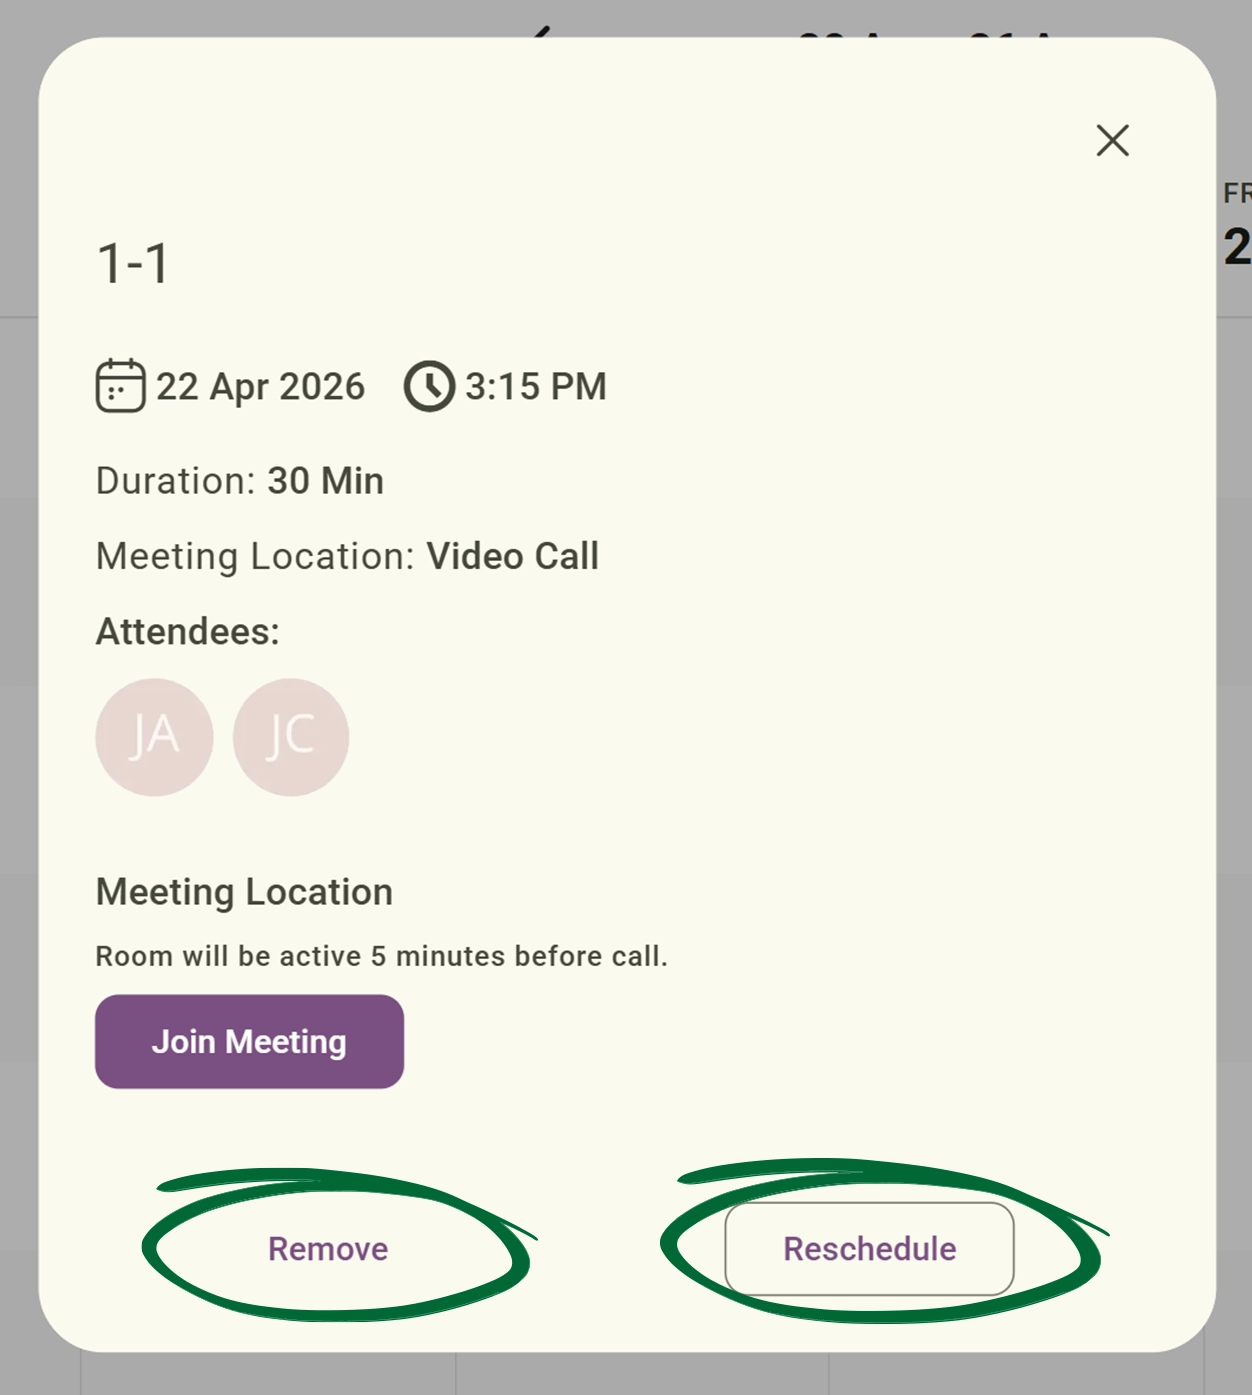
After sending the invitation, practitioners can stop future recurring events at any time. Simply click the appointment directly in the calendar to open its settings, then select 'Remove Recurrence' to delete the entire series, or click 'Remove' to delete a single event.
Tip: Use recurring events for long-term programs to save administrative time and ensure your clients’ preferred slots are reserved.
Event Types

Identify the source and type of events appearing on your schedule.

1
Dashboard-Created Events
These are manual appointments created directly by you.
2
Client Bookings
Appointments booked by clients via your public page.
3
Group Classes
Events created as part of group coaching.
Note: During the booking flow, clients will only see a time slot as unavailable if another client has already booked a service for that time. However, appointments created directly in your calendar can easily overlap, allowing you to manage and add simultaneous events to the same slot.
Reschedule or Cancel Appointments

Easily update, reschedule, or remove scheduled appointments and group class session events from your calendar when plans change.
1
Open Appointment
Select the appointment from your calendar.
Open Appointment screenshot
2
Choose Action
Click Reschedule or Remove.
Click reschedule or cancel screenshot
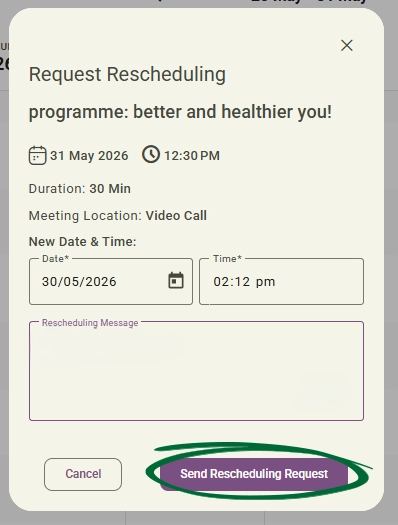
If the selected appointment time is already booked by a client, practitioners can also send a reschedule request to suggest a new appointment time instead of cancelling the booking completely.
reschedule request screenshot
3
Update Details or Confirm Removal
  • For Standard Appointments: Adjust the time/date as needed or confirm cancellation.
  • For Group Class Sessions: Clicking remove will launch the Remove Event? confirmation modal. Click Yes, Remove to proceed.
4
Save Changes
Apply updates to your schedule.
Tip: Notify clients as early as possible when rescheduling to maintain a professional relationship.
Calendar Integrations

Synchronise your clinical schedule with multiple external tools like Google Calendar or Outlook Calendar to keep your entire availability fully organised and prevent scheduling conflicts.
1
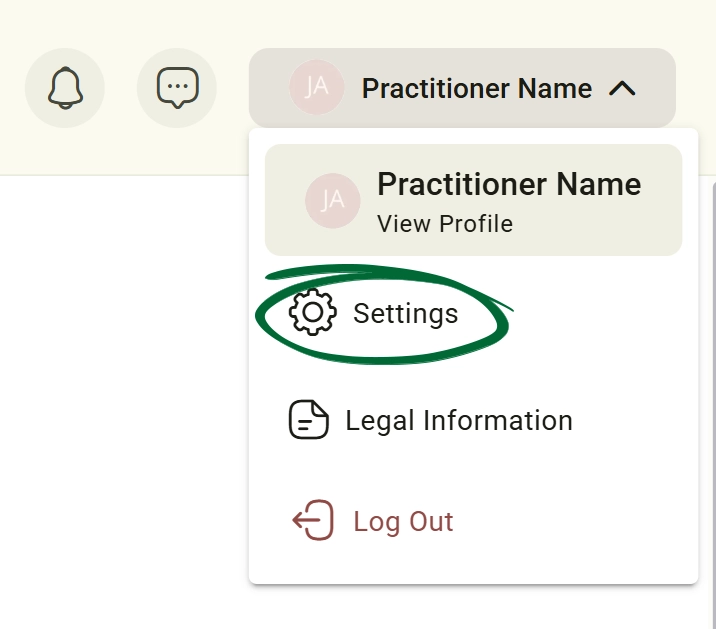
Go to Settings
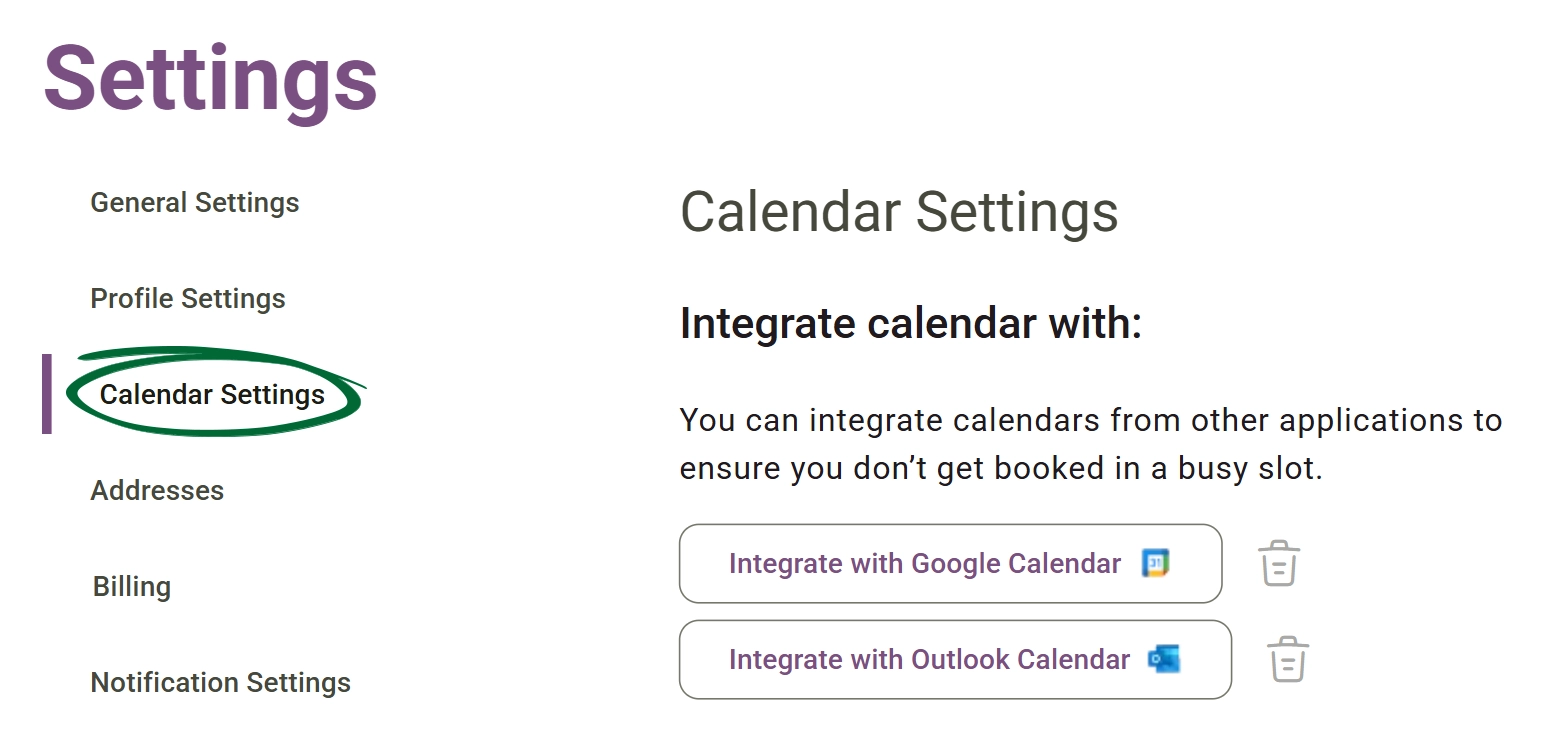
Select 'Settings' from your profile dropdown menu, then open the calendar integration settings.
Go to Settings.screenshot
2
Connect External Accounts
Click either the Integrate with Google Calendar or Integrate with Outlook Calendar button. Log in and authorise the connection. You can link multiple accounts to seamlessly aggregate your schedules.
Open calendar integration settings.screenshot
3
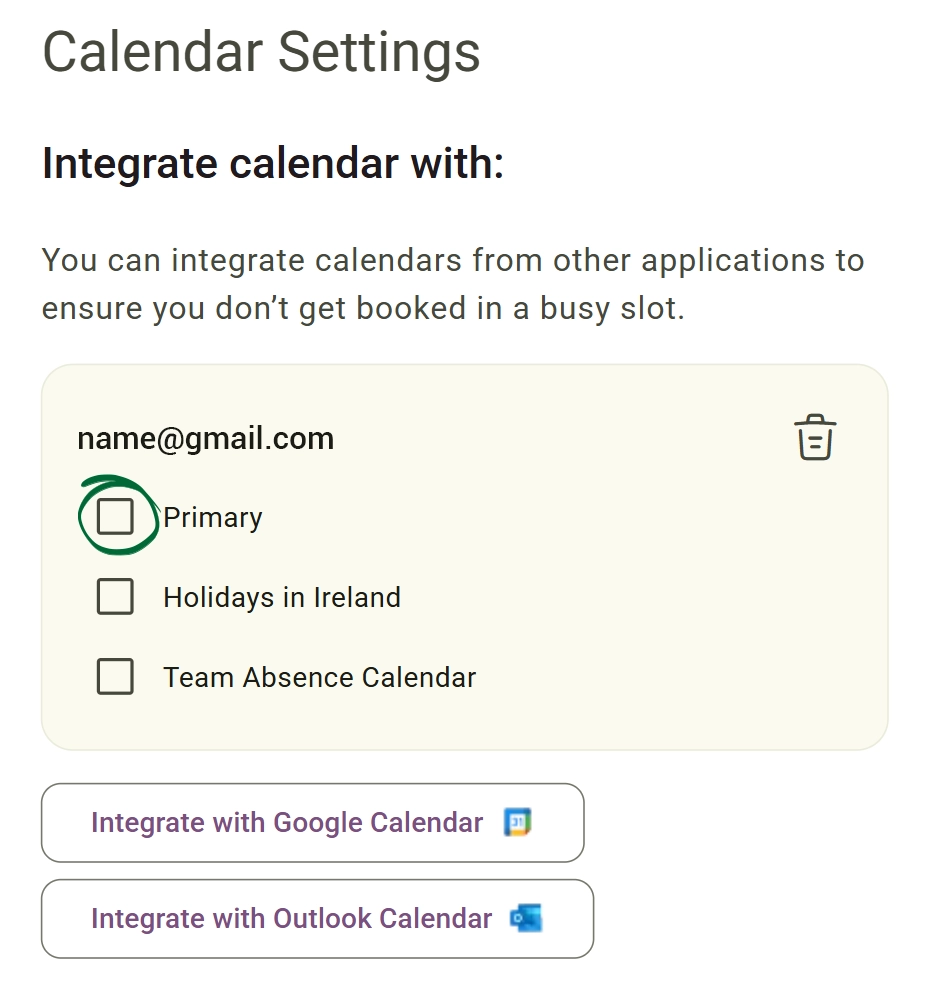
Select Active Calendars
Review the newly connected accounts on their dedicated profile cards. Tick the checkboxes next to the individual sub-calendars you wish to import into your professional schedule.
Manage Sub-Calendar Visibility Screenshot
4
Confirm Display Preferences
Return to your main calendar view to ensure that all selected events from your multiple integrations are synchronised correctly and displaying as intended.
5
Disconnect a Calendar Account
To completely remove a linked email account, click the trash icon located at the top right corner of the specific account's card.
Tip: Adding a new calendar, such as Google Calendar, will introduce colour coding to distinguish external events from standard dashboard events.
Frequently Asked Questions (FAQs)
Can I set different working hours for different days?
Yes. In your Calendar, you can define unique availability for each day of the week to reflect your actual clinical hours.
Will my personal Google Calendar events be visible to my clients?
No private details from your external calendar are ever shared with clients.
Troubleshooting & Common Issues
Issue: Need to cancel one session in a series
Potential Solution: Click on the specific appointment and select "Remove" instead of Remove Recurring entire series.
Issue: Timezone discrepancies
Potential Solution: Verify that both your account time zone and the client's time zone are correctly configured within the General Settings.

Next Step

Your calendar is live! Enhance your client journey by heading to Resources > Forms to build your intake questionnaires.

Go to Resources & Forms
Contact Support

Still need help?

Email Support: [email protected]