Build the core offerings of your nutritional practice.
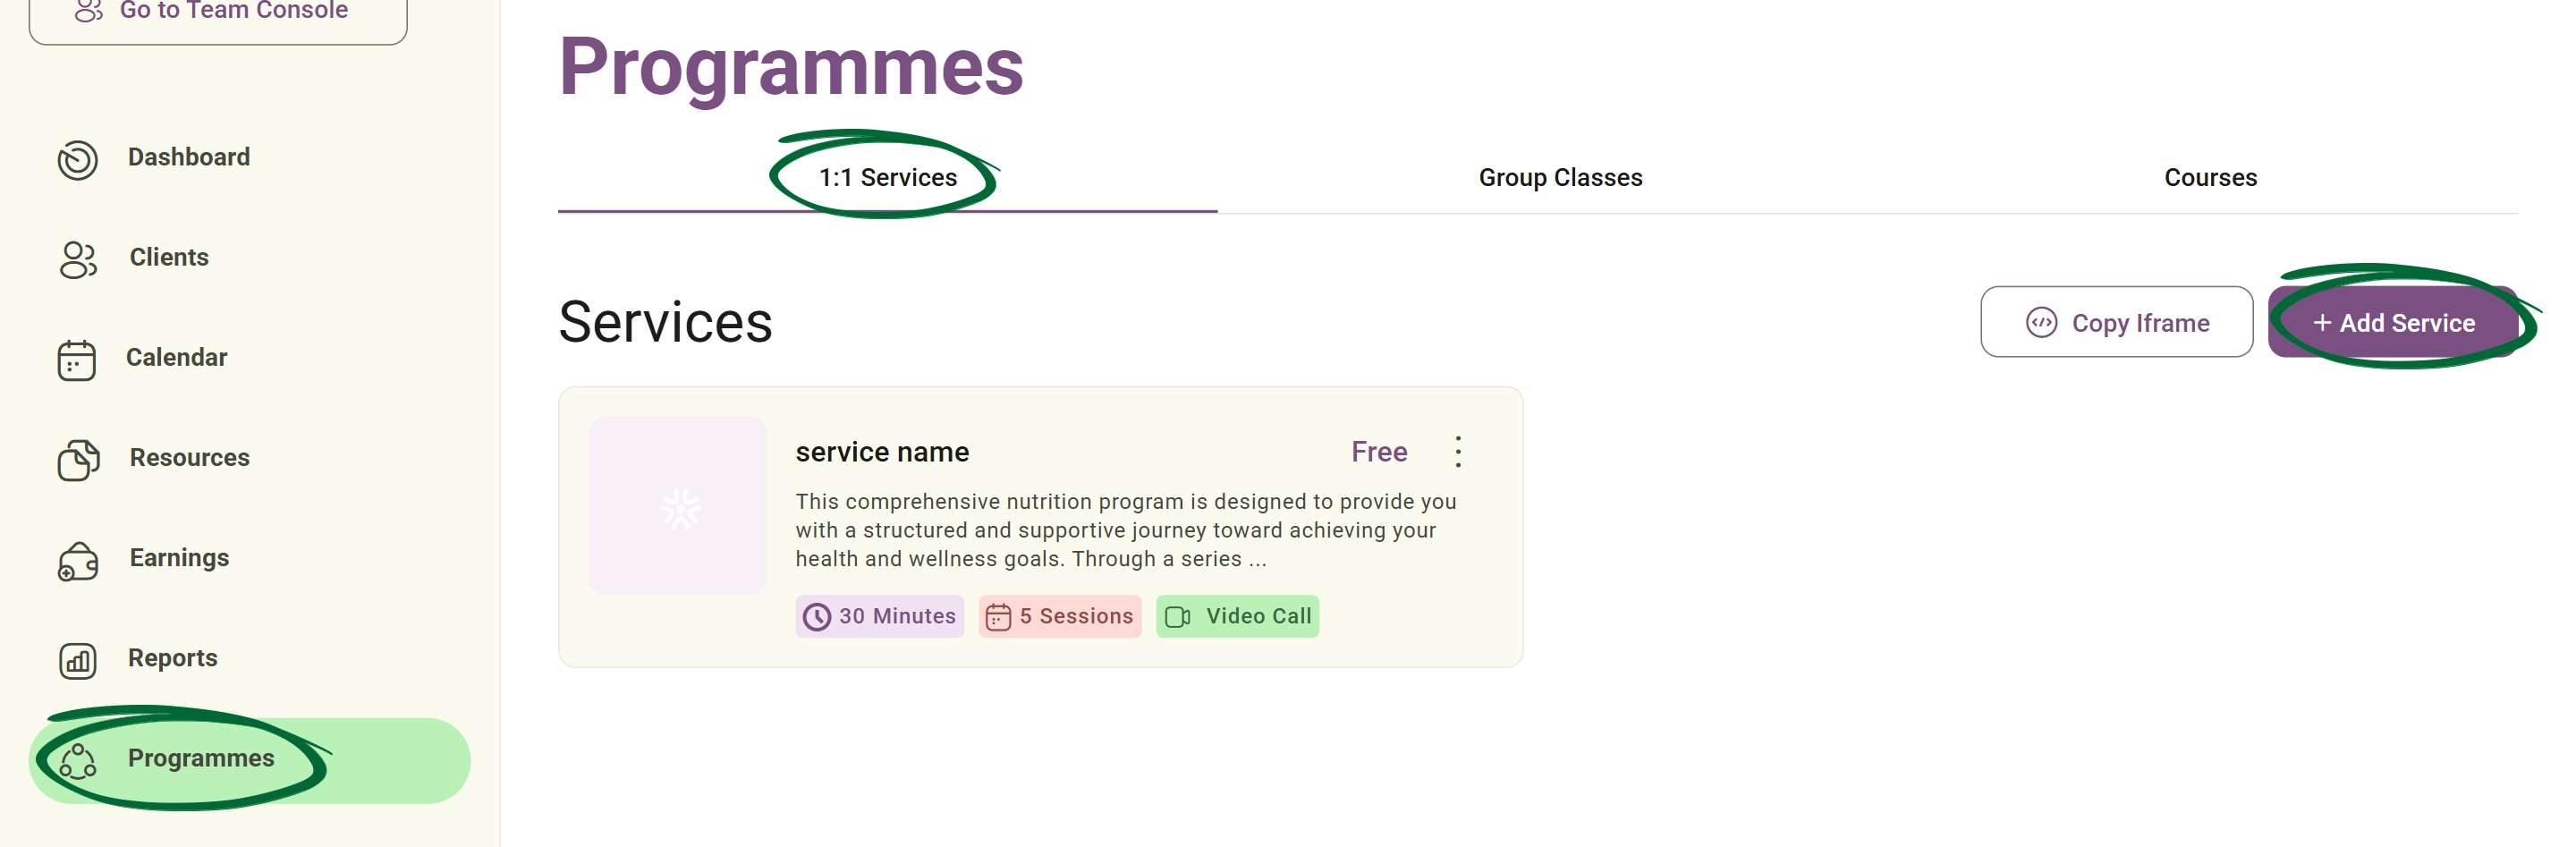
Click Add Service and select the type of service you would like to create:
- Discovery Call: A free introductory consultation that helps potential clients learn more about your services. Configuration: Duration
- Programme: A paid structured package that includes multiple sessions delivered over a defined period. Configuration: Programme Duration, Number of Sessions, First Session Duration, Follow-Up Session Duration
- Single Session: A paid standalone consultation or appointment delivered as a one-off service. Configuration: Session Duration
Complete the service information by adding: Title, Description, Service Location
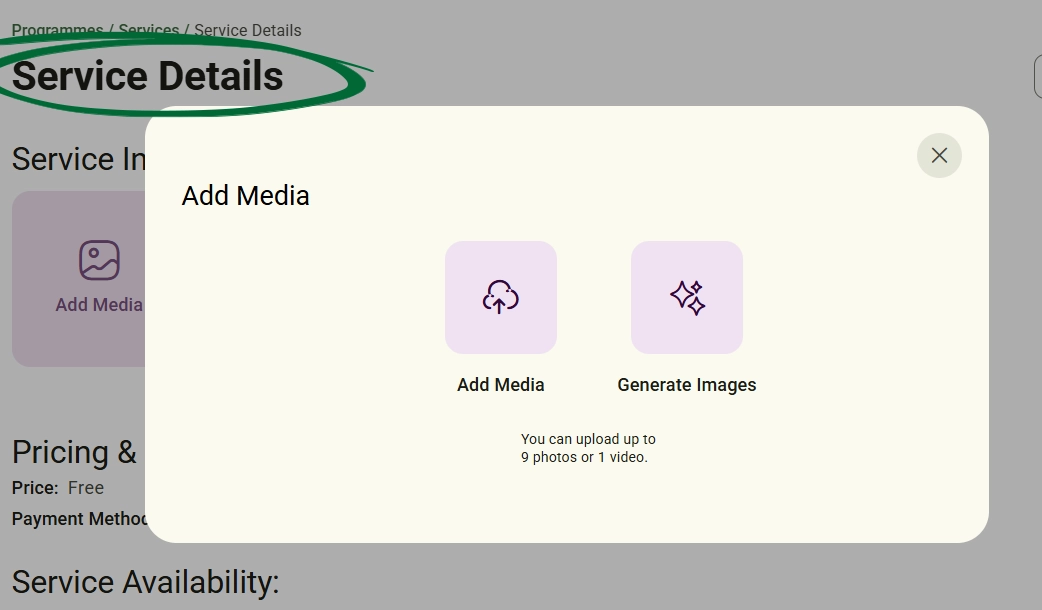
Add Media
Upload your own media files or use the built-in AI image generation tool to speed up your service creation process. Nurish Pro includes AI-powered media generation. This allows practitioners to create professional-looking service pages quickly without requiring external design tools.
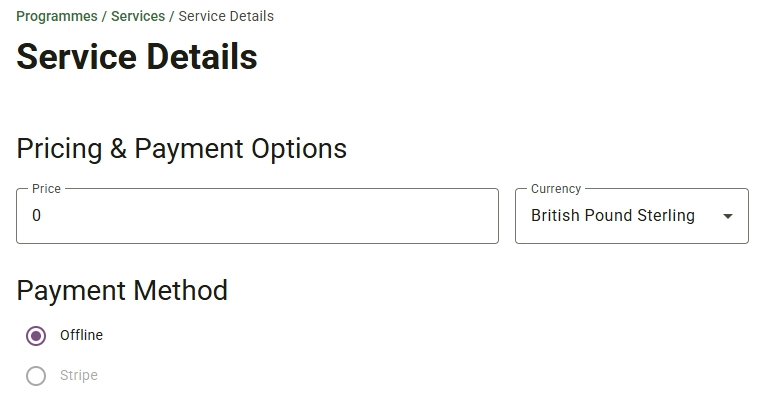
Set up how clients will pay for your service.
You can configure: Service Price, Currency, Payment Method (whether it is offline or via Stripe payment).
-
Offline Payment: Clients complete their booking, and payment is collected outside the platform. Use the text editor to enter your payment instructions to explain how clients should complete their payment after booking. An invoice containing your specific offline payment instructions will be automatically sent to your client via email to help them complete the transaction.
Examples include: Cash, Bank Transfer, In-Clinic Payment - Stripe Payment: Clients pay online during the booking process using your connected Stripe account. Payment processing follows the settings configured in: Settings → Payment Integration and in each programme payment settings.
All successful payments will automatically appear within: Earnings → Transaction History (Free programmes and offline payment services are not included)
A receipt will be sent to your client's email with the booking date and summary, including the amount paid.
Set when clients can book your service. You can also define:
- Buffer Time: Buffer Time is the amount of time automatically blocked before or after appointments.
-
Minimum Notice Period: The minimum amount of advance notice required before a client can book.
Example: A 24-hour notice period prevents same-day bookings.
Note: You can create and publish a service without configuring availability. However, we strongly recommend adding availability so clients can easily schedule appointments with you.
Attach relevant resources to the service, including:
- Pre-Booking Forms – Forms that clients must complete before booking, helping you collect important information in advance.
- Linked Forms – Forms that are attached to the service and can be assigned to clients as part of their journey during or after the service.
Control how your service is displayed and whether bookings are allowed.
- Activation Status
- Visibility Status
Controls whether the service is active and available for bookings. Disabled services are only visible to you and cannot be booked by clients.
Controls whether the service appears publicly within your Client Portal. Available publishing options include: Public, Unlisted
Public The service is visible throughout your Client Portal and can be discovered by clients.
Unlisted The service does not appear publicly but remains accessible through a direct shared link.
Note: If you disable a service, it will always be hidden from clients and cannot be booked.
Click Save Changes to save your service configuration.
Then you can use the Preview button to review the client experience before making the service live. Preview allows you to see exactly how the service will appear to clients.
Once your service is complete, click Publish to make it available.
Update an existing service at any time.
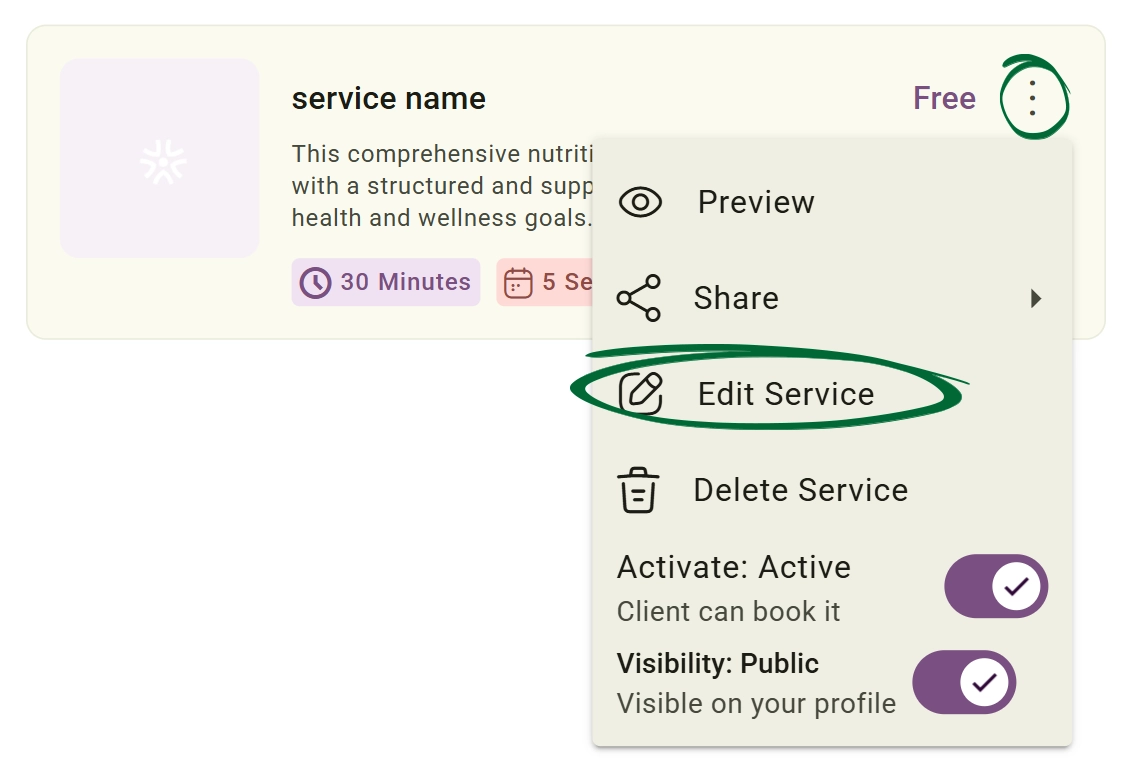
Modify any service setting, including: Service Info, Pricing & Payment Options, Availability, Buffer Time, Minimum Notice, Linked Forms, Pre-Booking Forms, Visibility Settings, Activation Status
This feature lets Admins assign multiple practitioners to a single service, set individual booking hours, and manage whether the service appears publicly on the shared team profile.
Go to the Services tab on your dashboard, locate the specific service you want to update, and click Edit Service. Scroll down to find the Assign to team member panel.
Tick the checkbox next to each practitioner who will deliver this service. This automatically links the service to their account so they can start taking bookings.
Note: Only Team Admins have the permission to assign practitioners to a service. As the admin/creator, you are already assigned to it by default.
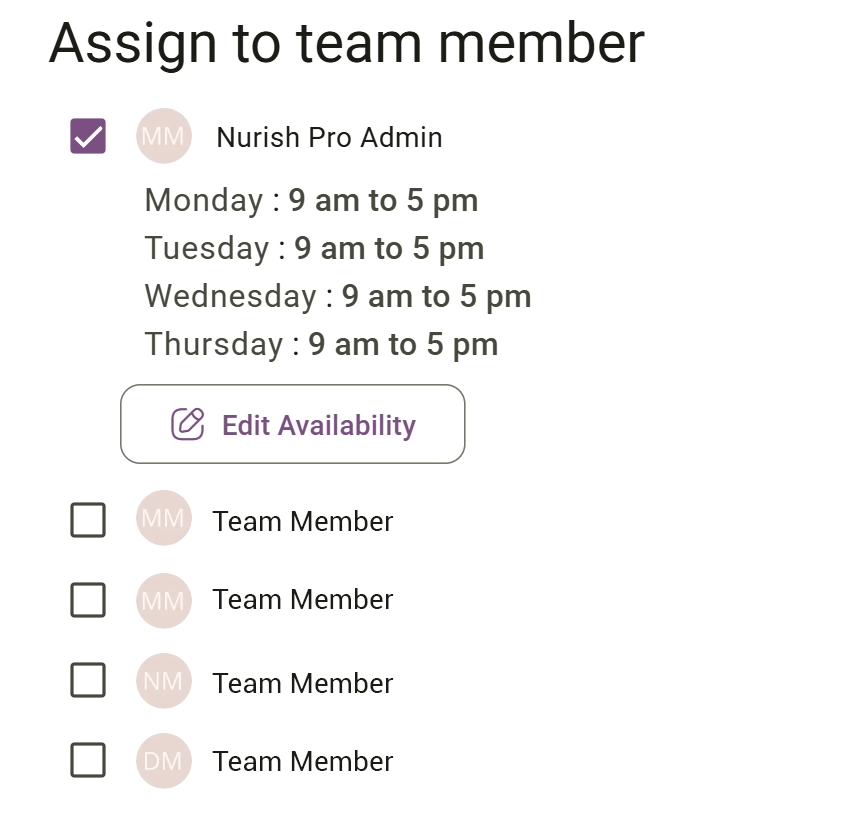
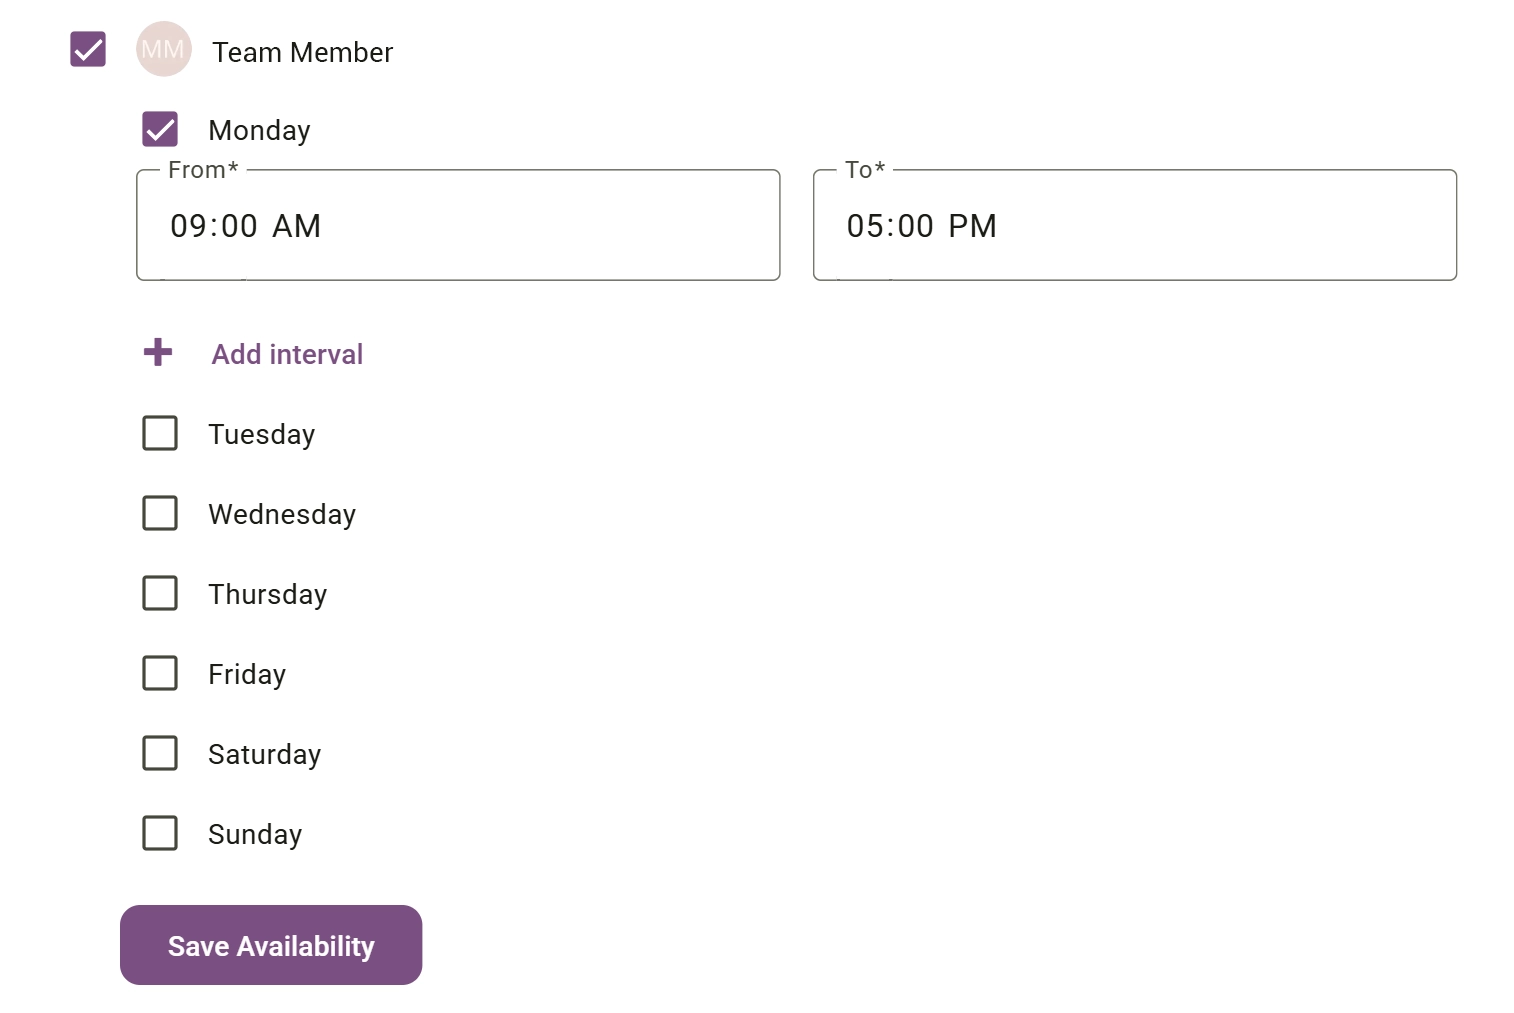
Click Edit Availability under a team member's name. Tick their active working days and enter their shift times in the From and To fields. Click + Add interval if they have breaks, then hit Save Availability.

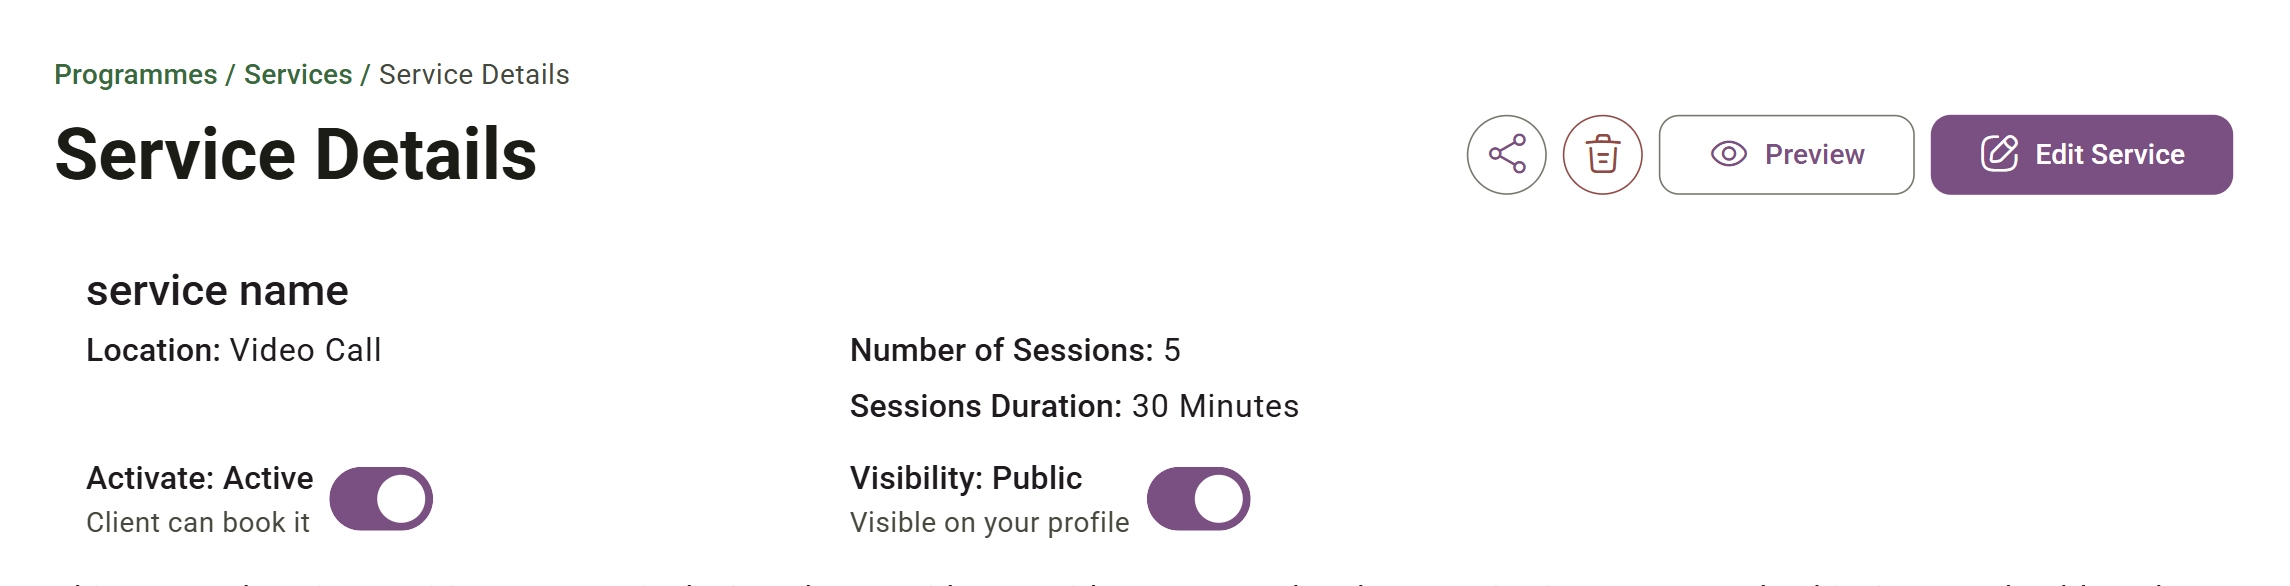
View all the service details from a single location. The Service Details Dashboard provides a complete overview of: Service Information, Pricing & Payment Options, Availability Settings, Buffer Time, Minimum Notice, Pre-Booking Forms, Linked Forms, Visibility Settings, Activation Status
Promote your services across multiple platforms.
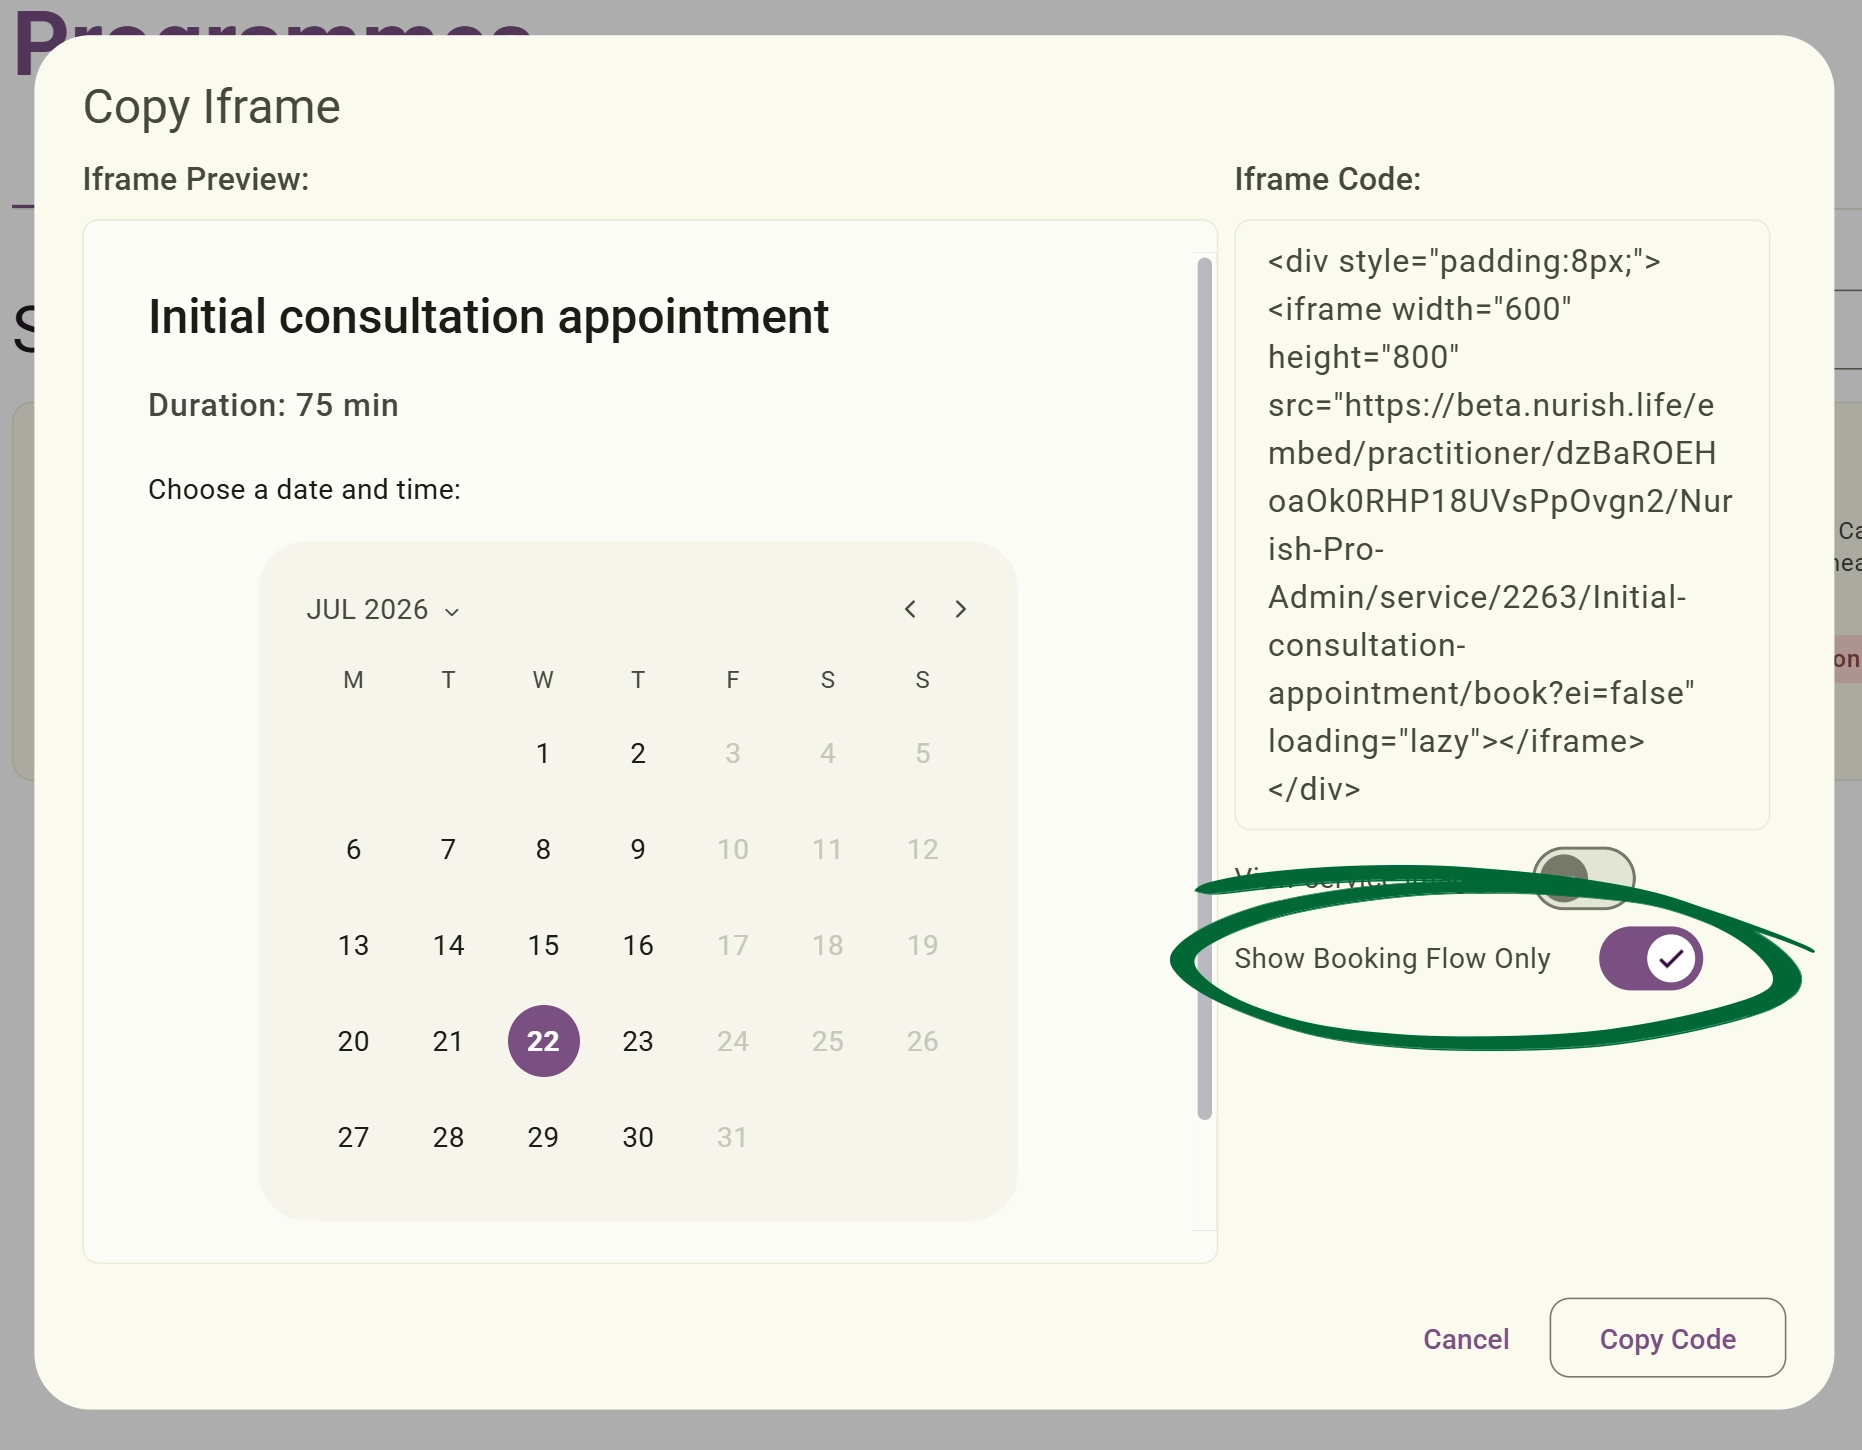
An iframe is a piece of code that allows you to display your Nurish Pro booking experience directly within your website.
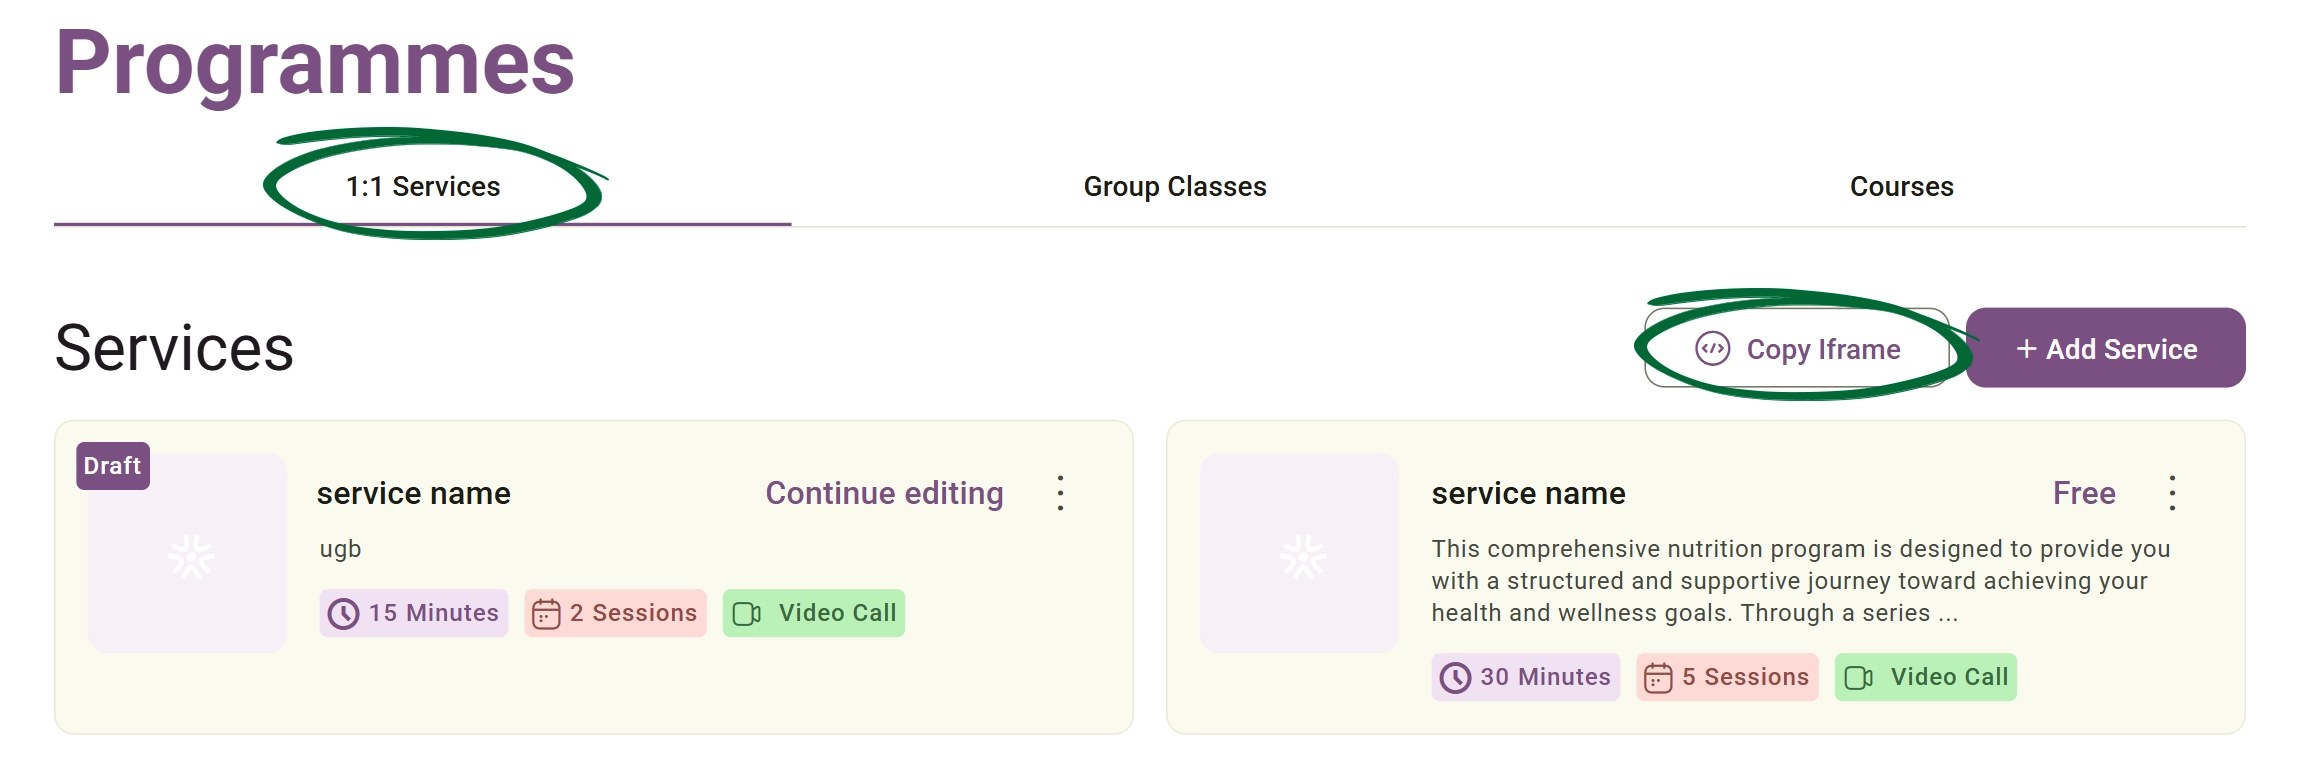
You can copy it for your list of services by navigating to: Services → Copy Iframe.
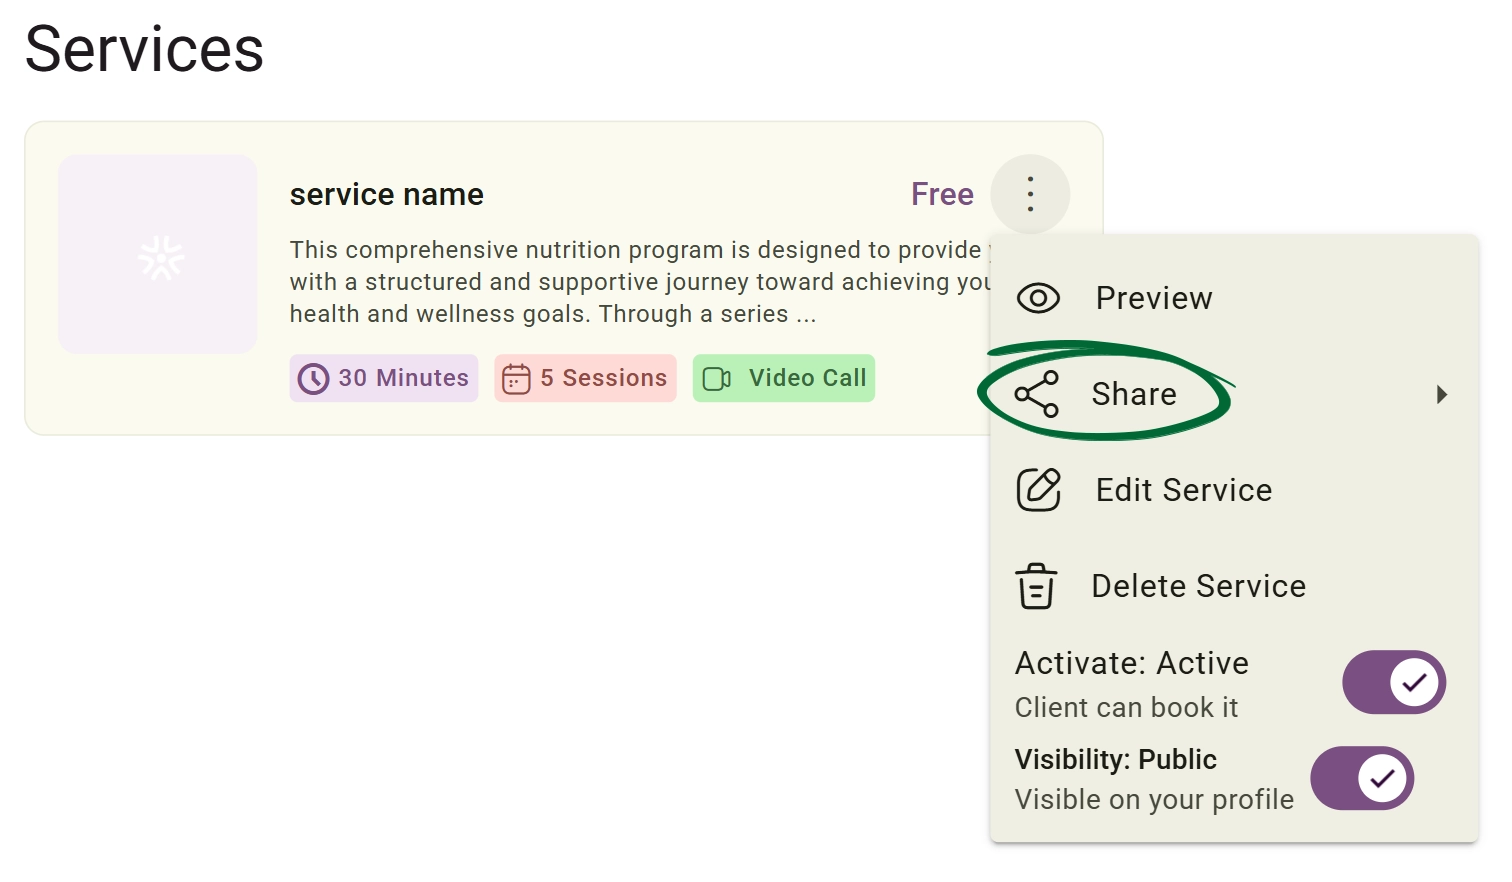
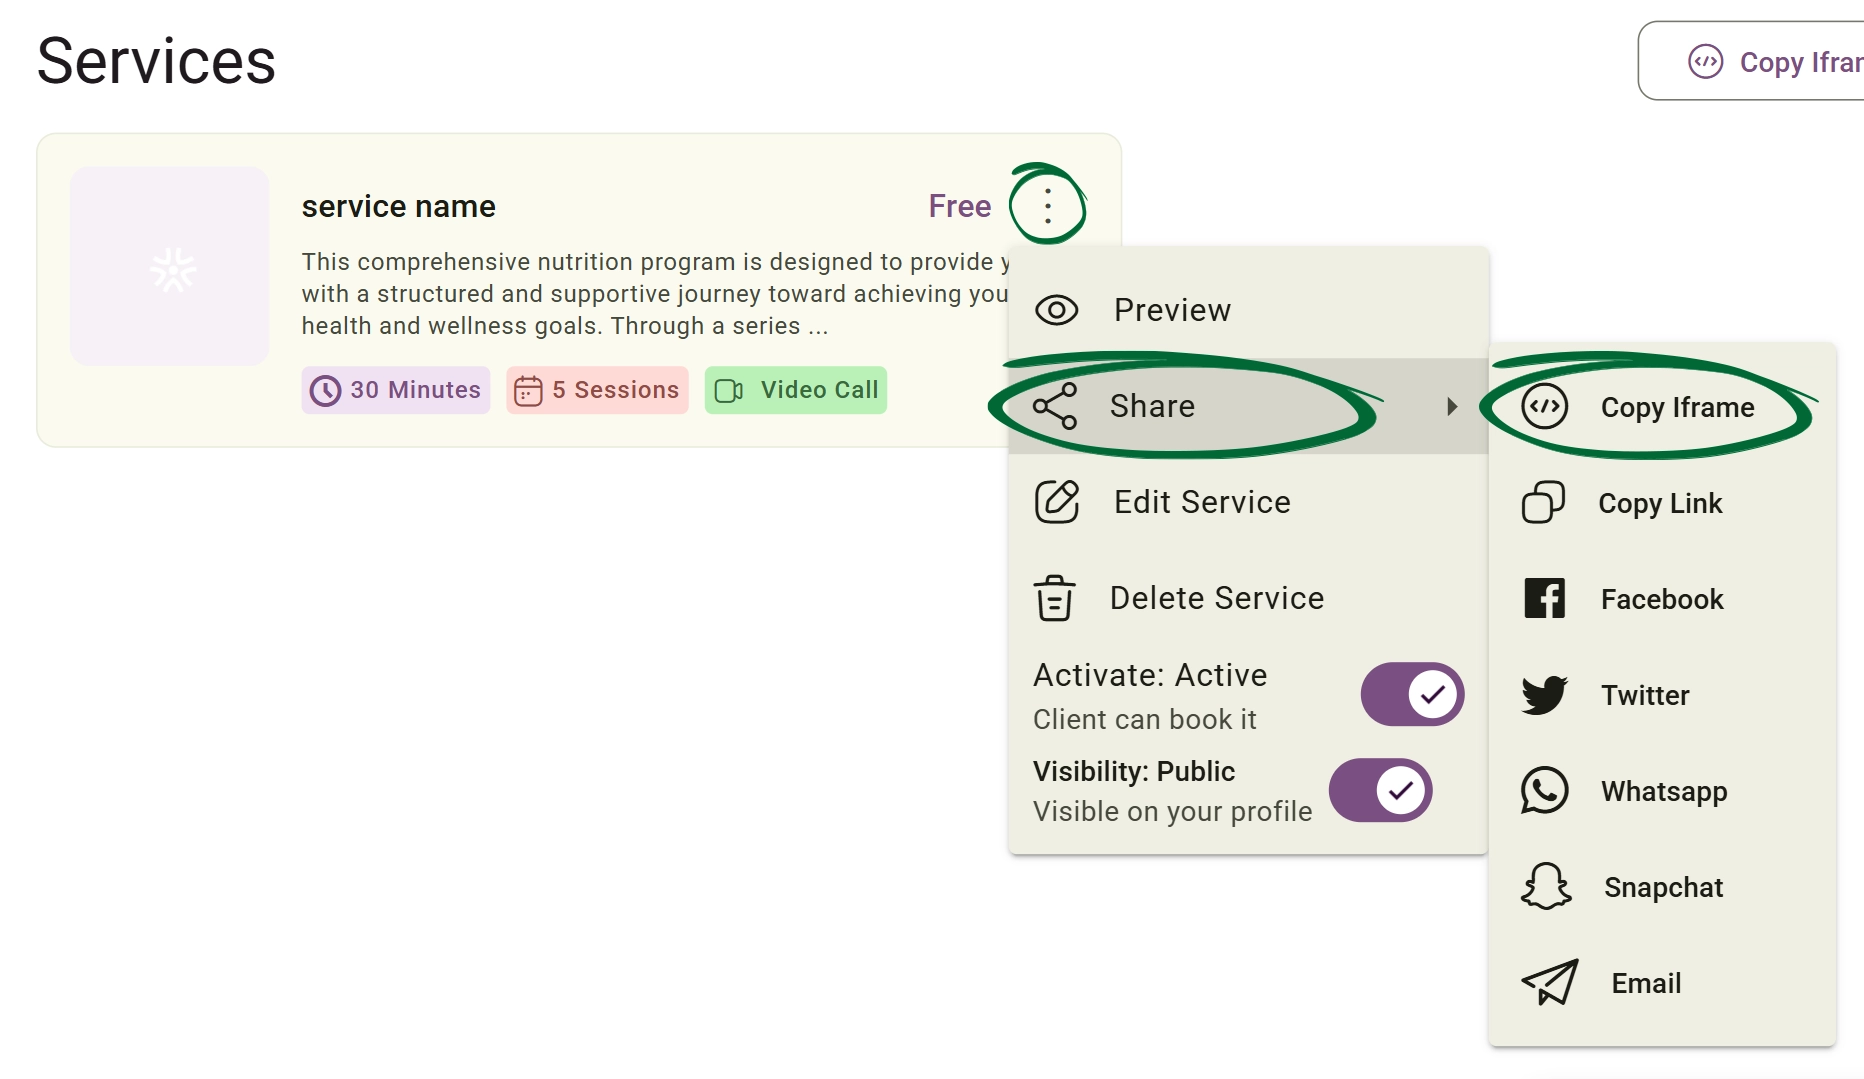
You also can copy it for a specific service by Navigating to: Services → Press the menu option in your service card → Share → Copy Iframe
- Available Iframe Types:
- Iframe Display Options:
Service List Iframe: Displays a list of available services.
Single Service Iframe: Displays one specific service.
View Service Image: Toggle this setting to show or hide the primary service image within the embedded widget.
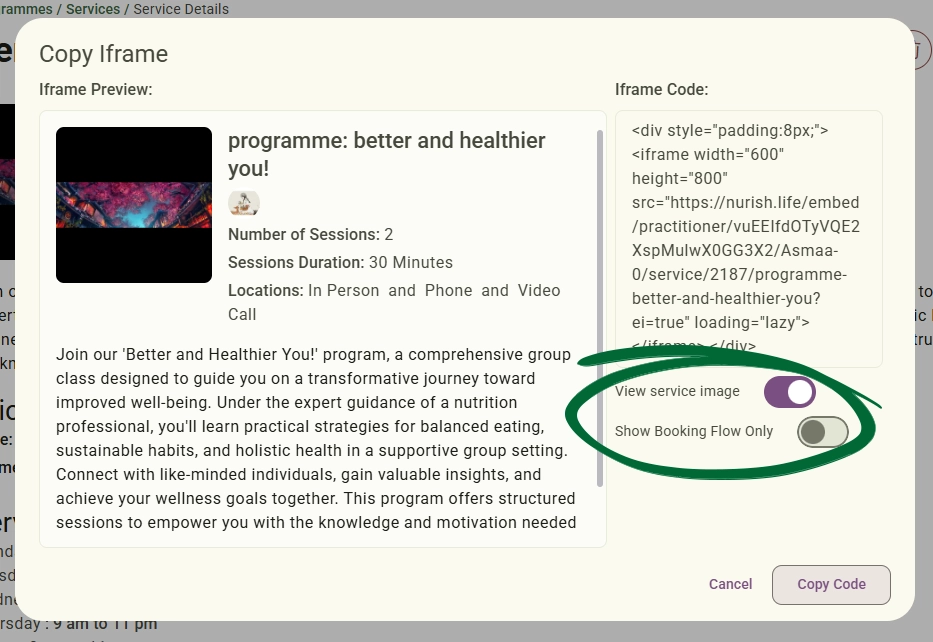
Show Booking Flow Only: Toggle this setting to skip the service details page and navigate directly to the booking flow.
Note: All iframe widgets follow your visibility and privacy settings.
For example, a Service List iframe will only display services that are publicly visible to clients.
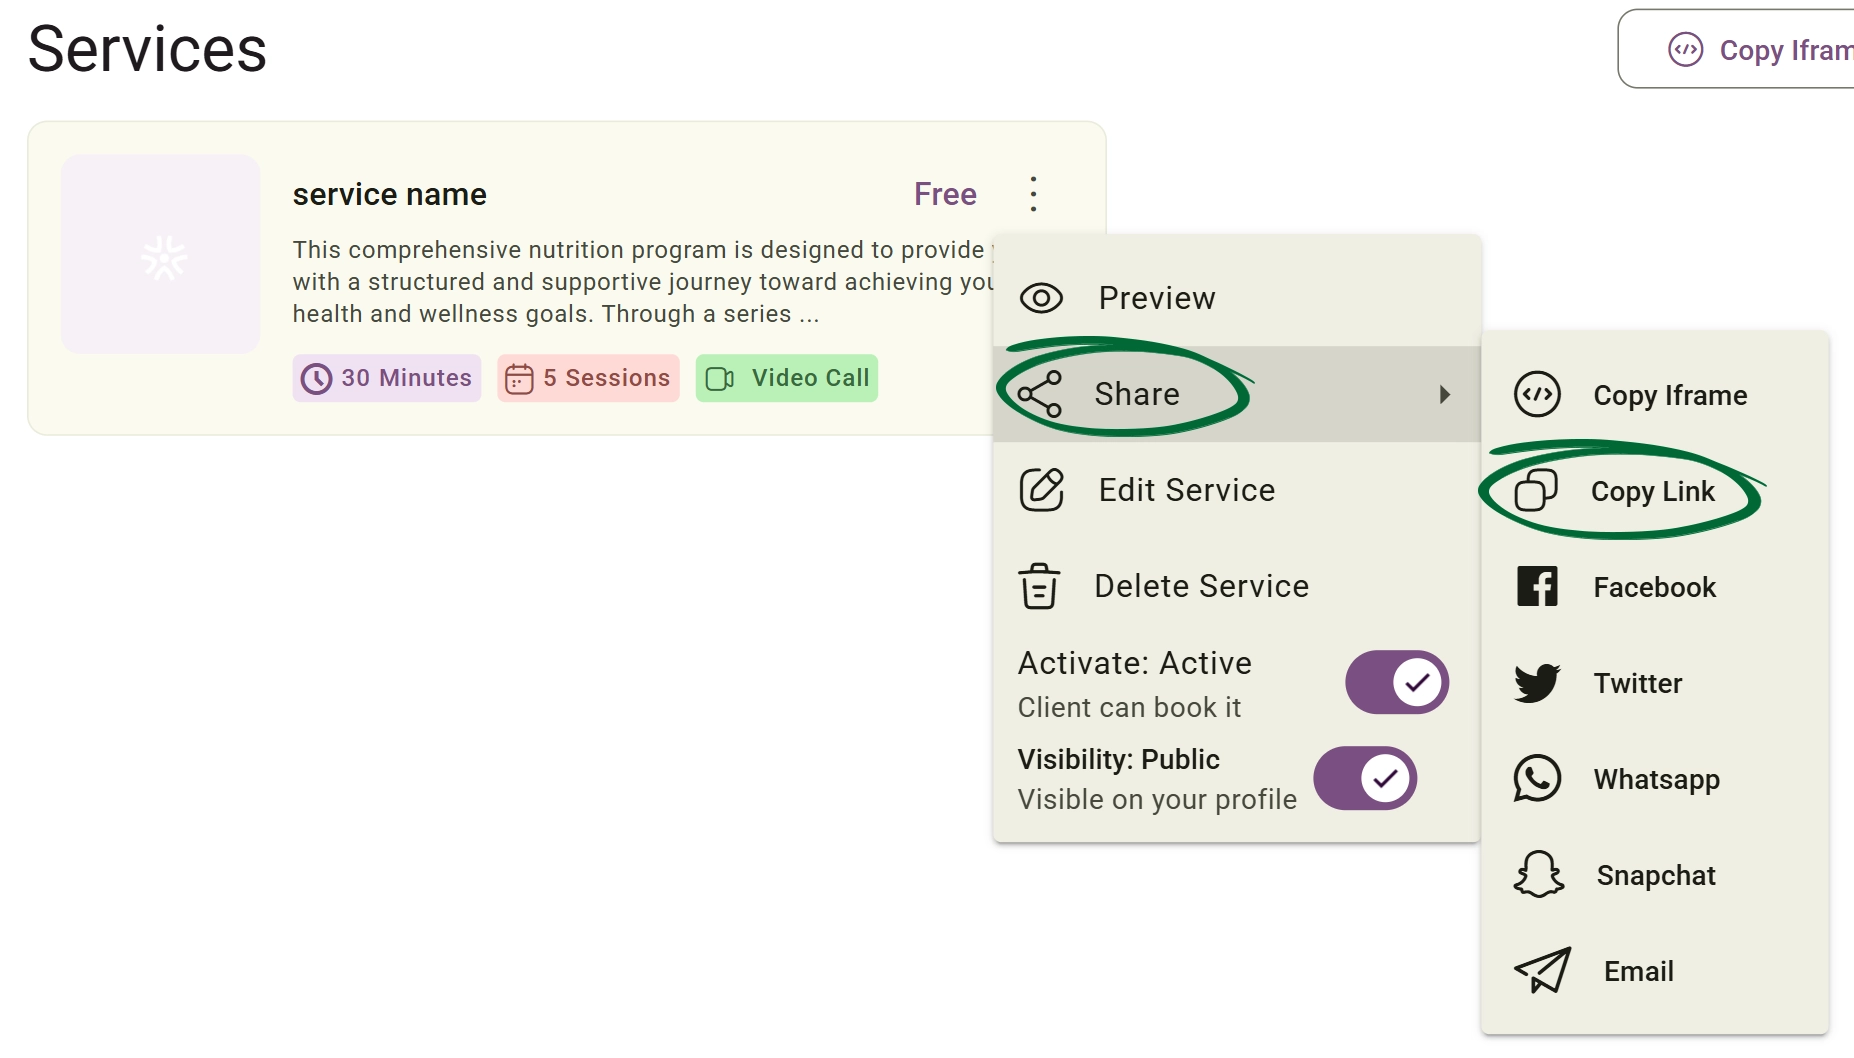
Services can also be shared directly through: Email, WhatsApp, Facebook, Twitter/X
and Snapchat
Remove services that are no longer required.
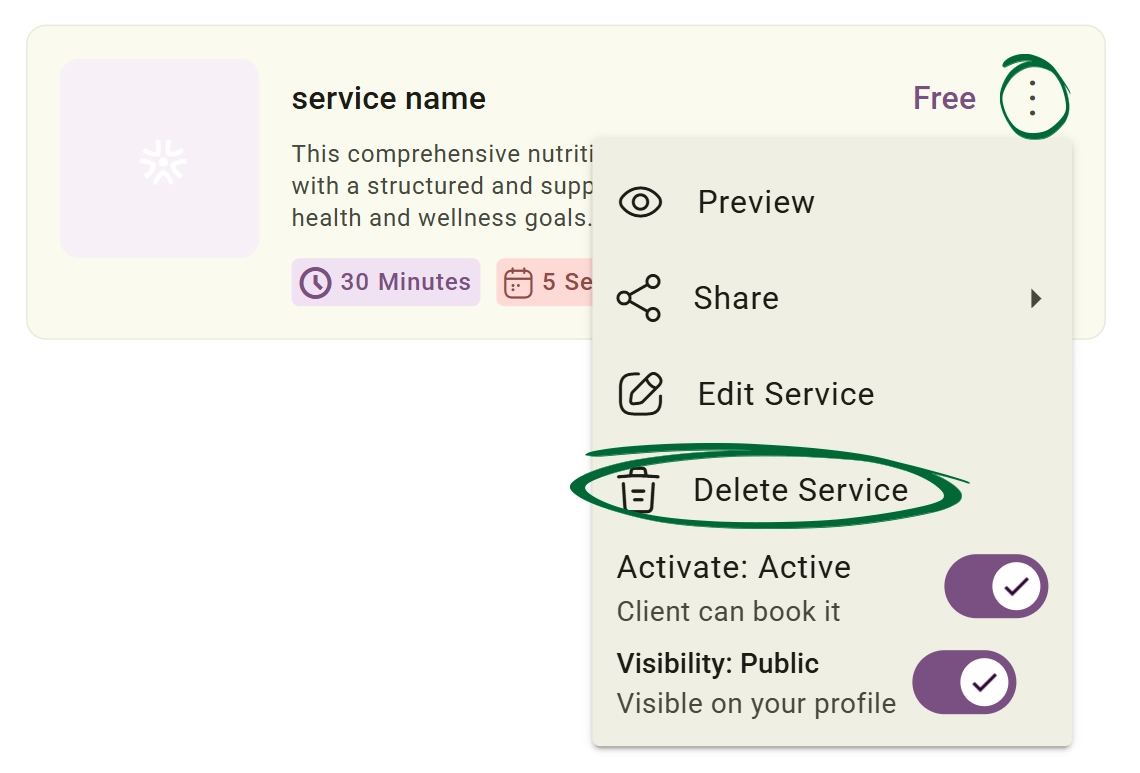
Confirm the action to permanently remove the service.
Deleted services: Can no longer be booked, Are removed from your Client Portal, Cannot be restored automatically
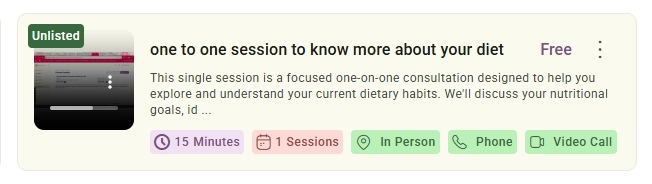
- Bottom labels: Show the service location, number of sessions, and duration.
- Top-left labels: Show the service status (Public, Unlisted, or Disabled).
Can I create a service without displaying a public price?
Can I attach different forms to different services?
Can I temporarily stop clients booking a service without deleting it?
What is the difference between Activation Status and Visibility?
Can I preview a service before publishing it?
Can I embed my services into my own website?
Issue: Service not appearing in the Client Portal
Issue: Clients can not book my service
Next Step
Your services are now ready to go live. Continue to the Programmes → Services dashboard to manage, update, and share your services.
Go to Services