Build and launch your interactive group sessions.
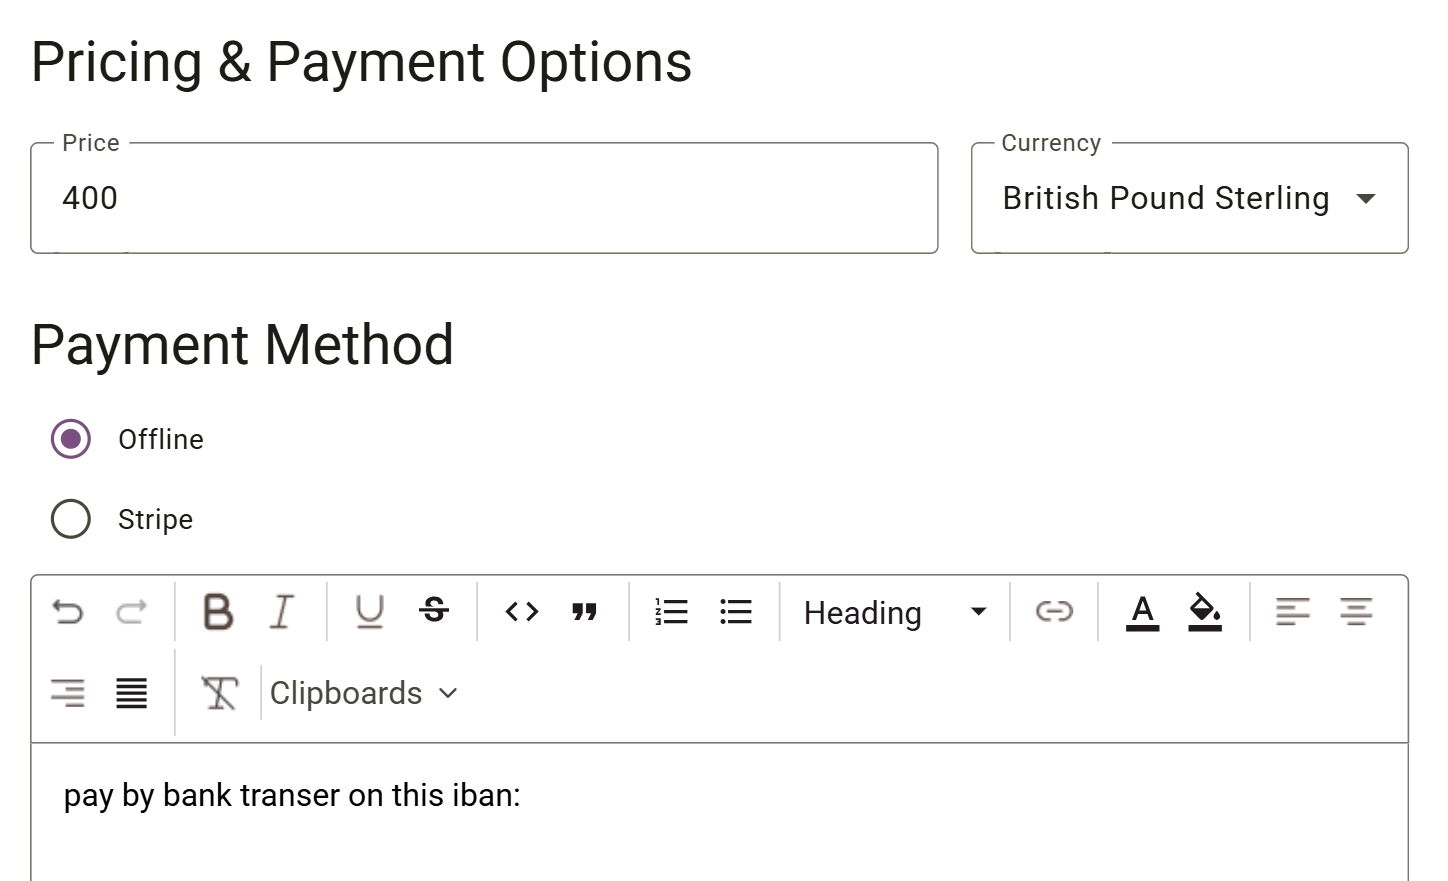
Set up how clients will pay for your service.
You can configure: Service Price, Currency, Payment Method (whether it is offline or via Stripe payment).
-
Offline Payment: Clients complete their booking, and payment is collected outside the platform. Use the text editor to enter your payment instructions to explain how clients should complete their payment after booking. An invoice containing your specific offline payment instructions will be automatically sent to your client via email to help them complete the transaction.
Examples include: Cash, Bank Transfer, In-Clinic Payment - Stripe Payment: Clients pay online during the booking process using your connected Stripe account. Payment processing follows the settings configured in: Settings → Payment Integration and in each programme payment settings.
All successful payments will automatically appear within: Earnings → Transaction History (Free programmes and offline payment services are not included)
A receipt will be sent to your client's email with the booking date and summary, including the amount paid.
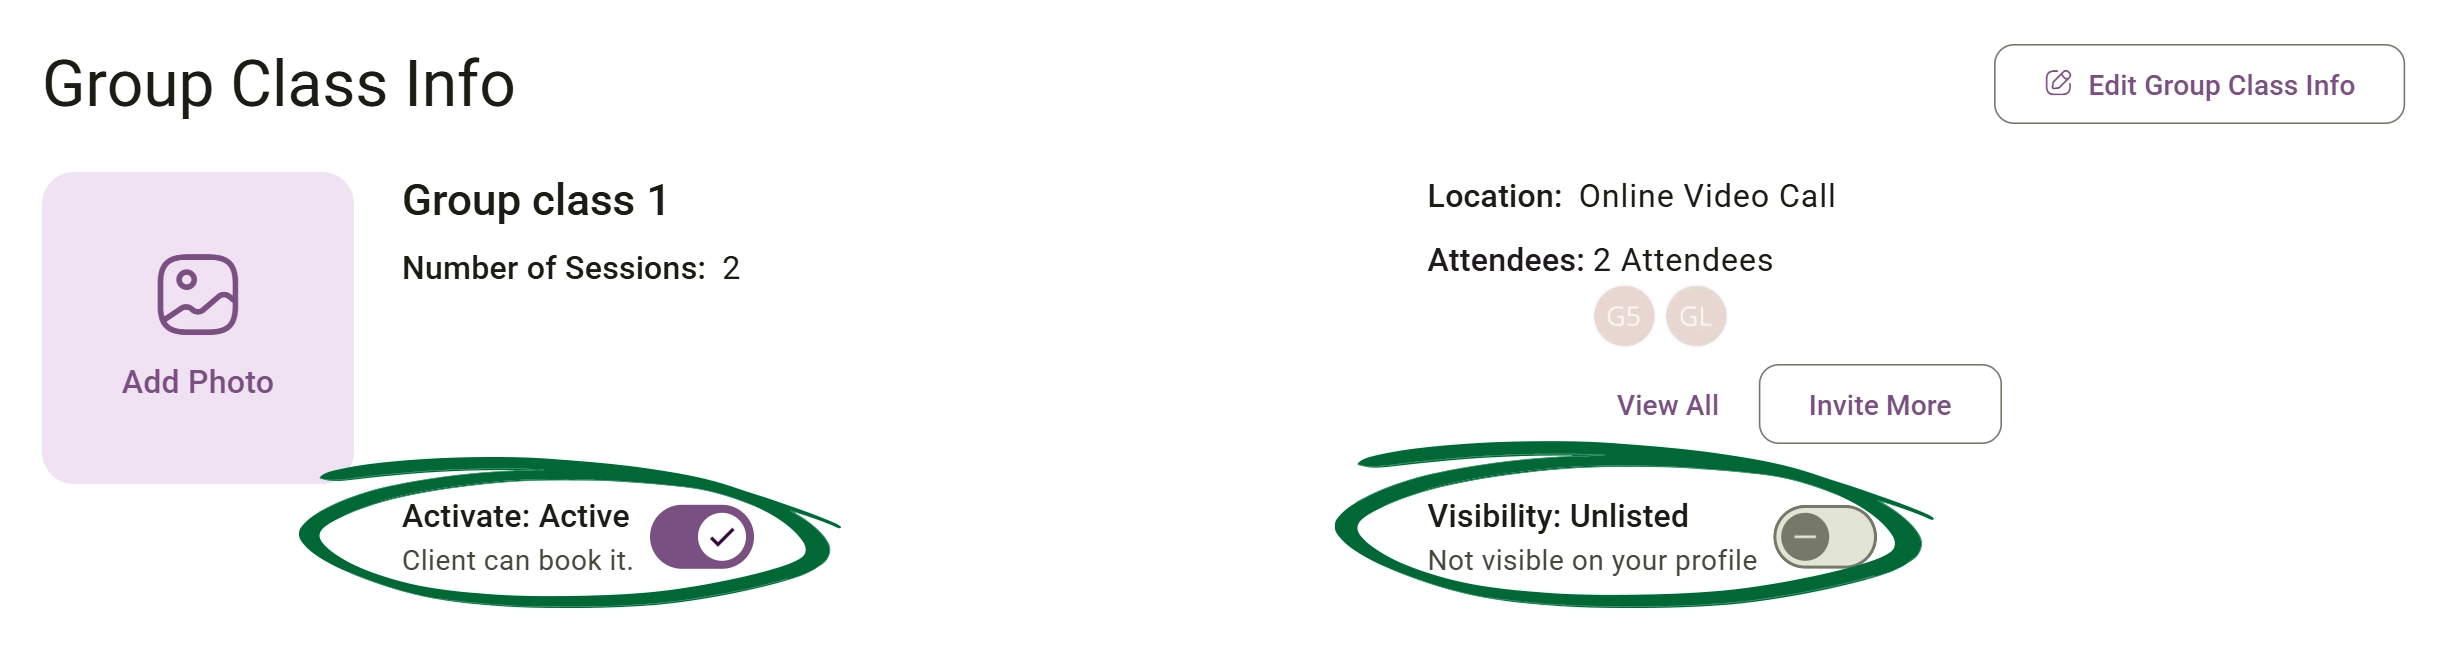
Control how your group class is displayed and whether bookings are allowed
- Activation Status
- Visibility Status
- Note: If you disable a group class, it will always be hidden from clients and cannot be booked.
Controls whether the group class is active and available for bookings. Disabled group classes are only visible to you and cannot be booked by clients.
Controls whether the group class appears publicly within your Client Portal. Available publishing options include: Public - Unlisted
Public: The group class is visible throughout your Client Portal and can be discovered and booked by clients.
Unlisted: The group class does not appear publicly but remains accessible through a direct shared link.
Create one or multiple sessions by defining the session name, date, time, duration, description, and content. Add linked forms and tasks.
Preview the details and click "Save Draft" to refine your class details before making them visible to potential attendees, or click Publish Class and select whether the class should be Public or Unlisted before making it available for bookings.
Duplicate any active, past, or upcoming group class to save setup time. Cloning automatically replicates all class details, session structures, and linked resources while projecting new session dates based on your original scheduling sequence.
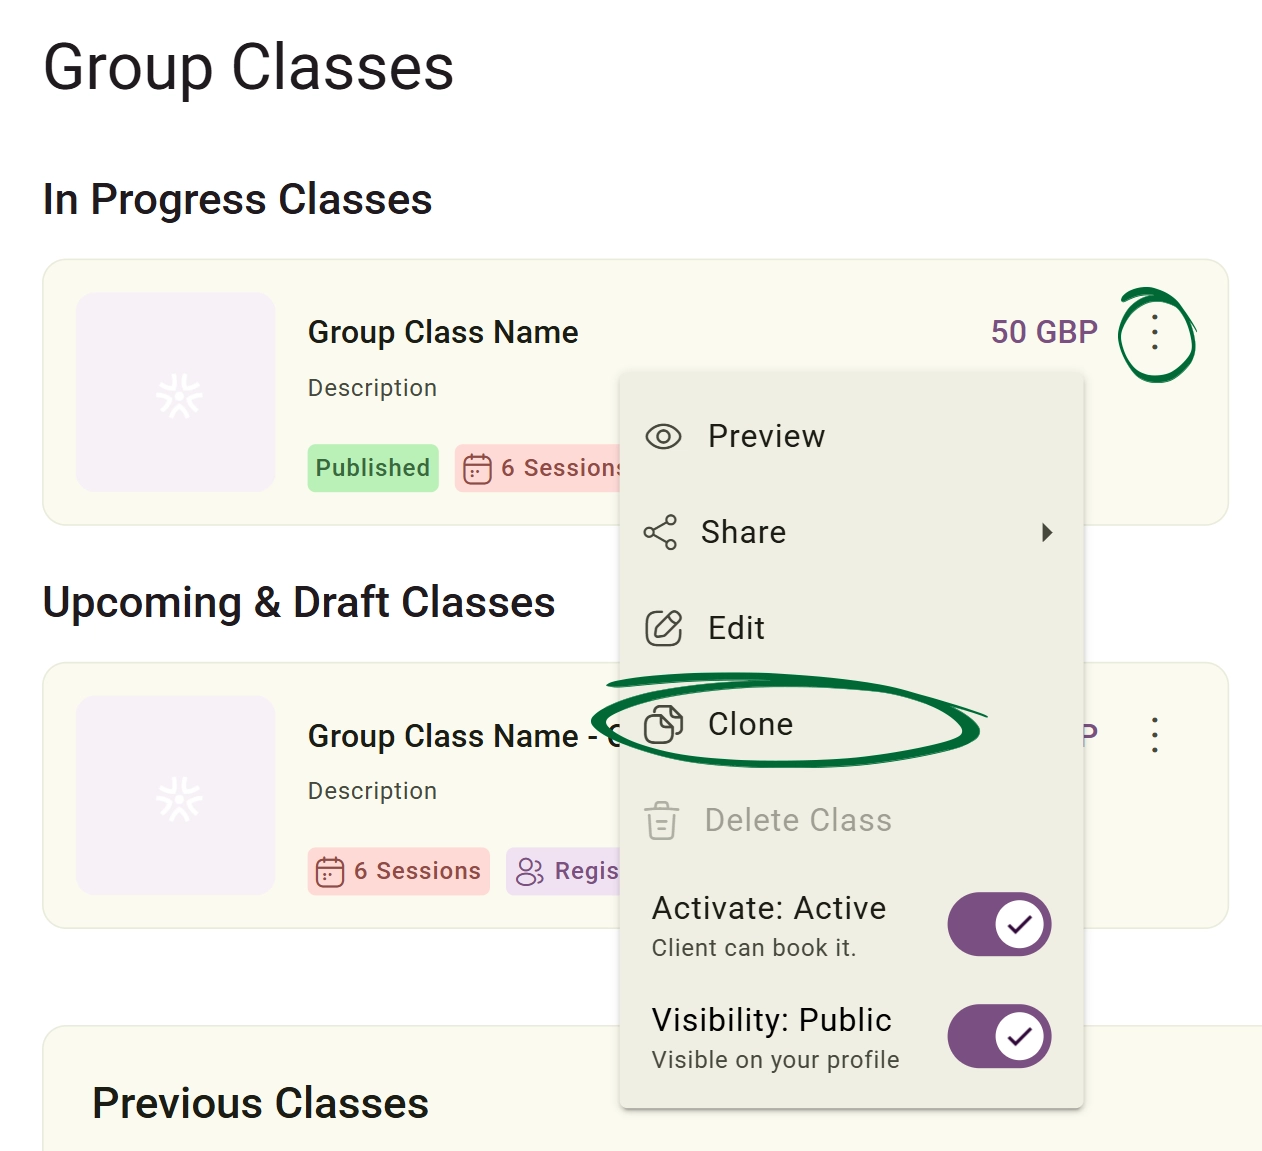
The system will automatically generate a new draft copy named "[Original Class Name] Copy" and place it under Upcoming & Draft Classes.
Note: All core settings—including duration, session count, maximum enrolments, descriptions, linked forms, and tasks—are preserved. The system automatically recalculates session dates, setting the first session to start on the day after the class is cloned and projecting all subsequent sessions based on your original schedule pattern.
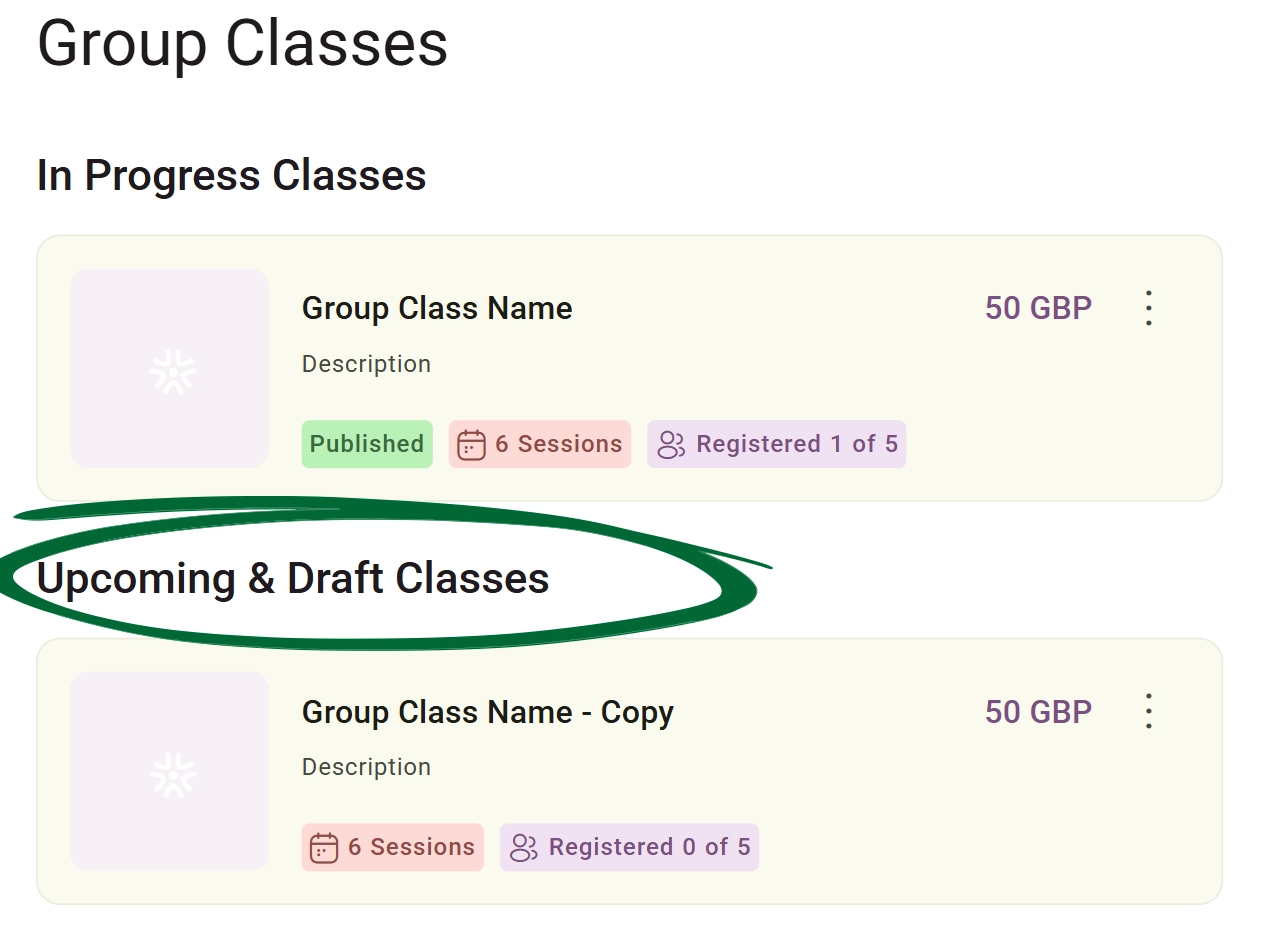
Select the newly created draft class and click Edit Class. You can now update and adjust:
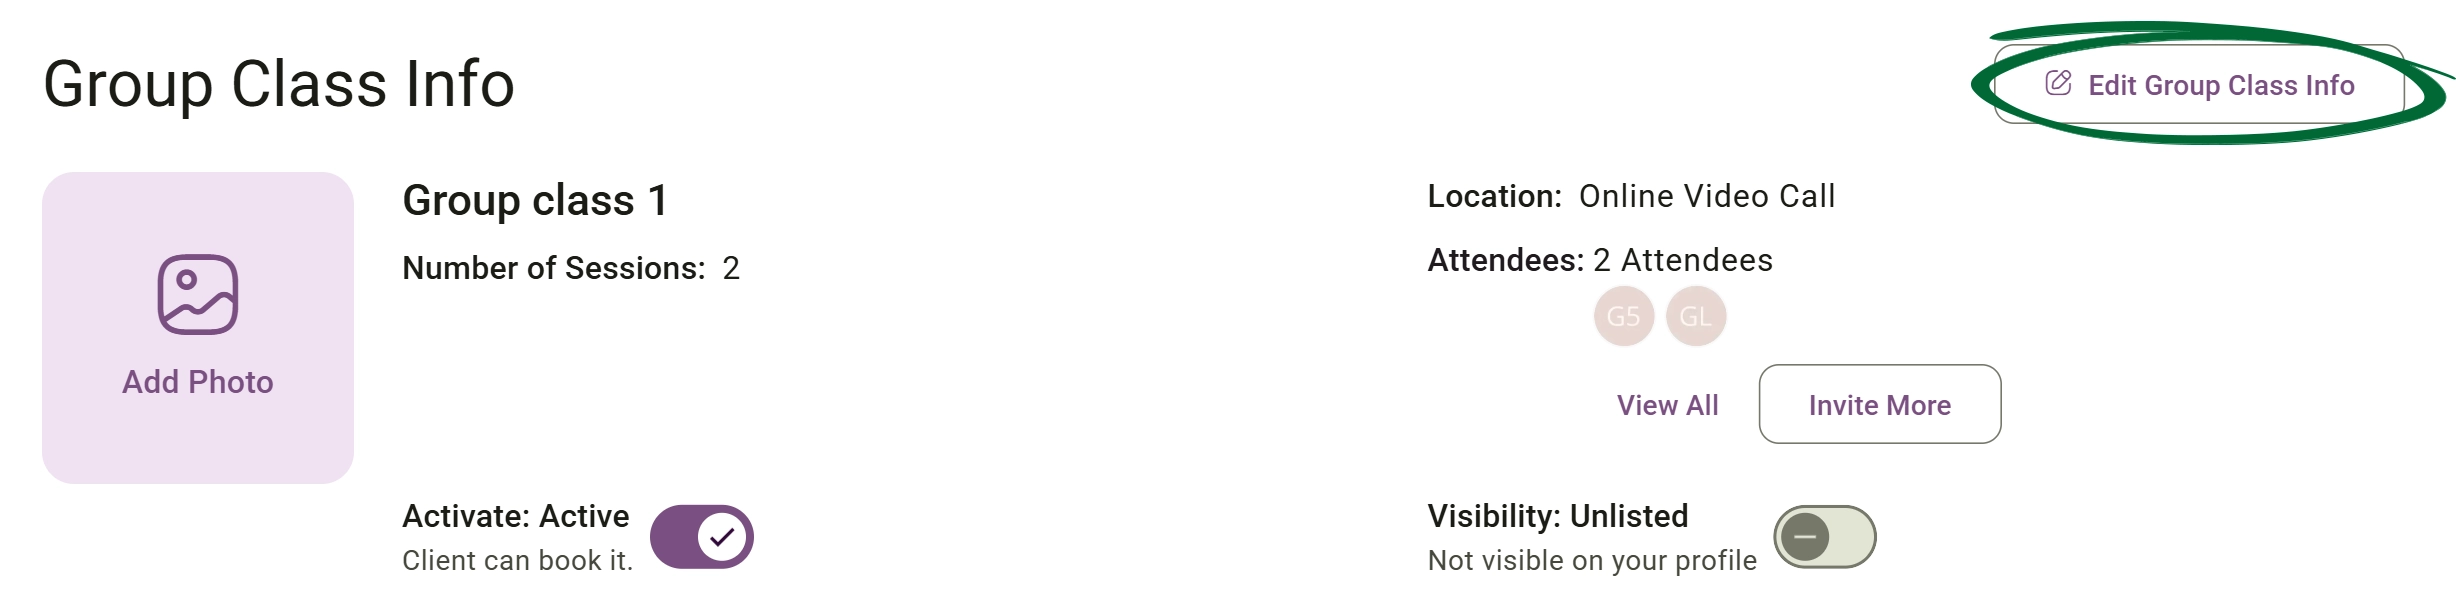
- Group Class Info (Title, description, date, and capacity)
- Pricing & Payment options
- Sessions (Names, dates, times, and individual content)
Note: the registered attendees list is automatically reset to zero (0). You must publish the cloned class before you can invite or add attendees to it
Once you have reviewed the duplicated setup, click Save Draft to continue working on it later, or click Publish Class to make it available for client enrolments.
Monitor your classes throughout their lifecycle. Group classes are automatically organised to:
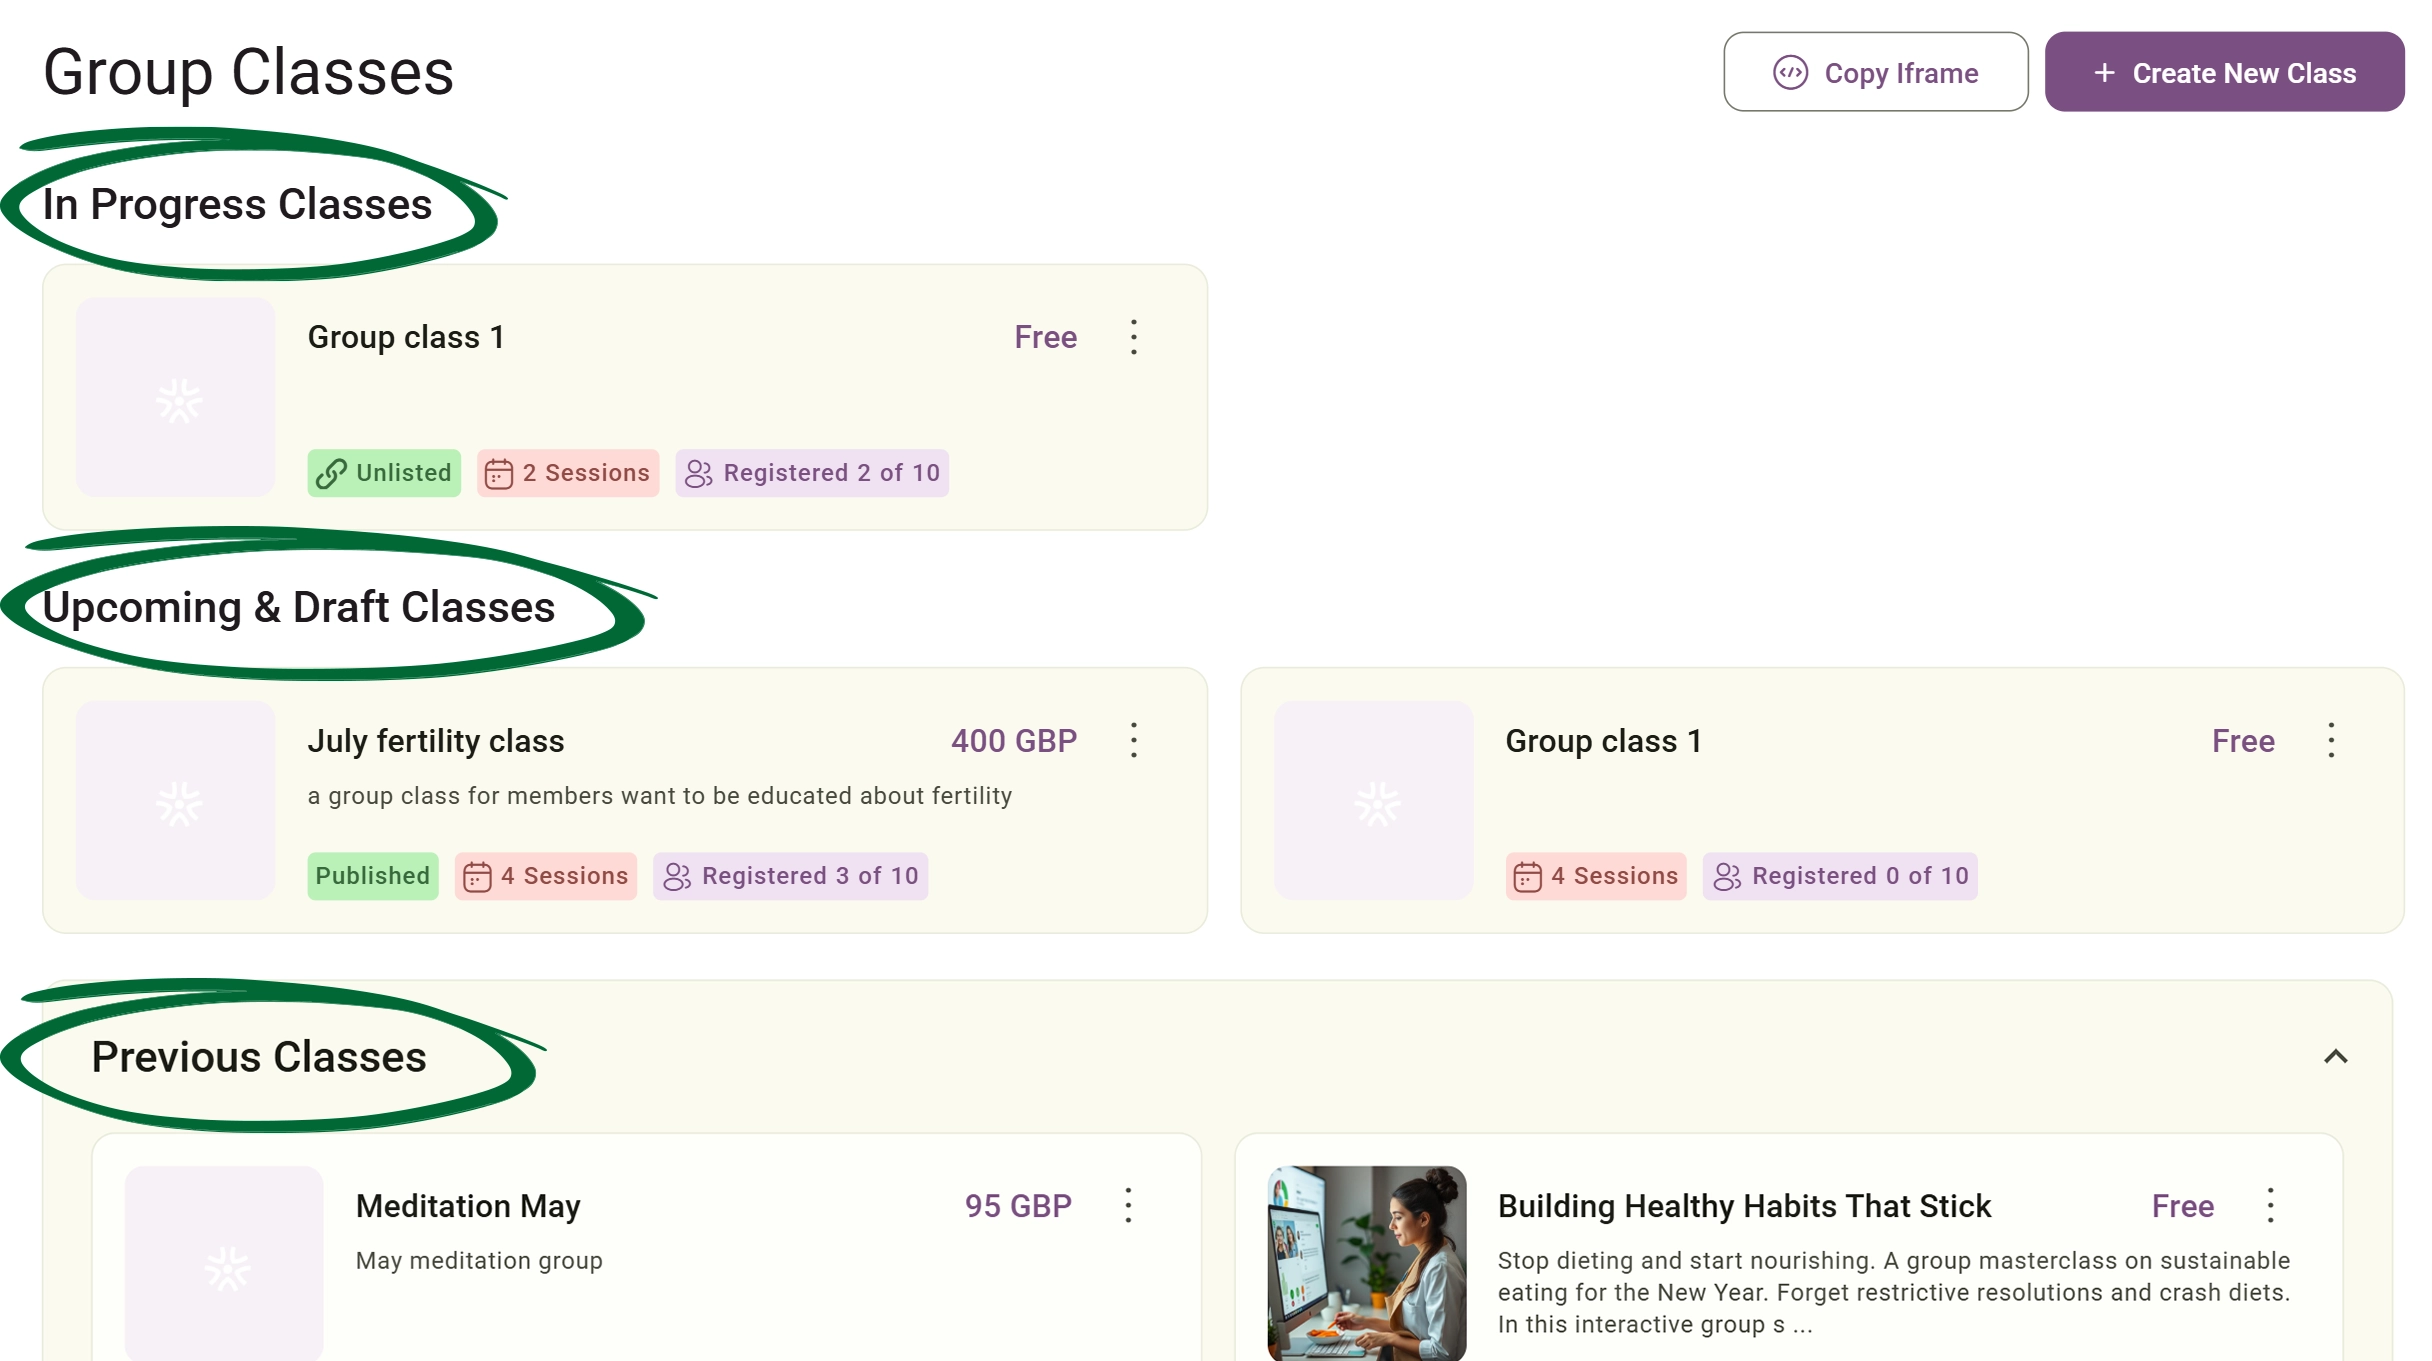
Invite participants and monitor attendance.
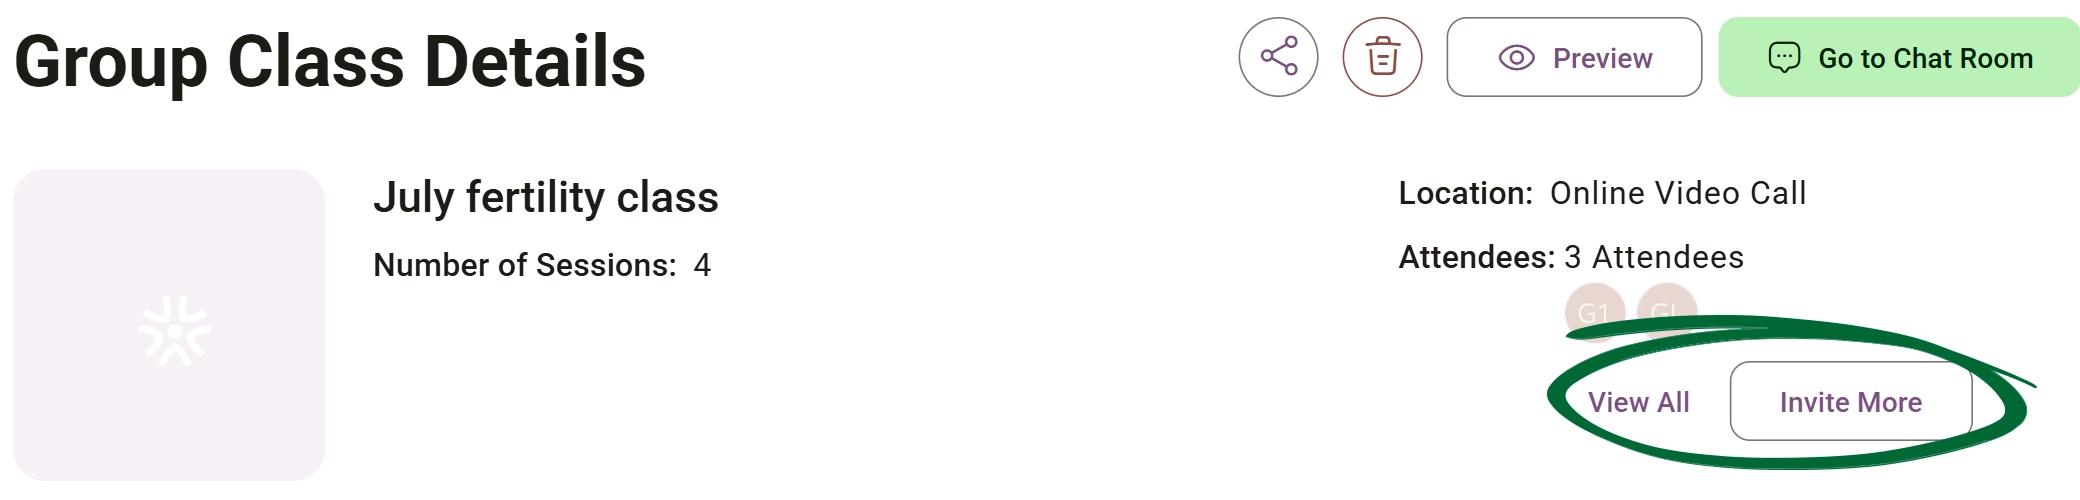
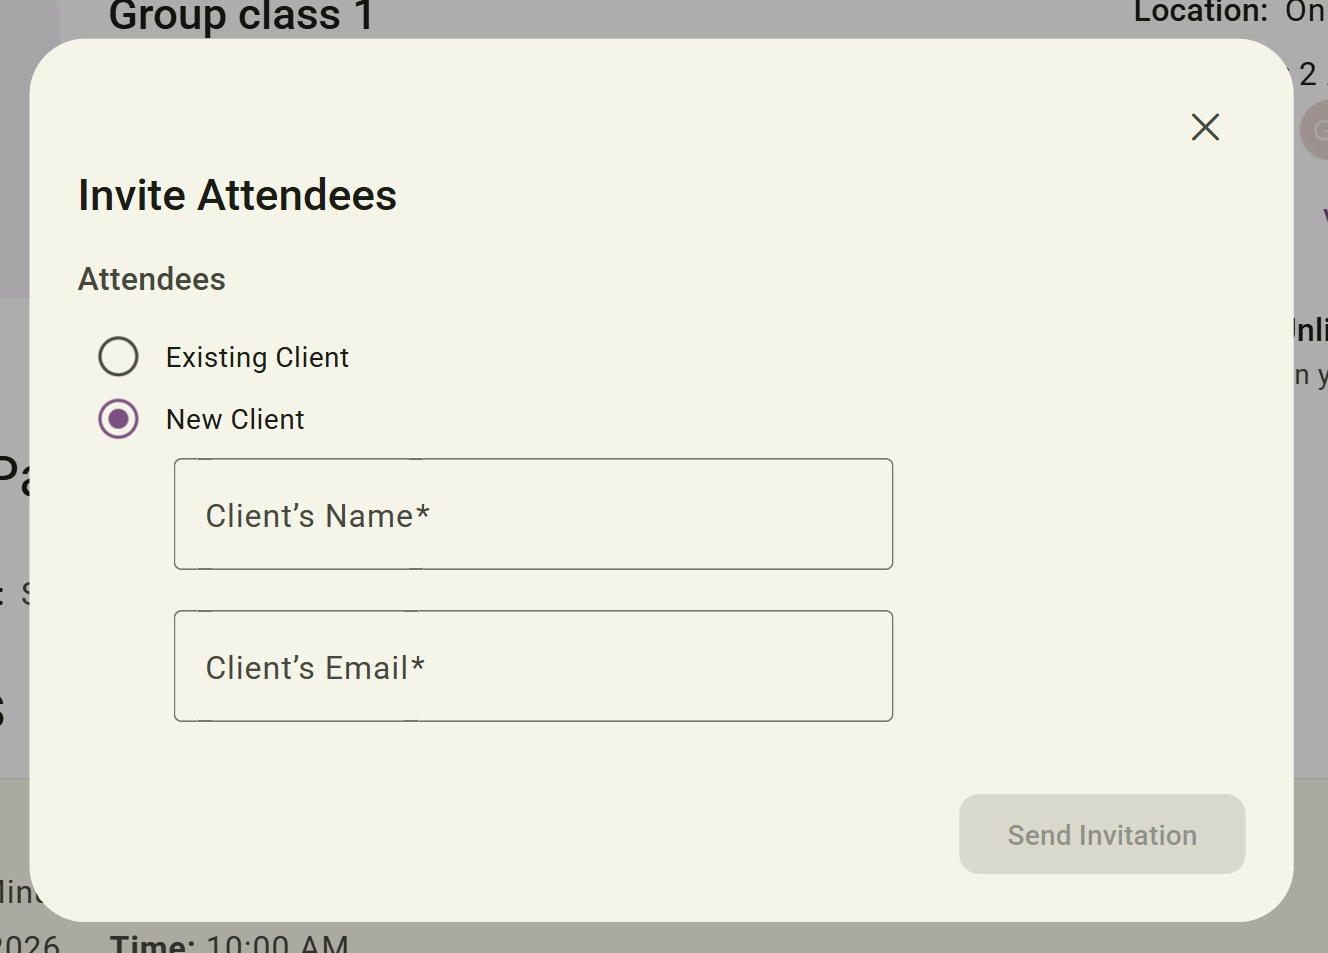
Choose either:
- Existing Client: When selecting Existing Client, search for and choose a client already stored in your client database.
- New Client: When selecting New Client, enter: Client Name, and Client Email Address. Then send the invitation directly to the attendee.
If the group class includes multiple locations or delivery methods, select the appropriate location for the attendee before sending the invitation. Available options include: In-Person Locations or Online Video Call
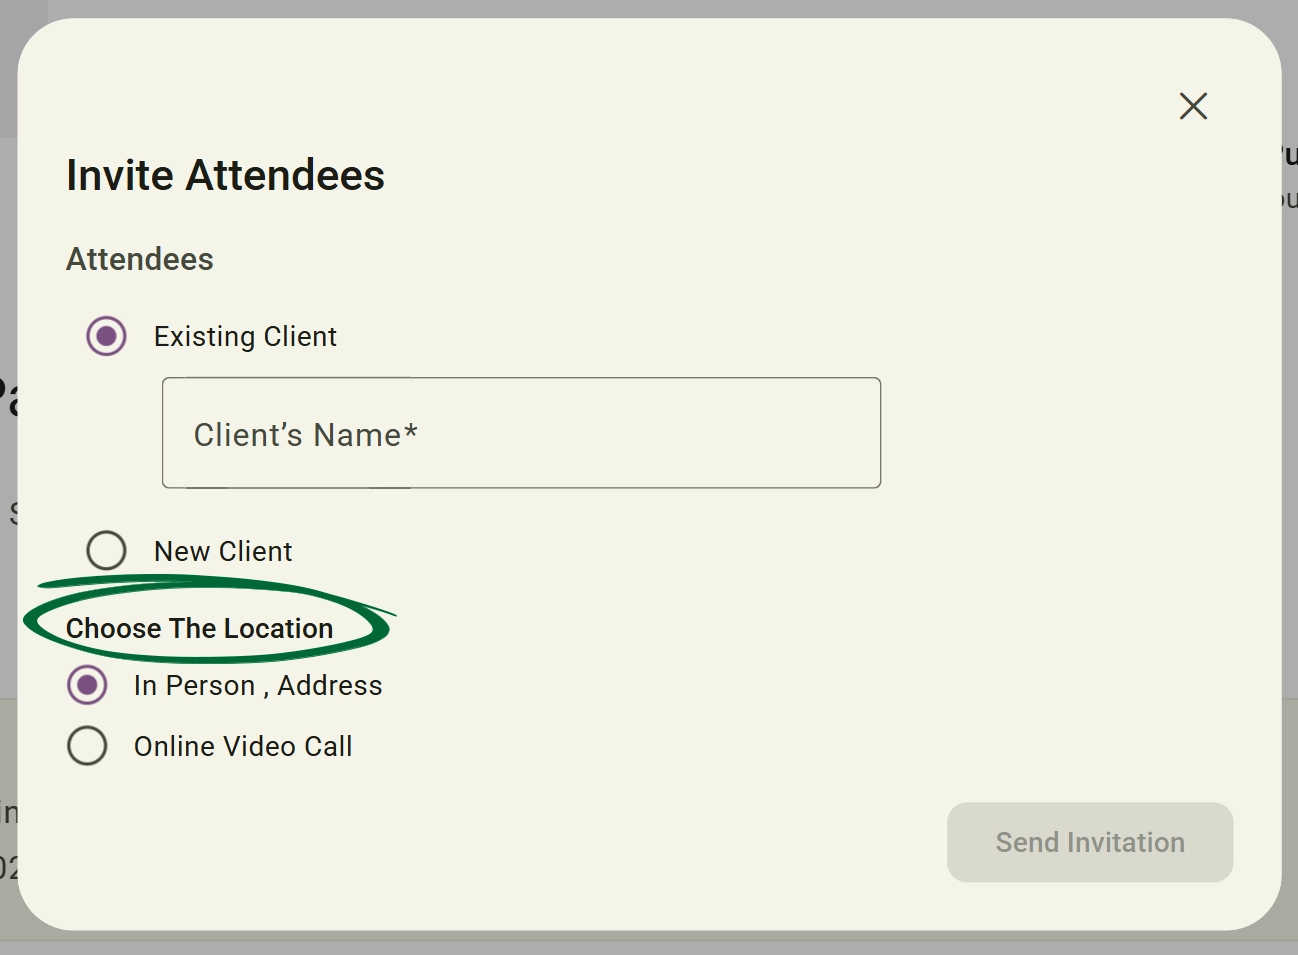
Complete the required information and send the invitation. Once the invitation has been sent, the attendee will be enrolled in the group class and notified automatically via email and through the platform
Communicate with all attendees from a single location.
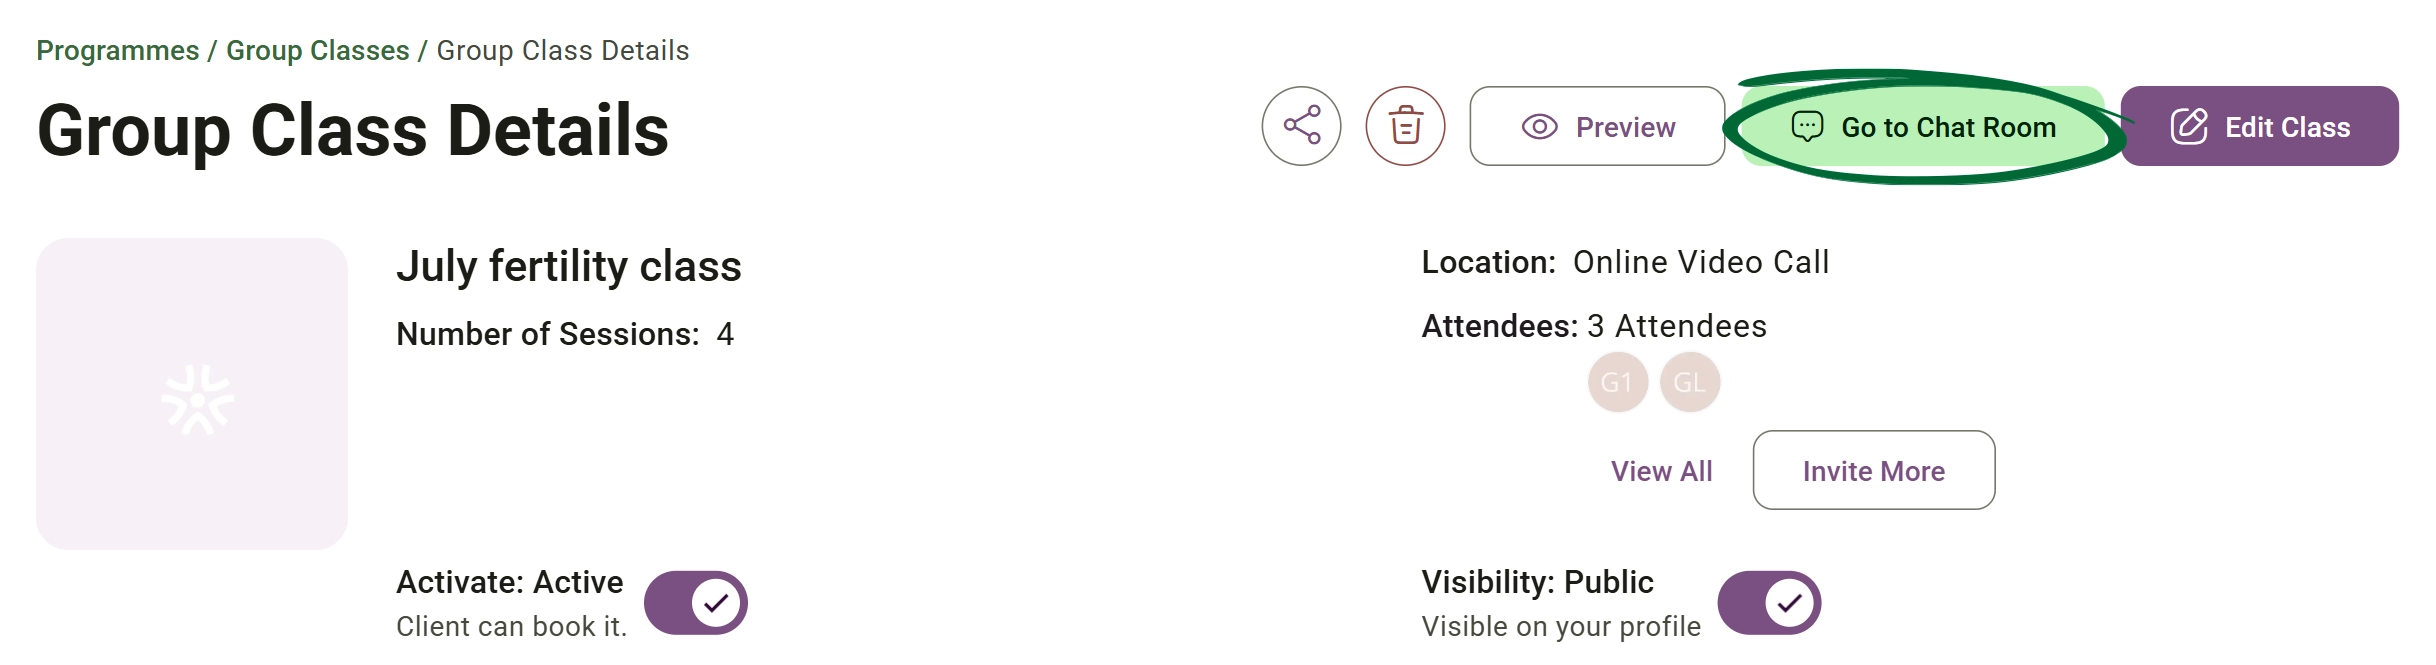
Communicate with all registered attendees within the class chat room.
Group Chat Room: The chat room allows practitioners to communicate with all attendees simultaneously without sending individual messages.
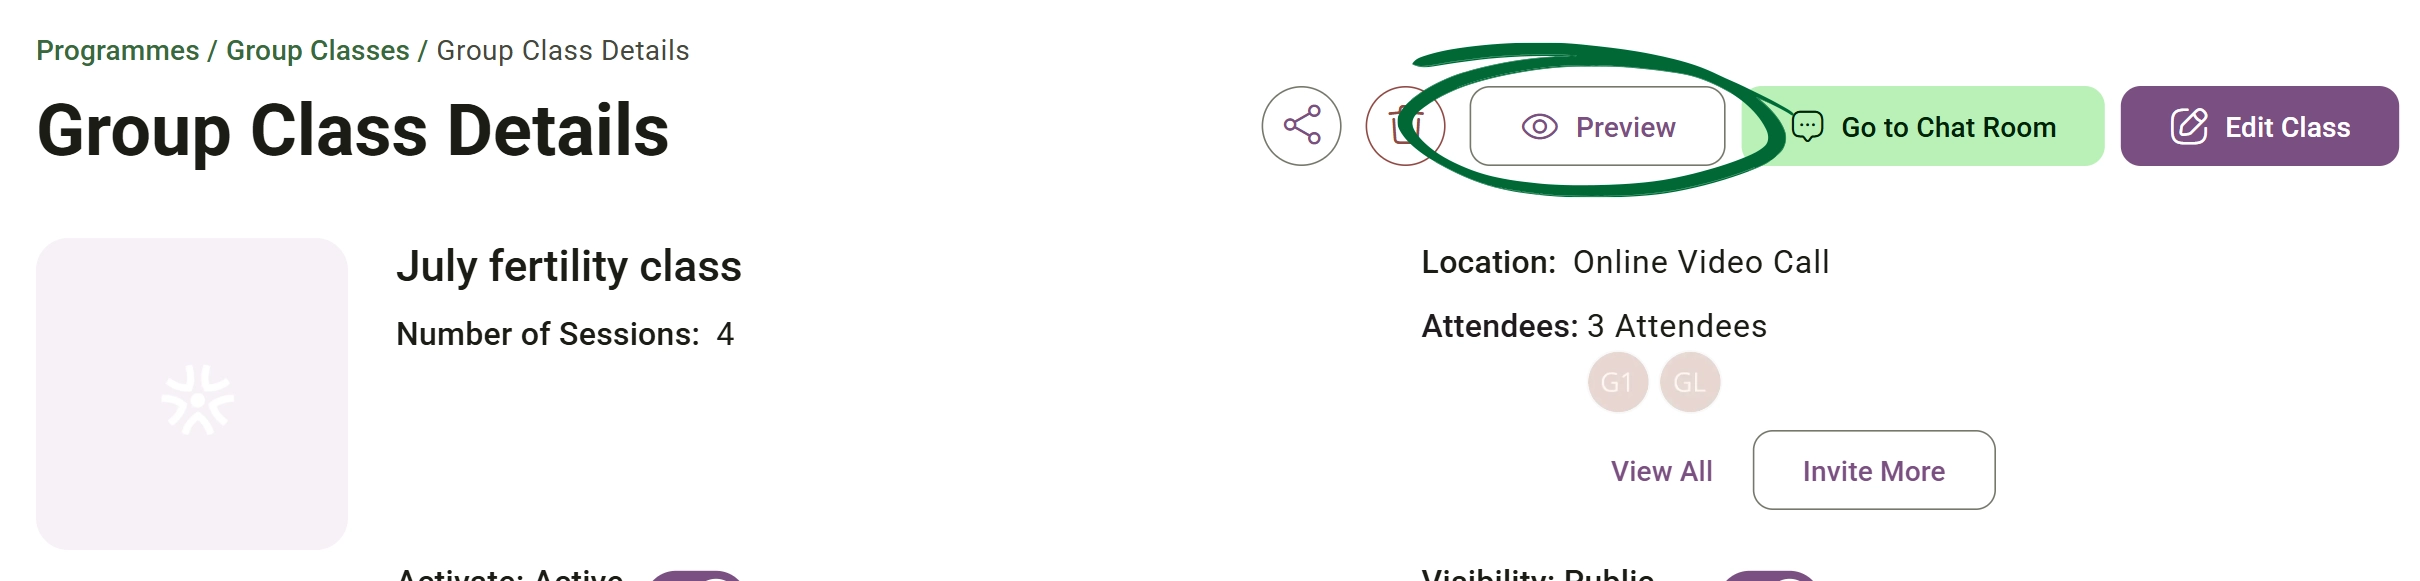
See exactly how your group class will appear to clients.
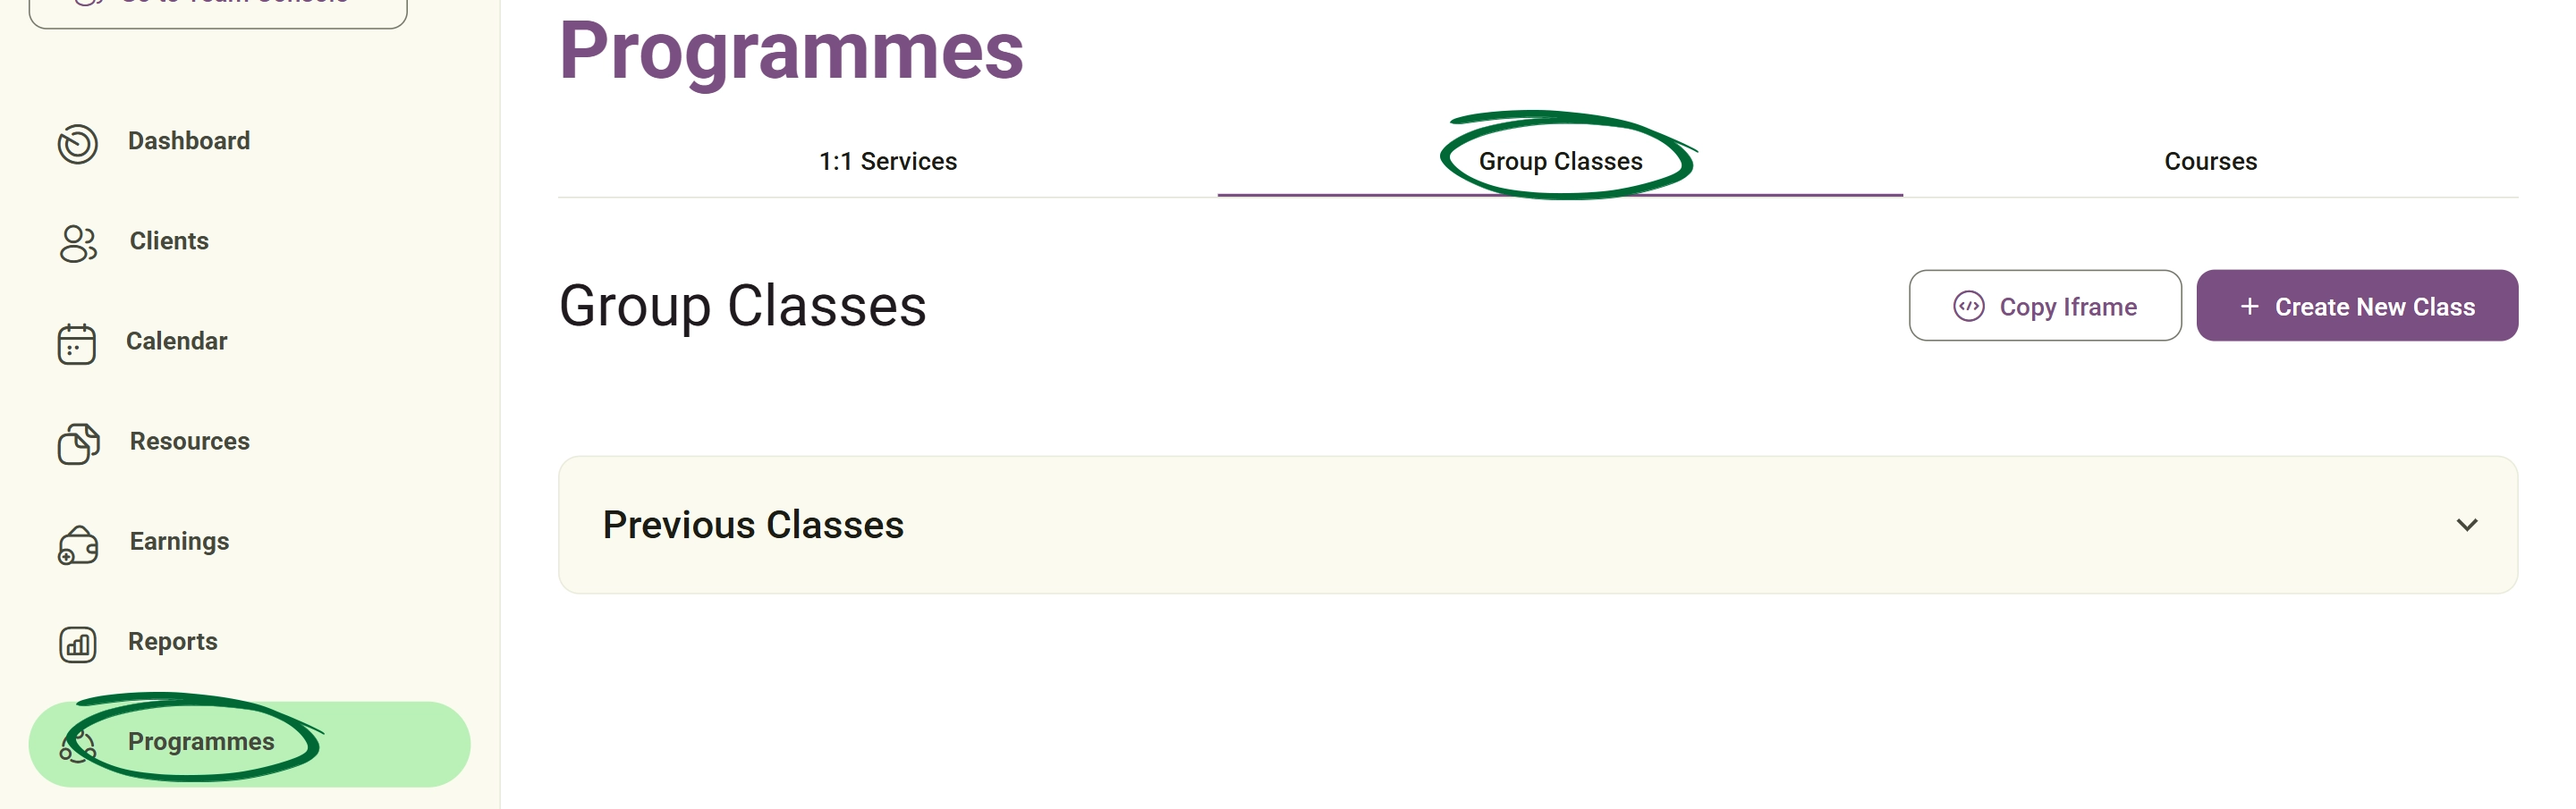
Navigate to Programmes → Group Classes.
Press the group class card to open the Class Details screen.
Use the Preview button to display your class details, sessions, and info.
Update class details whenever needed.
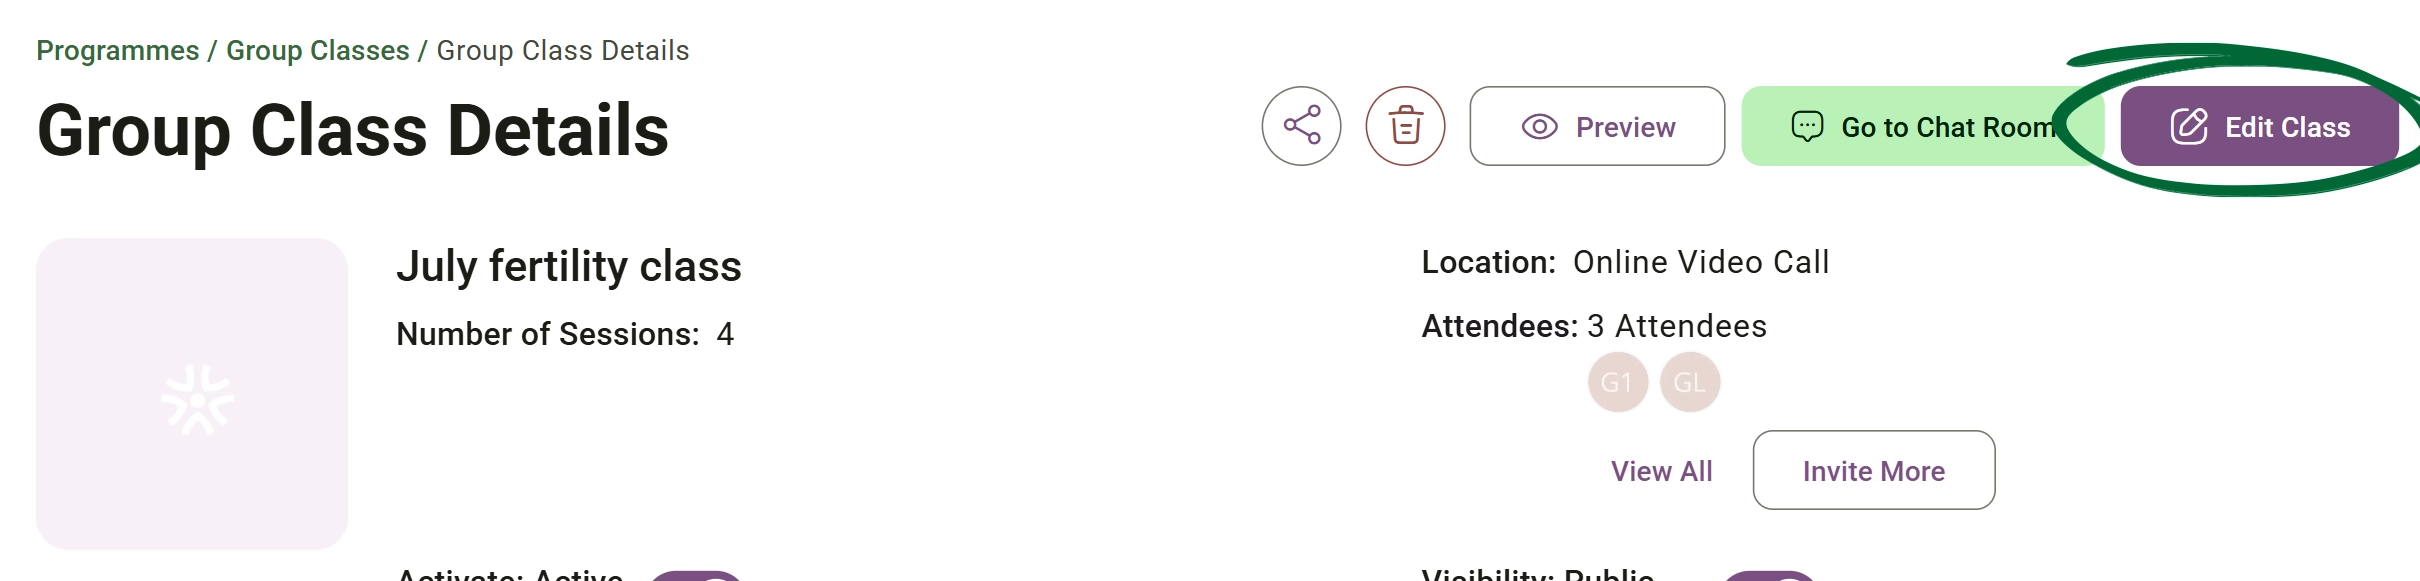
Modify class information, including: Class title, Description, Attendees, Visibility, Activate, Sessions content, Pricing & Payment settings
Apply and publish your updates
Manage individual sessions within a group class.
Modify session name, description, date, time, duration, content, linked forms, linked documents, linked plans or tasks.
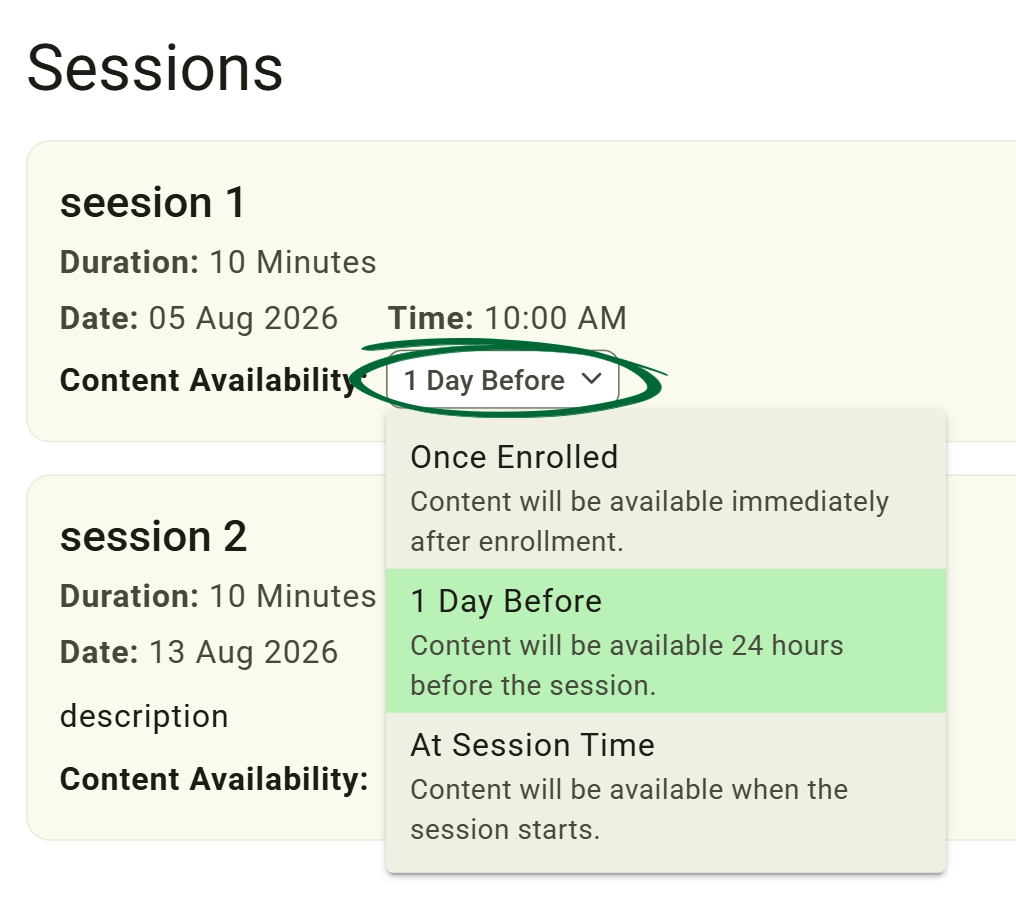
Control exactly when enrolled clients can access the session's materials.This setting can only be edited for Draft, Upcoming, or In-Progress classes; it cannot be changed for completed/Previous classes.
To update, open your desired group class, click Edit Class, and choose one of the following options from the Content Availability dropdown menu:
- Once Enrolled (Default): Content is available immediately after the client purchases or joins the class.
- 1 Day Before: Content becomes accessible a day prior to the session's start time.
- At Session Time: Content unlocks exactly when the scheduled session begins.
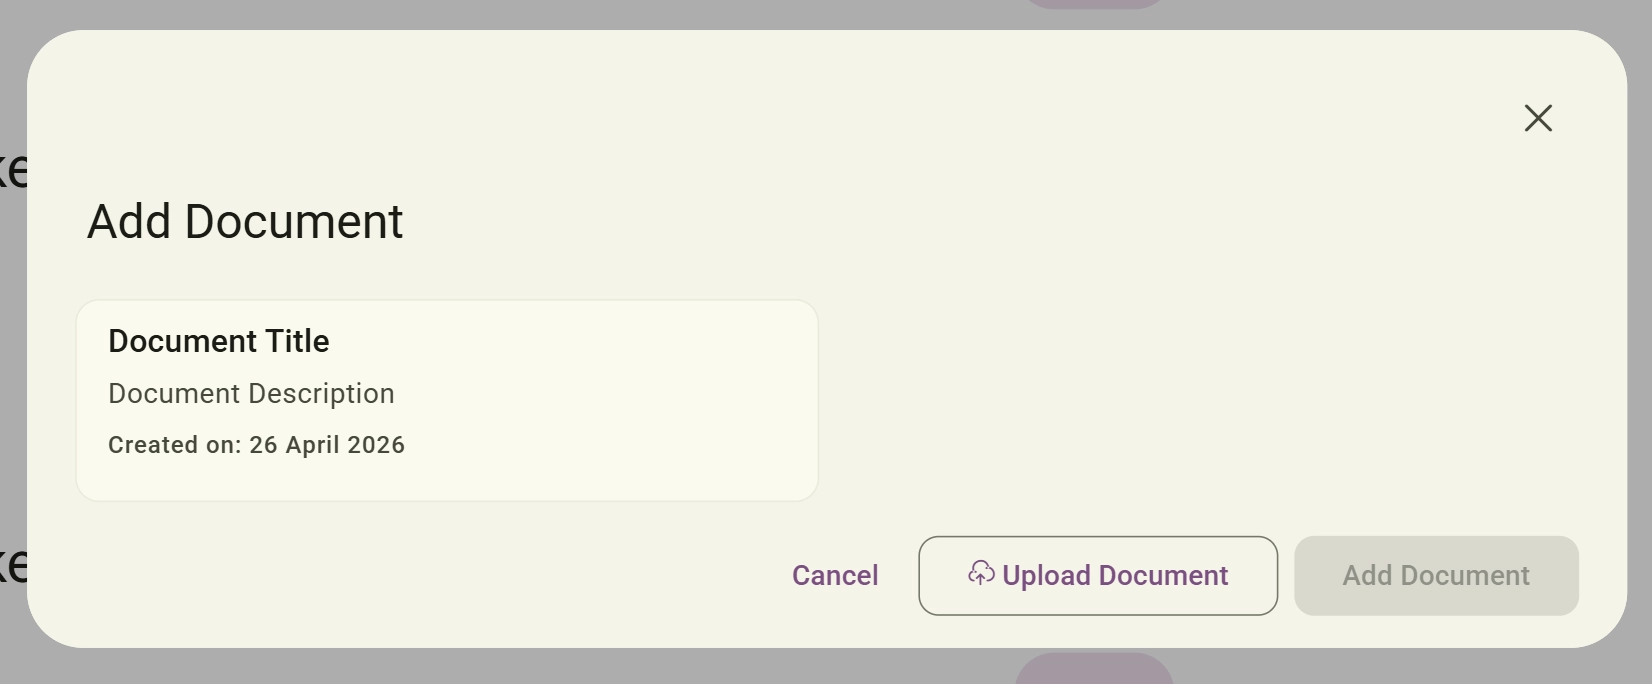
Attach clinical resources or educational files directly to the session. Click the + Add Document button to open the document library overlay. From here, you can select an existing file from your pre-saved library and click Add Document. Alternatively, click the Upload Document button to open an overlay where you can enter a Document Title, an optional description, and upload a new file directly from your device.
Remove sessions that are no longer required, Click the Delete (trash) icon on any individual session card to remove it from the class structure
- The session date, time, and duration cannot be modified.
- The group class start date and location cannot be changed.

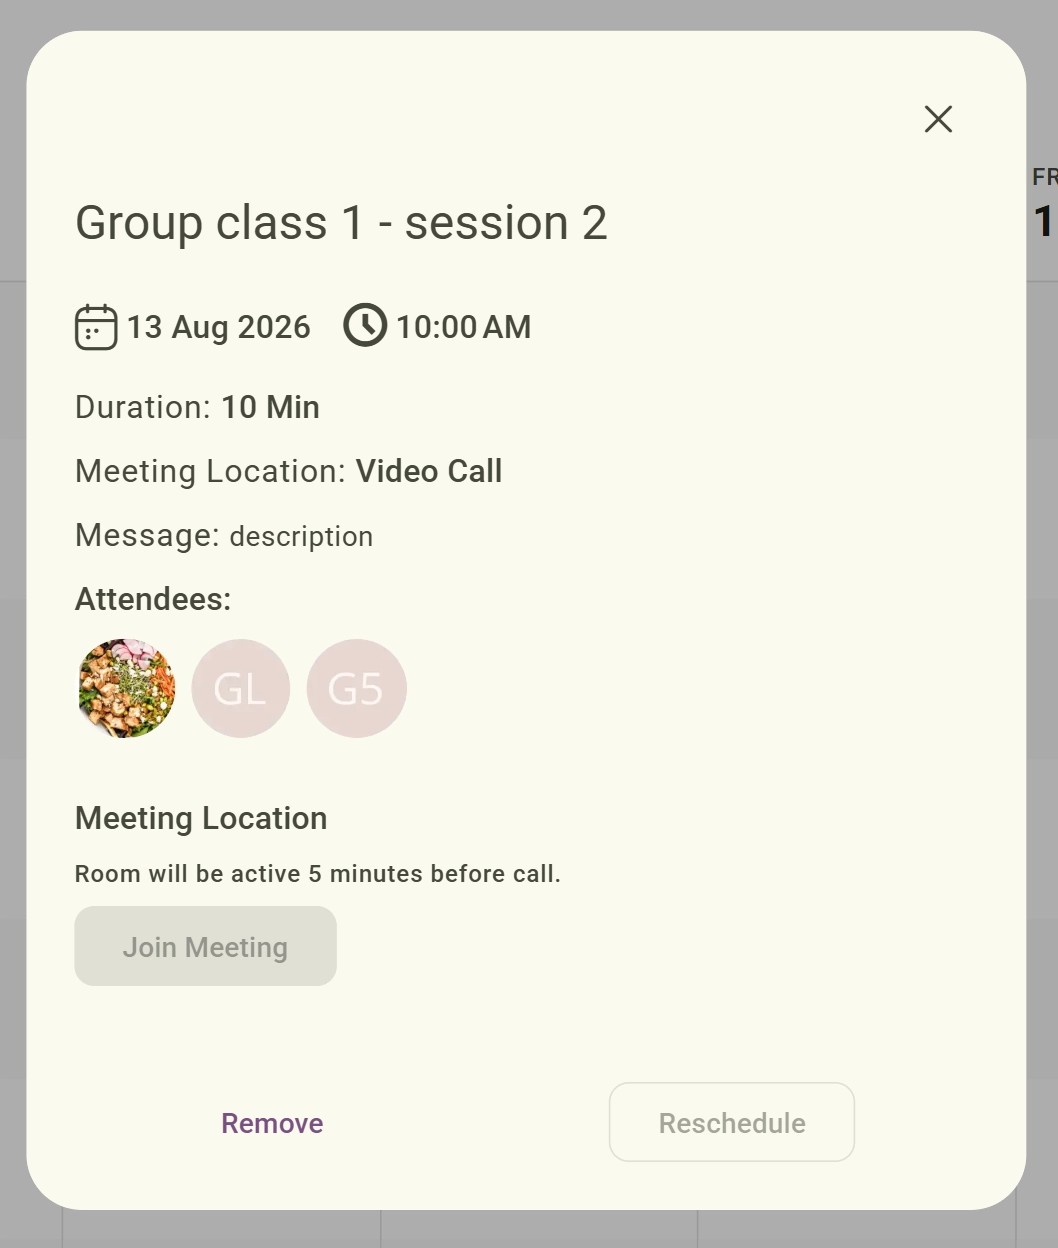
Each session within a group class is automatically displayed in your Calendar for easy scheduling and management.
- View Session Details: Review upcoming sessions, attendee lists, and meeting locations or video links.
- Remove Session Event: Click Remove to revoke room access for a specific session. This will not delete any content from the main group class.
Control who can view and book your class.
Toggle Activate on or off. Please note that you can not archive a programme with client active enrollments.

Toggle Visibility on or off.

A group class can be:
- Public and Active – Visible in the Client Portal and available for enrolment.
- Unlisted and Active – Hidden from the Client Portal but available through a direct shared link.
- Disabled – visible only to you and not available for enrolments.
Promote your classes externally.
Navigate to Programmes → Group Classes → three dots options menu, or press on the Group Class card
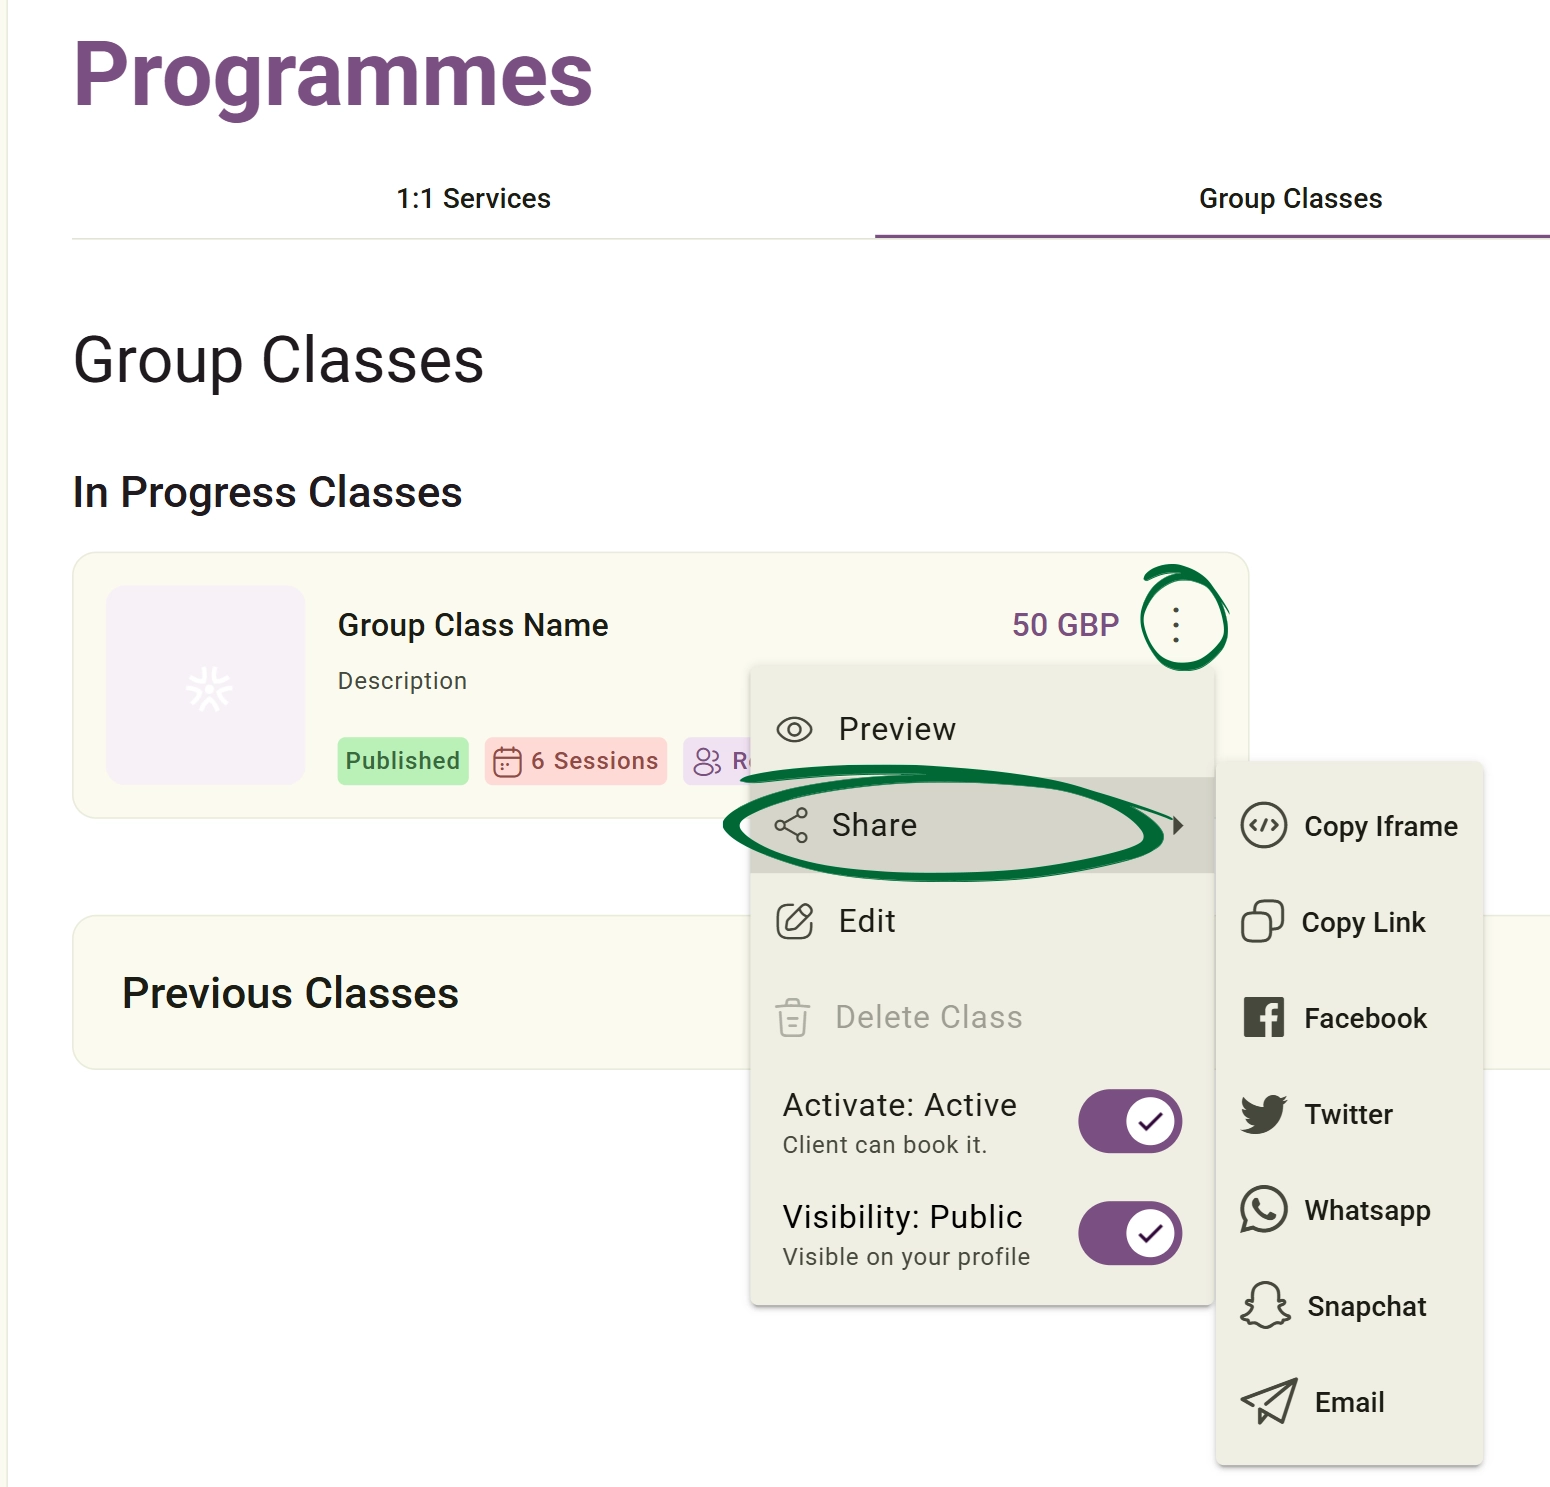
Click the share option or icon.
Distribute the class using your preferred channel. Available options include: Copy Link, Copy iFrame, Facebook, Twitter/X, WhatsApp, Snapchat, and Email.
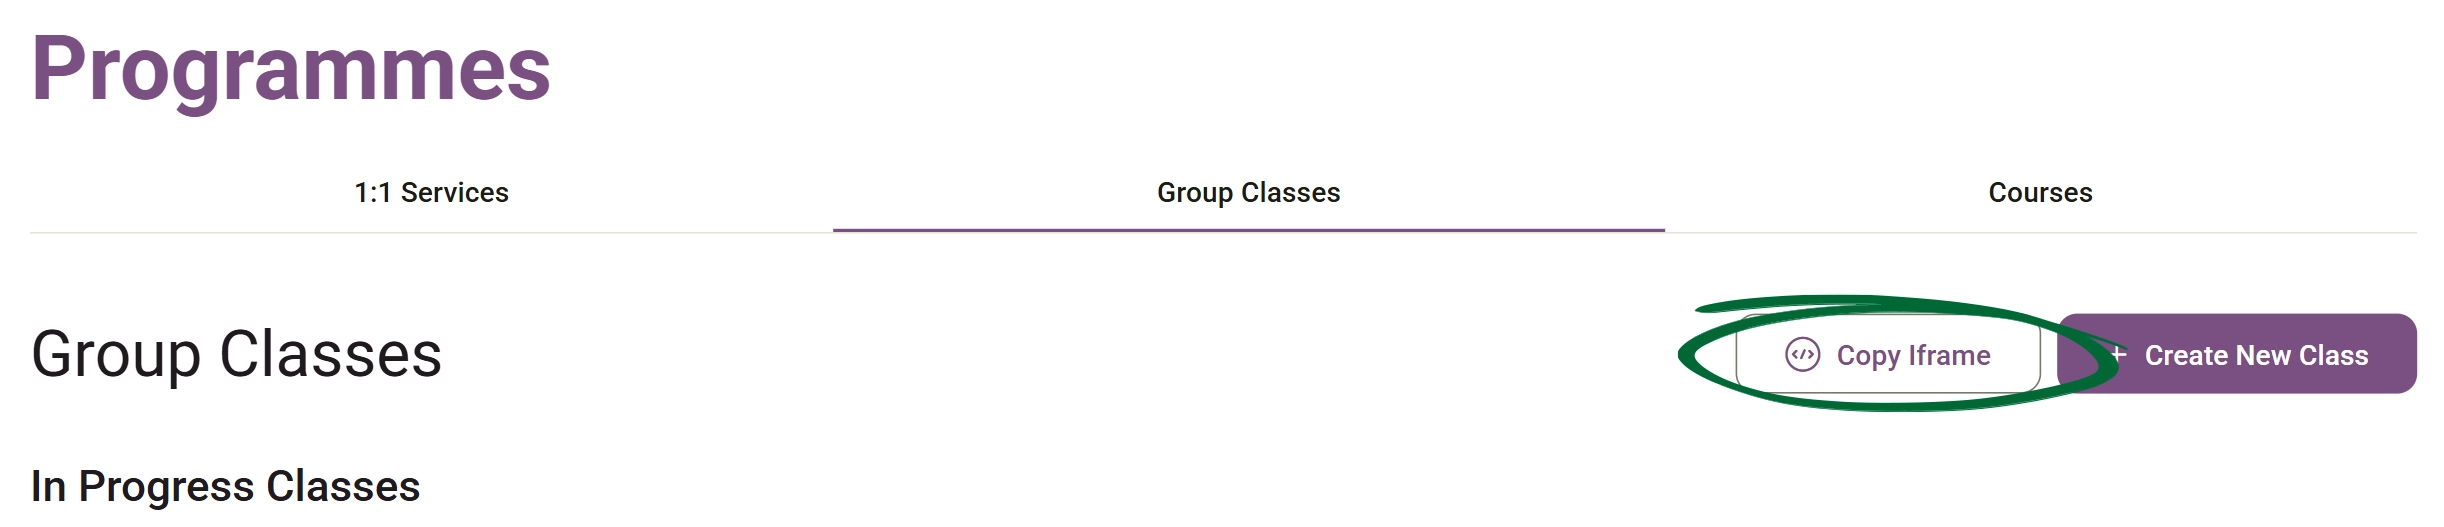
An iframe is a piece of code that allows you to display your Nurish Pro booking experience directly within your website.
You can copy it for your list of services by navigating to: Programmes →Group Classes → Copy Iframe
You also can copy it for a specific class by Navigating to: Group Classes→ Press the menu option in your Group Class card → Share → Copy Iframe
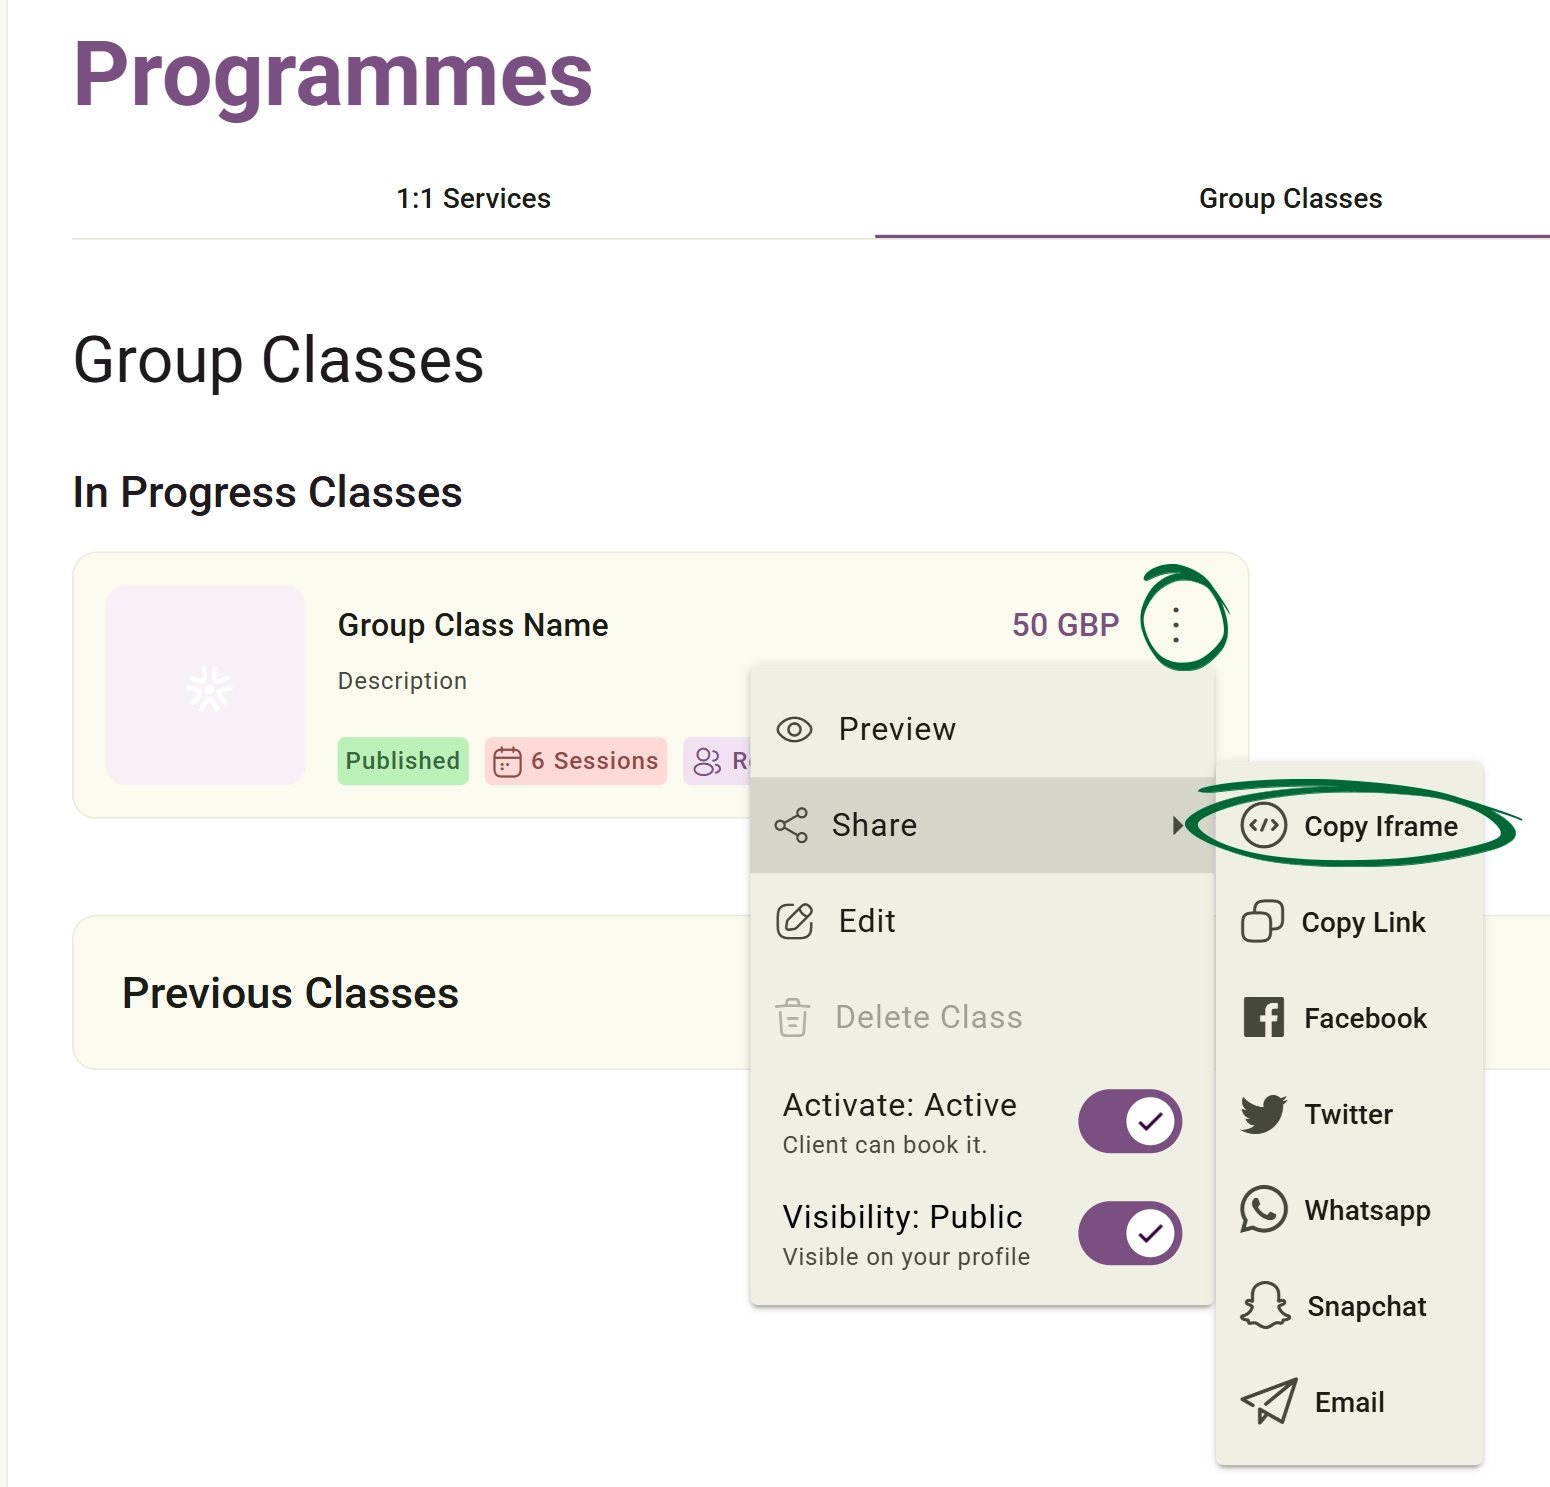
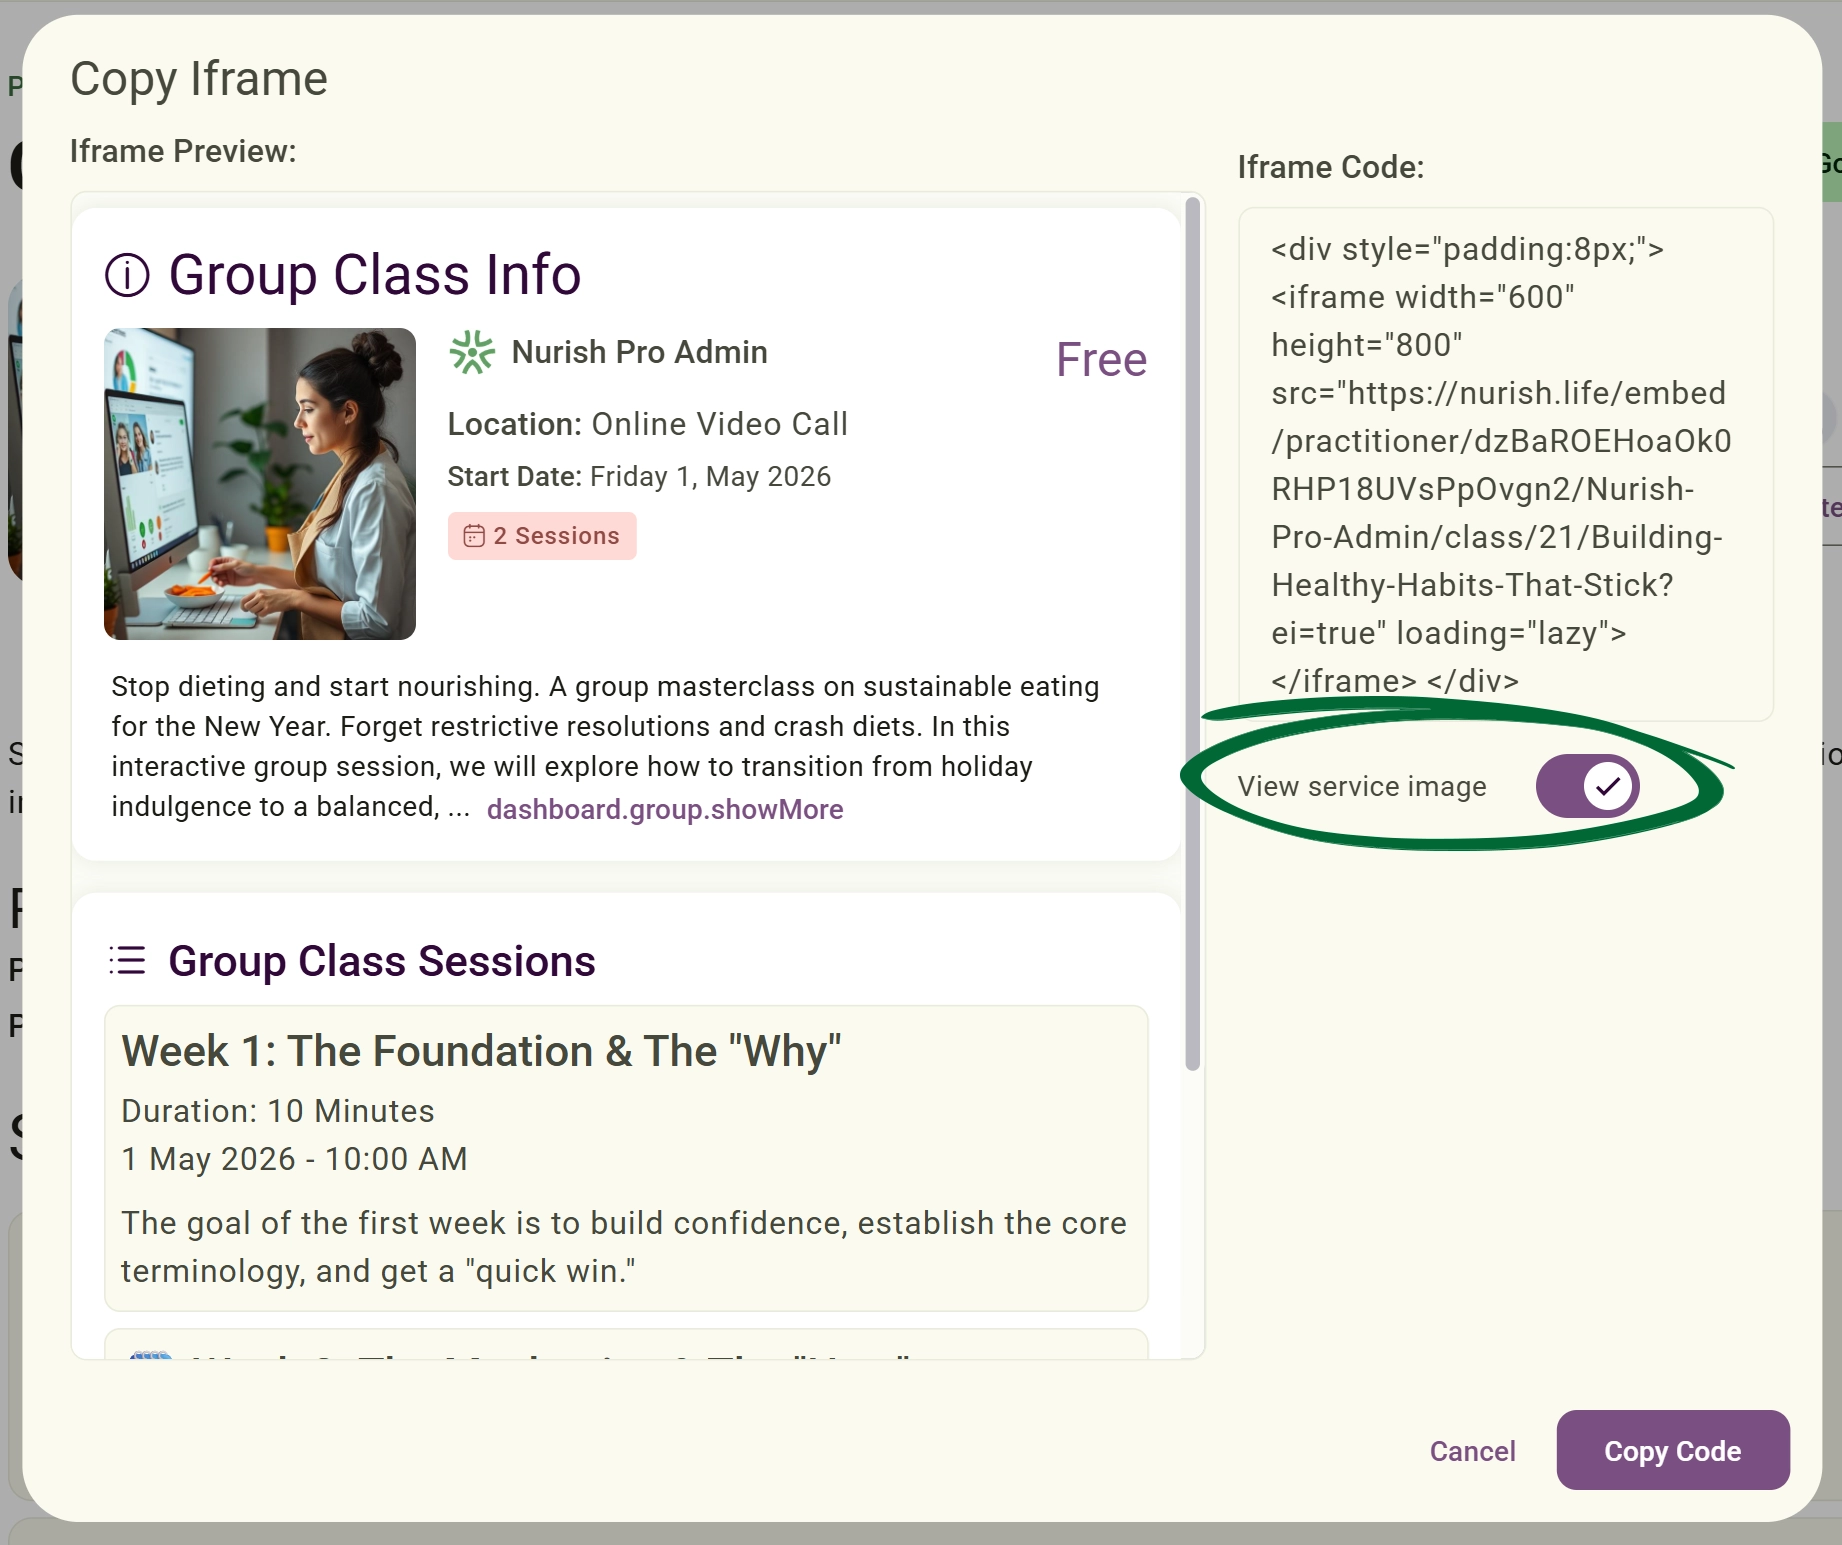
- Available Iframe Types:
- Hide/View Images: Toggle this setting to control whether the program image appears inside your embedded widget.
Group Class List Iframe: Displays a list of available Group Classes.
Single Group Class Iframe: Displays one specific Group Class.
Note: All iframe widgets follow your visibility and privacy settings.
For example, a List iframe will only display group classes that are publicly visible to clients.
Permanently remove a group class from your practice records. Deleting a class immediately revokes access and automatically notifies enrolled participants.
Navigate to Programmes → Group Classes. Locate the class card under In Progress Classes, Upcoming & Draft Classes, or Previous Classes.
Click the three-dot options menu on the group class card and select Delete Class (or click the Delete icon directly within the Class Details page)
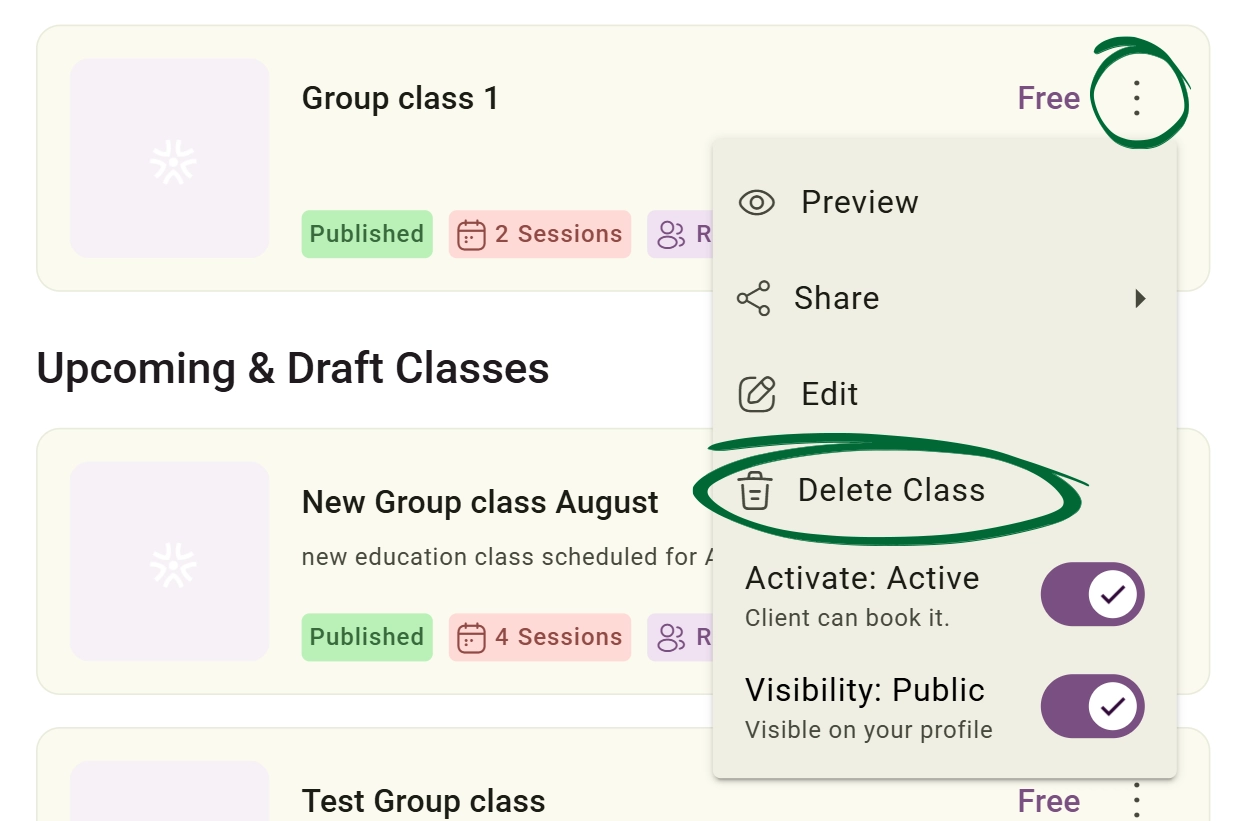
In the confirmation pop-up modal, click Yes, Delete.
Warning & Attendee Impact:
- Irreversible Action: Deleting a group class is permanent and cannot be undone. All class structure and session data will be permanently removed.
- Automatic Client Notifications: If the group class has active or enrolled attendees, deleting it will automatically cancel their enrolment and trigger automated cancellation emails to inform all registered clients immediately.
Can I invite attendees who are not existing clients?
Can I communicate with all attendees at once?
Can I edit individual sessions without affecting the whole class?
Can I embed my group classes on my website?
Can I hide a class without deleting it?
Issue: Cannot find a draft class
Issue: Attendee did not receive an invitation
Issue: Need to update only one session
Issue: Class not visible publicly
Next Step
Your group classes are now ready to manage and promote. Visit the Group Classes Dashboard to create and launch your classes, helping you deliver high-impact care to multiple clients at once.
Go to Group Classes