Building Your Courses

Create, modularise, and manage professional online courses for your clients. 

Scale your practice by transforming your knowledge into structured digital courses. This section allows you to create a new course from scratch, set a price, and define the overall course duration. You can break your content down into manageable steps by using modules and their tasks to ensure a logical learning progression for your students.

1. Course Creation & Structure

Design the architecture of your educational content.
1
Open Courses
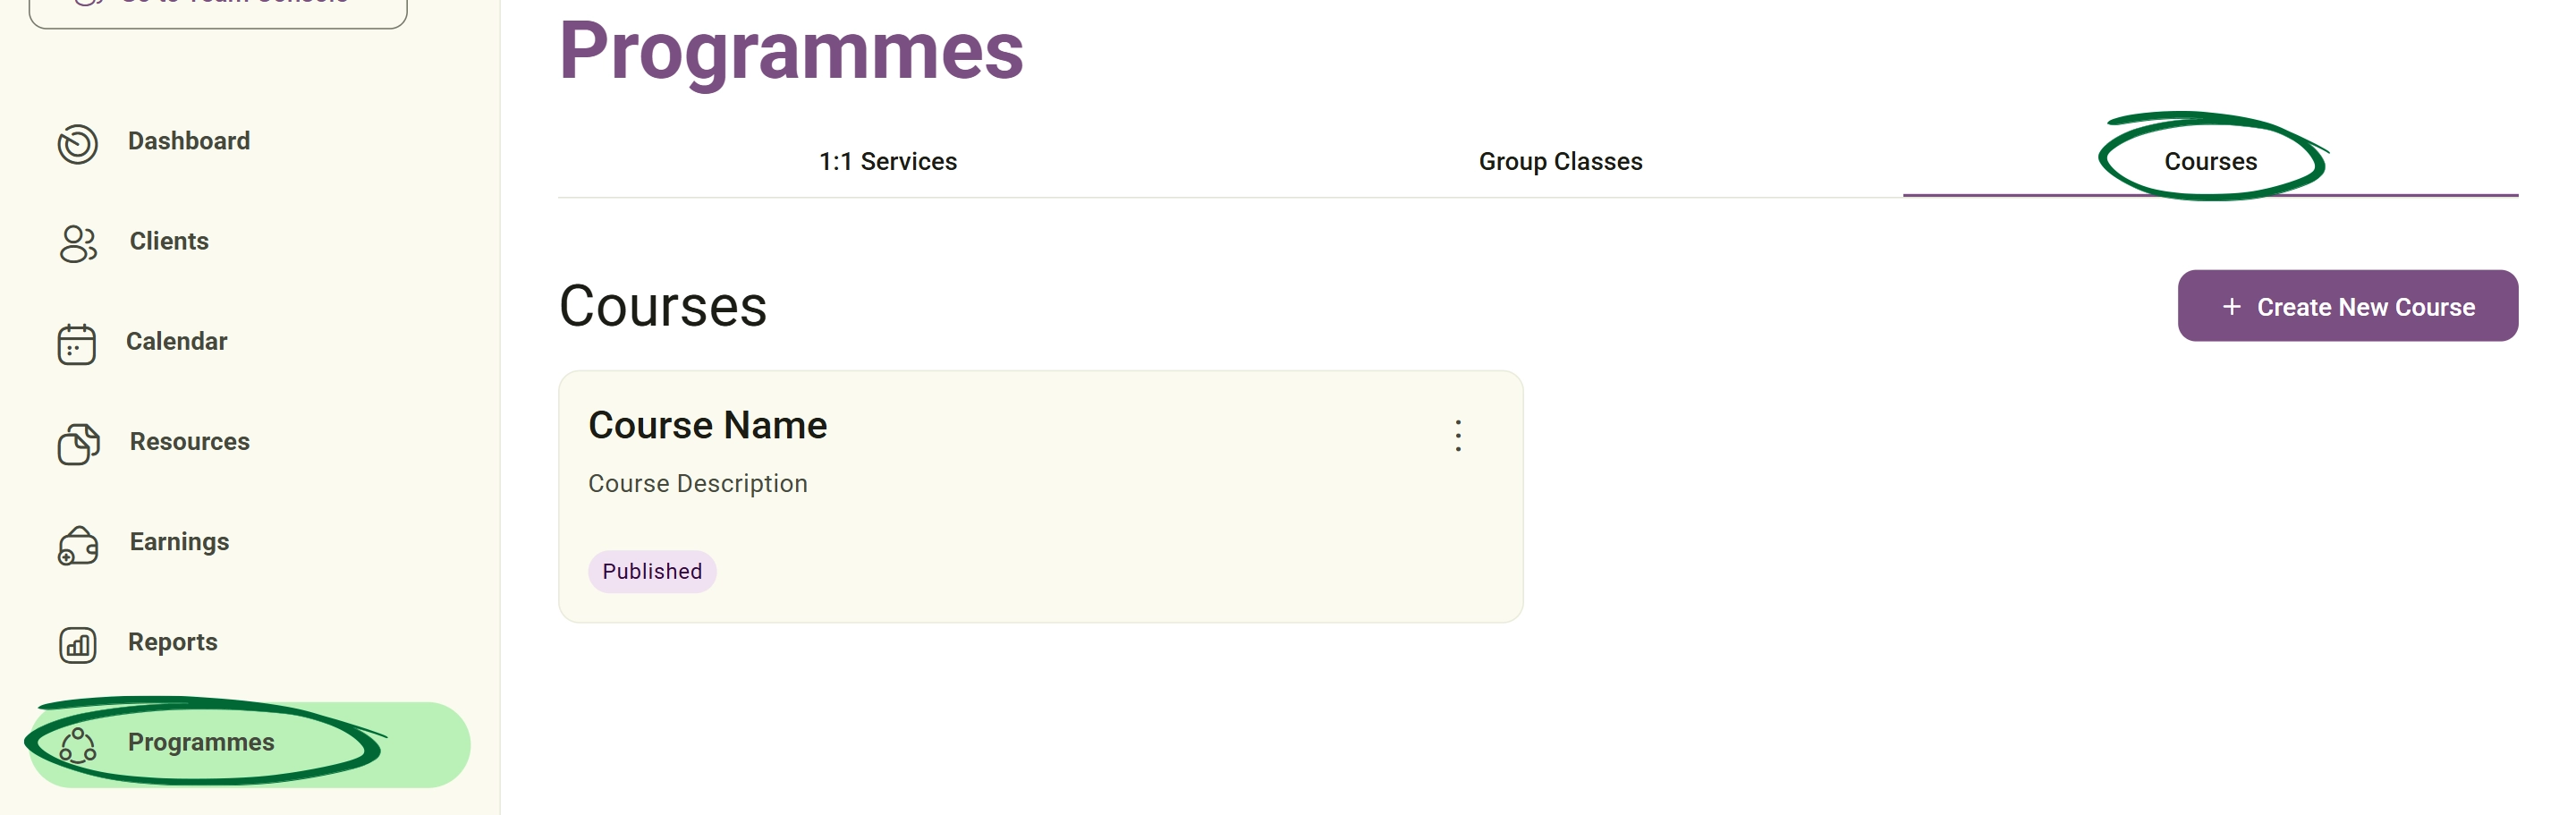
Navigate to Programmes → Courses from the sidebar.
Open Courses screenshot
2
Create New Course
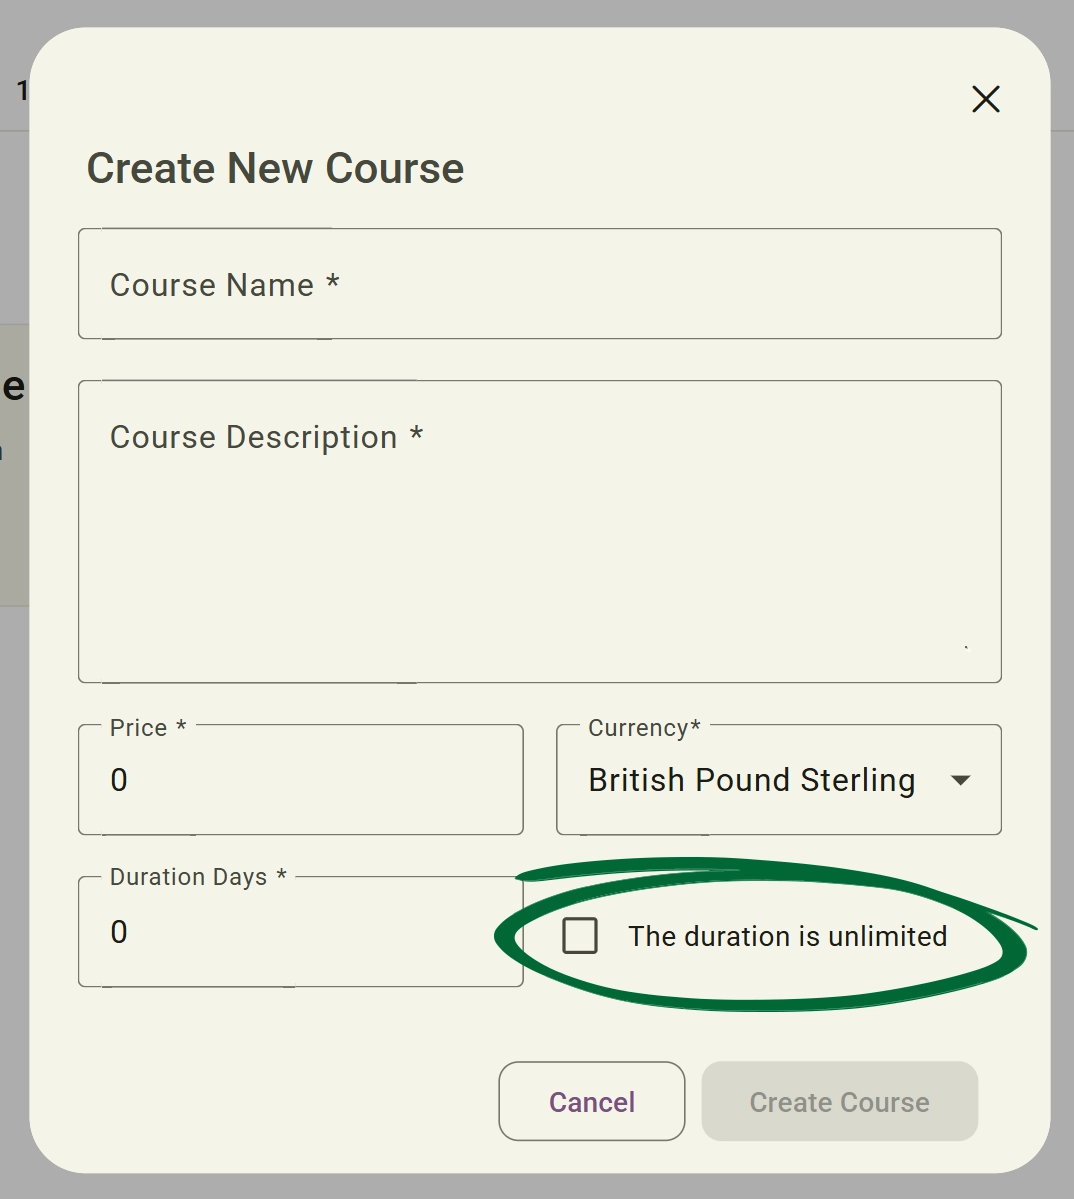
Define your course name, description, price, and preferred currency.
3
Set Duration

Define the overall duration or access period for the course. 

Note: When setting the course duration, you can enable Unlimited Access if you want learners to retain permanent access to the course content.
Arrange Content screenshot

When selecting the currency, you can choose the currency you wish to charge clients in, including British Pound Sterling (GBP), Euro (EUR), or US Dollar (USD).

4
Save & Continue
By clicking Create Course. You will then be redirected to the course editing screen, where you can select Edit Course Info at any time to update: Course Name, Description, Duration, Price, Preferred Currency
5
Add Modules
Use the Add Module feature to break your content into manageable lessons.
6
Add Module Information

For each module, enter the following details: Module Name, Module Description 

This helps organise your course content and provides learners with a clear overview of each module before they begin 

7
Build Module Content

Create educational content using the rich text editor. 

  • Rich Content Editor:  Modules support formatted text, images, videos, tables, hyperlinks, and embedded resources.
  • Use Clipboard Templates:  Insert pre-saved Clipboard content directly into your module editor to speed up content creation and maintain consistency.

Use Clipboard Templates  screenshot

You can add tasks within each module to organise learning activities and course content. Tasks can be edited, renamed, rearranged, or removed at any time as your course develops.

8
Arrange Modules

Use the drag-and-drop handle (six dots icon) to reorder modules into the desired learning sequence.

Edit or Delete Modules 

Use the edit and delete icons beside each module to manage existing course content.

Edit or Delete Modules screenshot
9
Course Status

Review your course and save your updates by changing the course status:

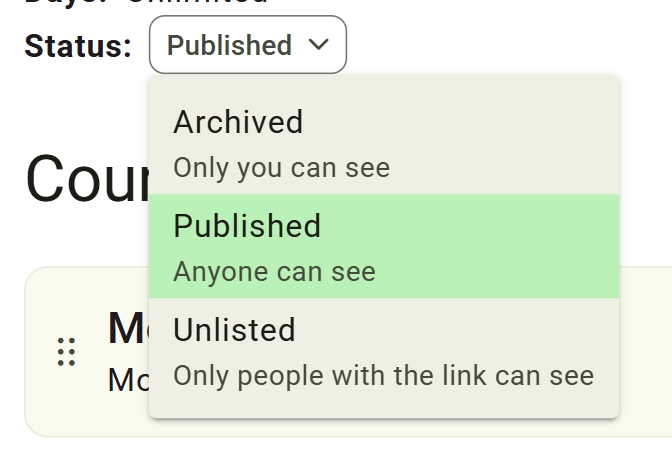
  • Draft (Default Status) – The course is saved but not visible to learners.
  • Published – Anyone can view and enrol in the course. You must add at least one module before the course can be published.
  • Unlisted – Only people with the direct link can access the course.
  • Archived – Only you can view the course.
Tip: Keep your modules concise. Breaking a large topic into smaller lessons often improves completion rates and learner engagement
2. Course Actions

Manage access and promote your course content to your audience.
1
Open Courses
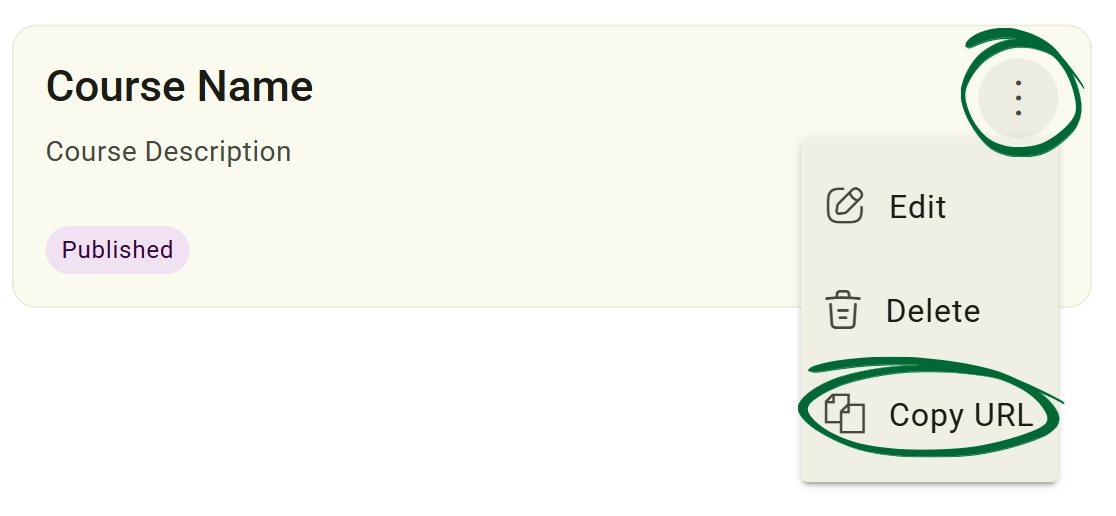
Navigate to: Programmes → Courses. Then, click the three-dot options menu (⋮) on the course you want to manage.
2
Set Course Status
from the menu Select Edit → Status and choose the status that best suits your course visibility: (Published, Unlisted , Archived).
Set Status screenshot
3
Copy Course URL
You can also access Copy URL directly from the course options menu (three dots).
Copy Course URL screenshot
4
Edit Course Information
Update your course title, description, pricing, duration, or status at any time.
5
Delete a Course
If the course is no longer required, select Delete Course from the options menu and confirm the action.
Tip: Deleting or archiving a course does not affect learners who are already enrolled. Existing learners will retain access to the course content.
3. Module Tasks

Create actionable tasks and learning activities within course modules.

1
Open a Module
Select the module you want to edit.
2
Navigate to Tasks
Scroll to the Tasks section within the module.
3
Add a Task
Click Add Task and enter the task details.
add tasks screenshot
4
Save a Task
You can Save each task by pressing its save icon or save all your changes within the module by pressing the “Save Changes” button.
5
Manage Tasks
You can Edit tasks, Rearrange task order, and Delete tasks.
Tip: Tasks can help reinforce learning and improve engagement throughout the course.
Frequently Asked Questions (FAQs)
Can I add video content to my course modules?
Yes. Course modules can contain a mix of learning materials, including images, rich text content, tables, and hyperlinks. They also support adding video links to enhance the learner experience.
Can I set a course to be unlimited rather than fixed-duration?
Yes. Enable "The duration is unlimited" when editing the course information to provide ongoing access.
Will my clients be notified when I add a new module to an active course?
Clients will see the new content the next time they access the course. You may also notify them separately if required.
Can I use Clipboard content inside my modules?
Yes. The module editor includes access to your Clipboard library, allowing you to insert reusable content directly into your course modules.
Can I create tasks for learners within a course?
Yes. You can add tasks to individual modules to encourage learner participation, reinforce knowledge, and improve course engagement.
Troubleshooting & Common Issues
Issue: Changing the Order of Modules
Potential Solution: Use the Arrange Module handle (six dots icon) in the Course Modules section to drag and drop modules into the desired order.
Issue: Saving Unfinished Work
Potential Solution: Set the course status to Unlisted or Archived while you are still building content. This prevents clients from accessing incomplete material.
Issue: Shared Link Displays "Page Not Found"
Potential Solution: Check that the course status is not set to Archived. The course must be either Published or Unlisted for external users to access it via the shared URL.
Issue: Removing a course
Potential Solution: Use the Delete Course option from the course menu. If you only want to stop new enrolments, consider changing the course status to Archived instead.

Next Step

You can now manage and monitor all of your courses from the Courses section within your Programmes dashboard.

Go to Courses
Contact Support

Still need a hand?

Email Support: [email protected]