1. Course Creation & Structure
Design the architecture of your educational content.
1
Open Courses
Navigate to Programmes → Courses from the sidebar.
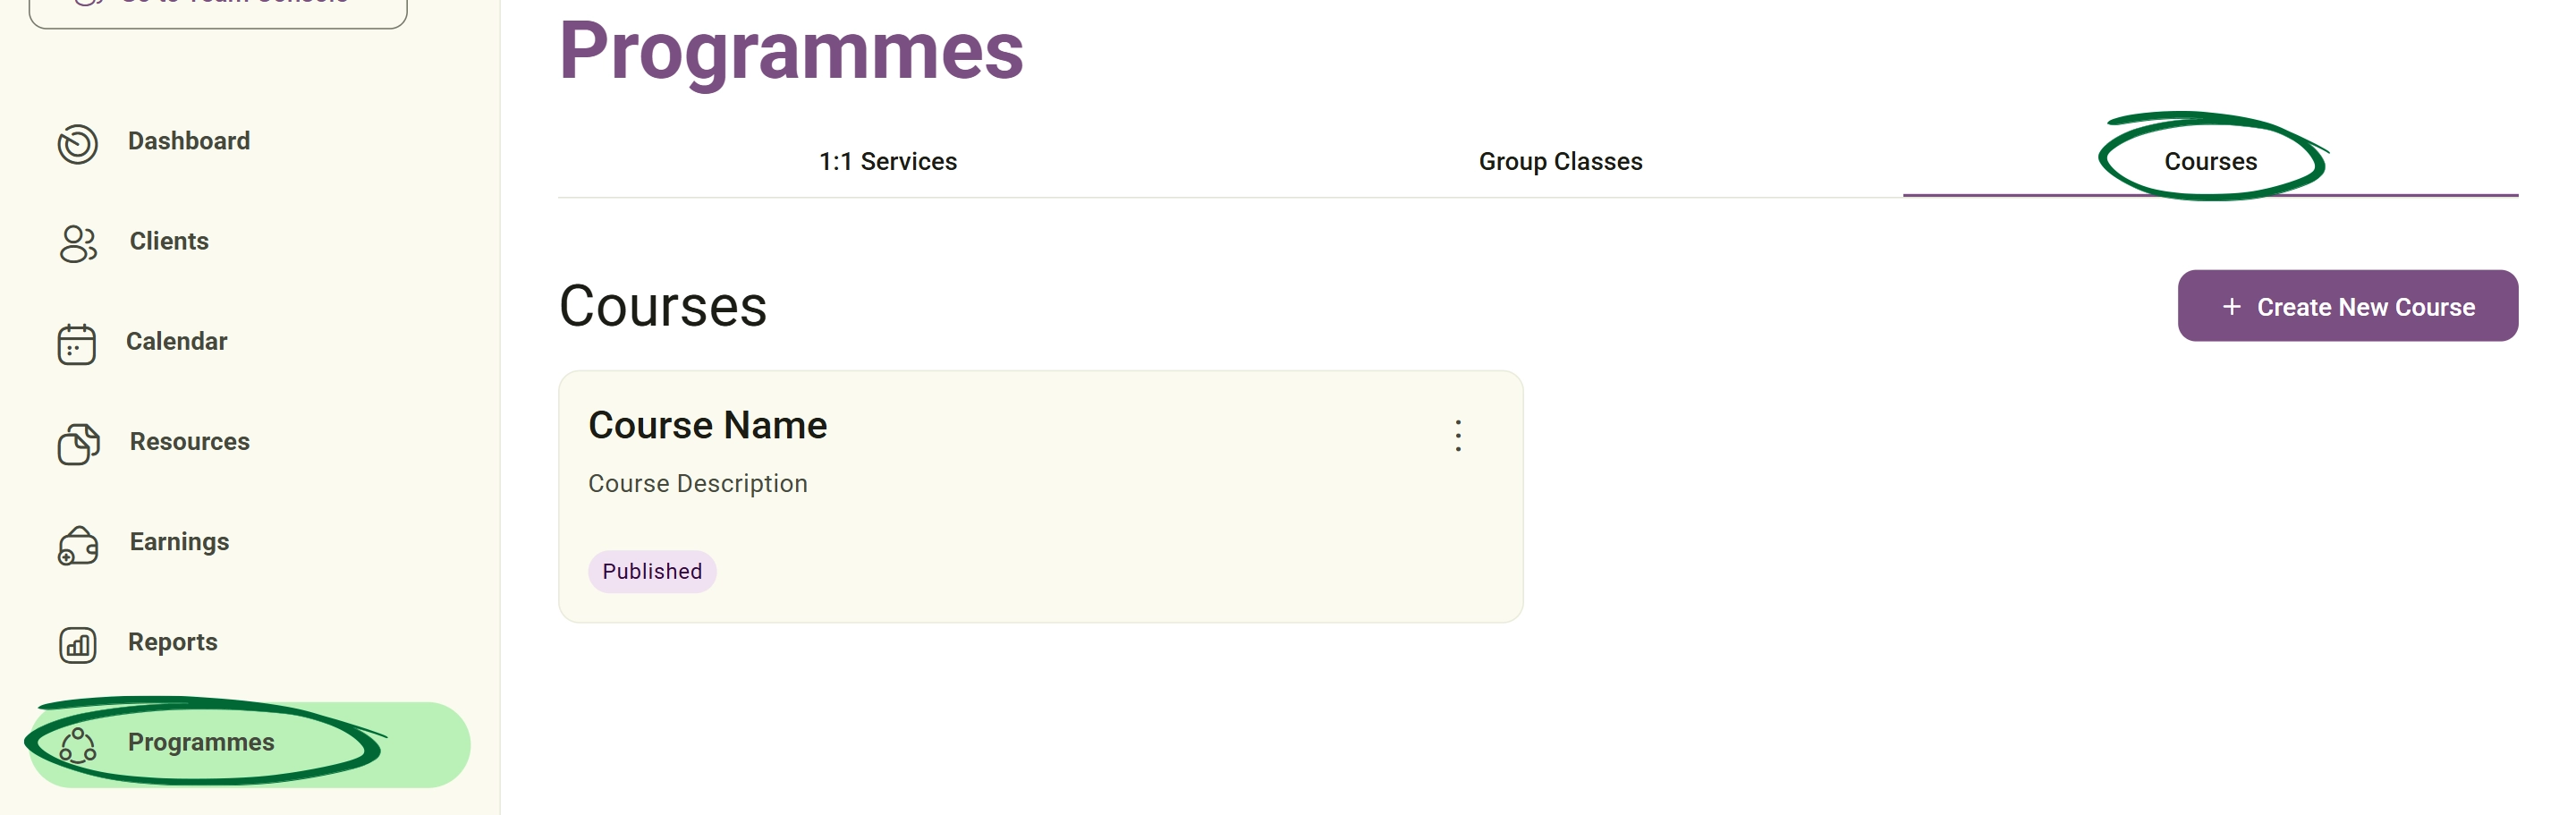
2
Create New Course
Define your course title, description, and set your professional price.
3
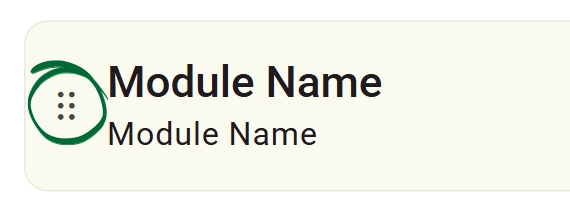
Add Modules
Use the Add / Edit Module feature to break your content into digestible lessons.
4
Arrange Content
Use the Arrange Module drag-and-drop tool (six dots icon) to reorder your content into the perfect logical sequence.
5
Set Duration
Define the overall duration or access period for the course.
Tip: Keep your modules concise. Breaking a large topic into 5-6 smaller modules improves client completion rates and overall engagement.
2. Course Visibility & Enrollment
Manage access and promote your course content to your audience.
1
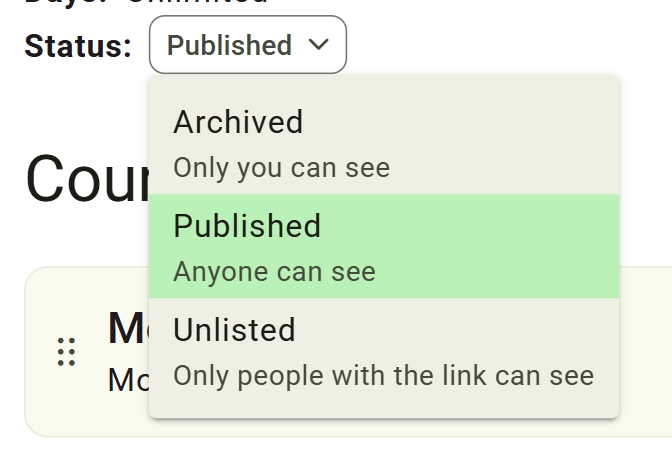
Set Status
Choose between Published (live for all), Unlisted (private link only), or Draft (internal view only).
2
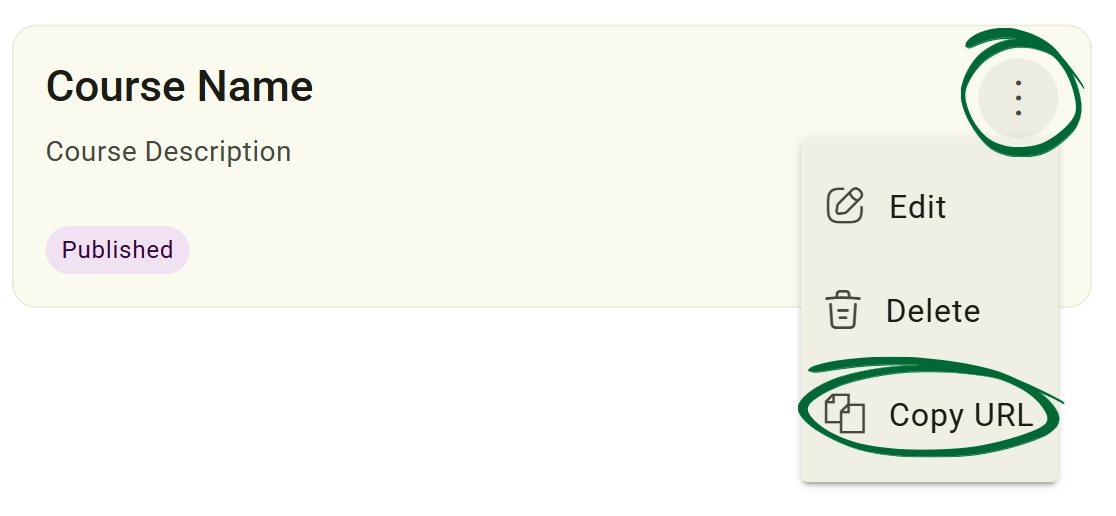
Copy Course URL
Use this feature to generate a direct link to your enrollment page for social media or email campaigns.
3
Edit Course Info
Update your titles, descriptions, or pricing at any time as your course evolves.
4
Manage Enrollment
Monitor which clients have access and their progress through the modules.
Tip: Use the "Unlisted" status for "Early Bird" course launches, sharing the link only with your loyal email subscribers before the official public release.
Frequently Asked Questions (FAQs)
Can I add video content to my course modules?
Yes. Within each module, you can embed video links or upload supporting documents, handouts, and clinical resources for your students to download.
Can I set a course to be "Evergreen" or fixed-date?
You have the flexibility to set an overall duration for access or leave it open-ended. For structured programmes, you can also manually manage enrollment windows using the status toggles.
Will my clients be notified when I add a new module to an active course?
If the course is already published and clients are enrolled, they will see the new content the next time they log into their portal. You can also send a manual broadcast to notify them of the update.
Troubleshooting & Common Issues
Issue: Changing the order of lessons
Potential Solution: Use the Arrange Module handle (six dots icon) in the syllabus view to drag modules up or down the list.
Issue: Saving unfinished work
Potential Solution: Set your Course Status to "Unlisted" or "Draft" while you are still building content to prevent clients from seeing an incomplete course.
Issue: "Page Not Found" for shared link
Potential Solution: Ensure the course status is not set to Draft. It must be either "Published" or "Unlisted" for the URL to be accessible to external users.
Issue: Removing a course
Potential Solution: Use the Delete Course option. Note: This removes access for all currently enrolled students; use "Unlisting" instead if you just want to stop new sign-ups.
Next Step
Your offerings are live! To see how these look from your client's perspective, visit the Client Experience (Nurish Life App) guide.
Go to Client ExperienceContact Support
Still need a hand?
Email Support: [email protected]